1
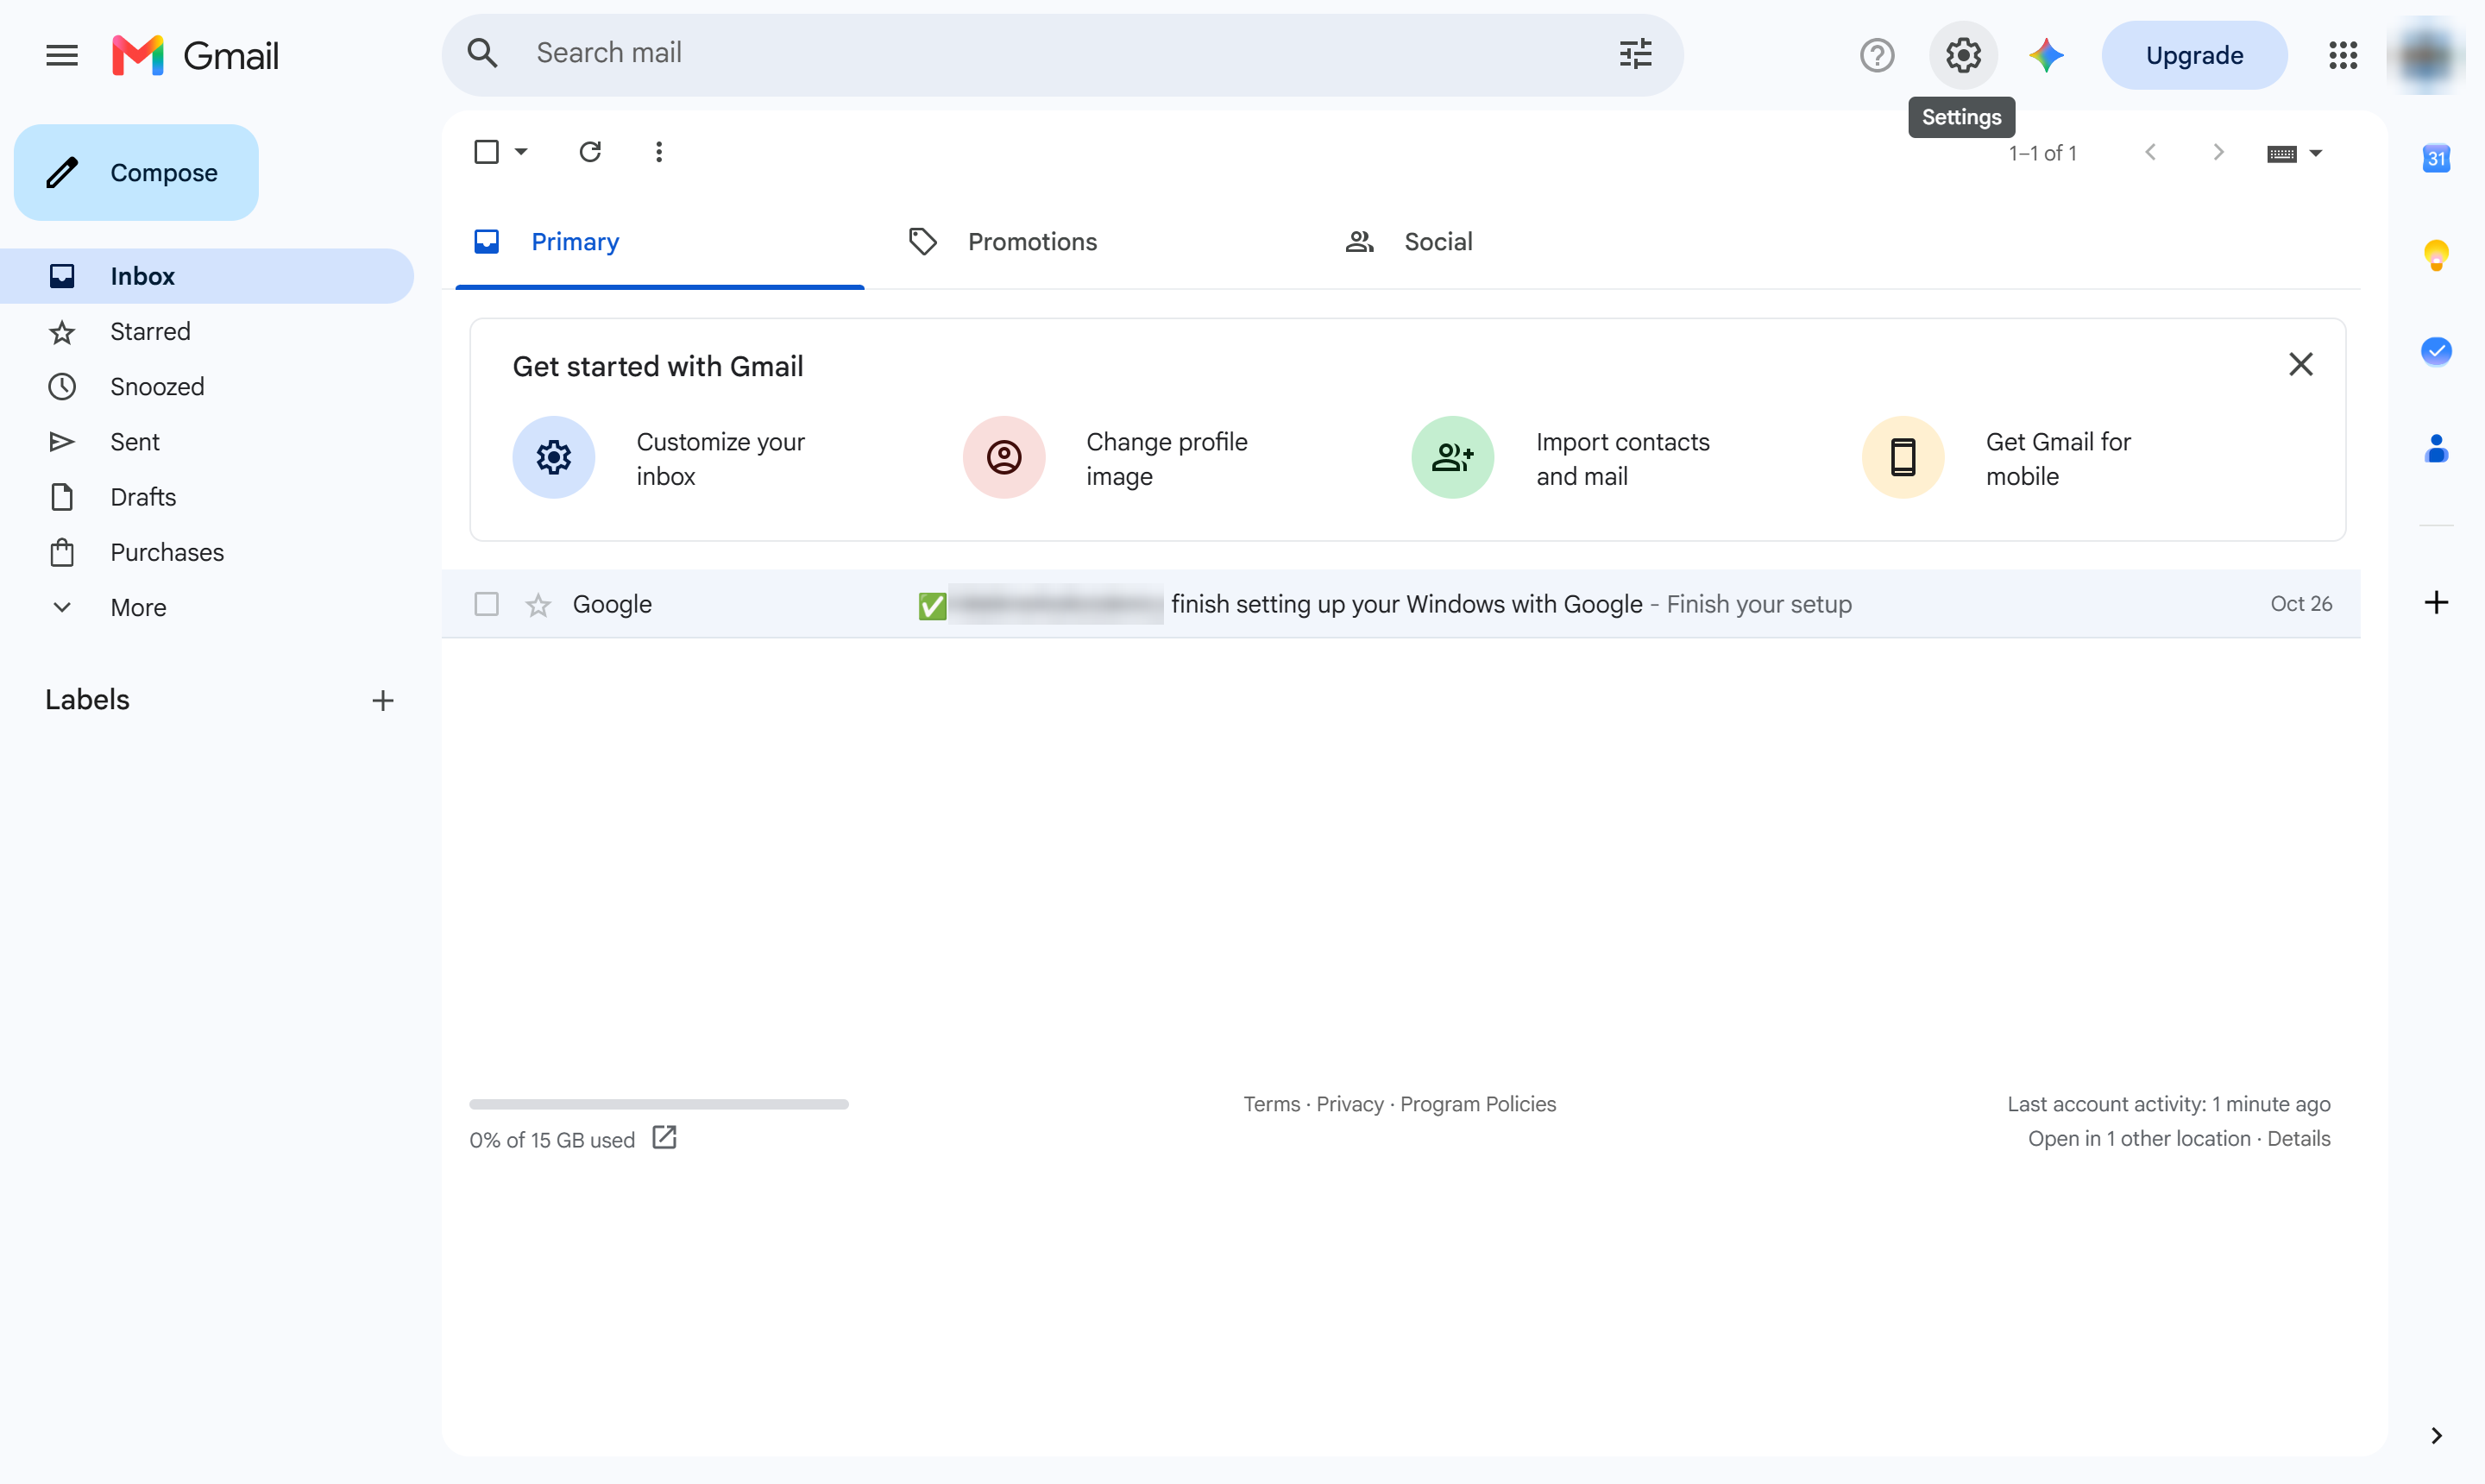
Click Settings
At the top right, click the gear icon (Settings).

In this guide, you will learn how to whitelist a specific email sender in Gmail to ensure their messages never end up in your spam folder. You will navigate through your Gmail settings to create a custom filter for the sender's address. Following these steps will allow you to successfully configure Gmail to always deliver emails from this sender directly to your inbox.
At the top right, click the gear icon (Settings).
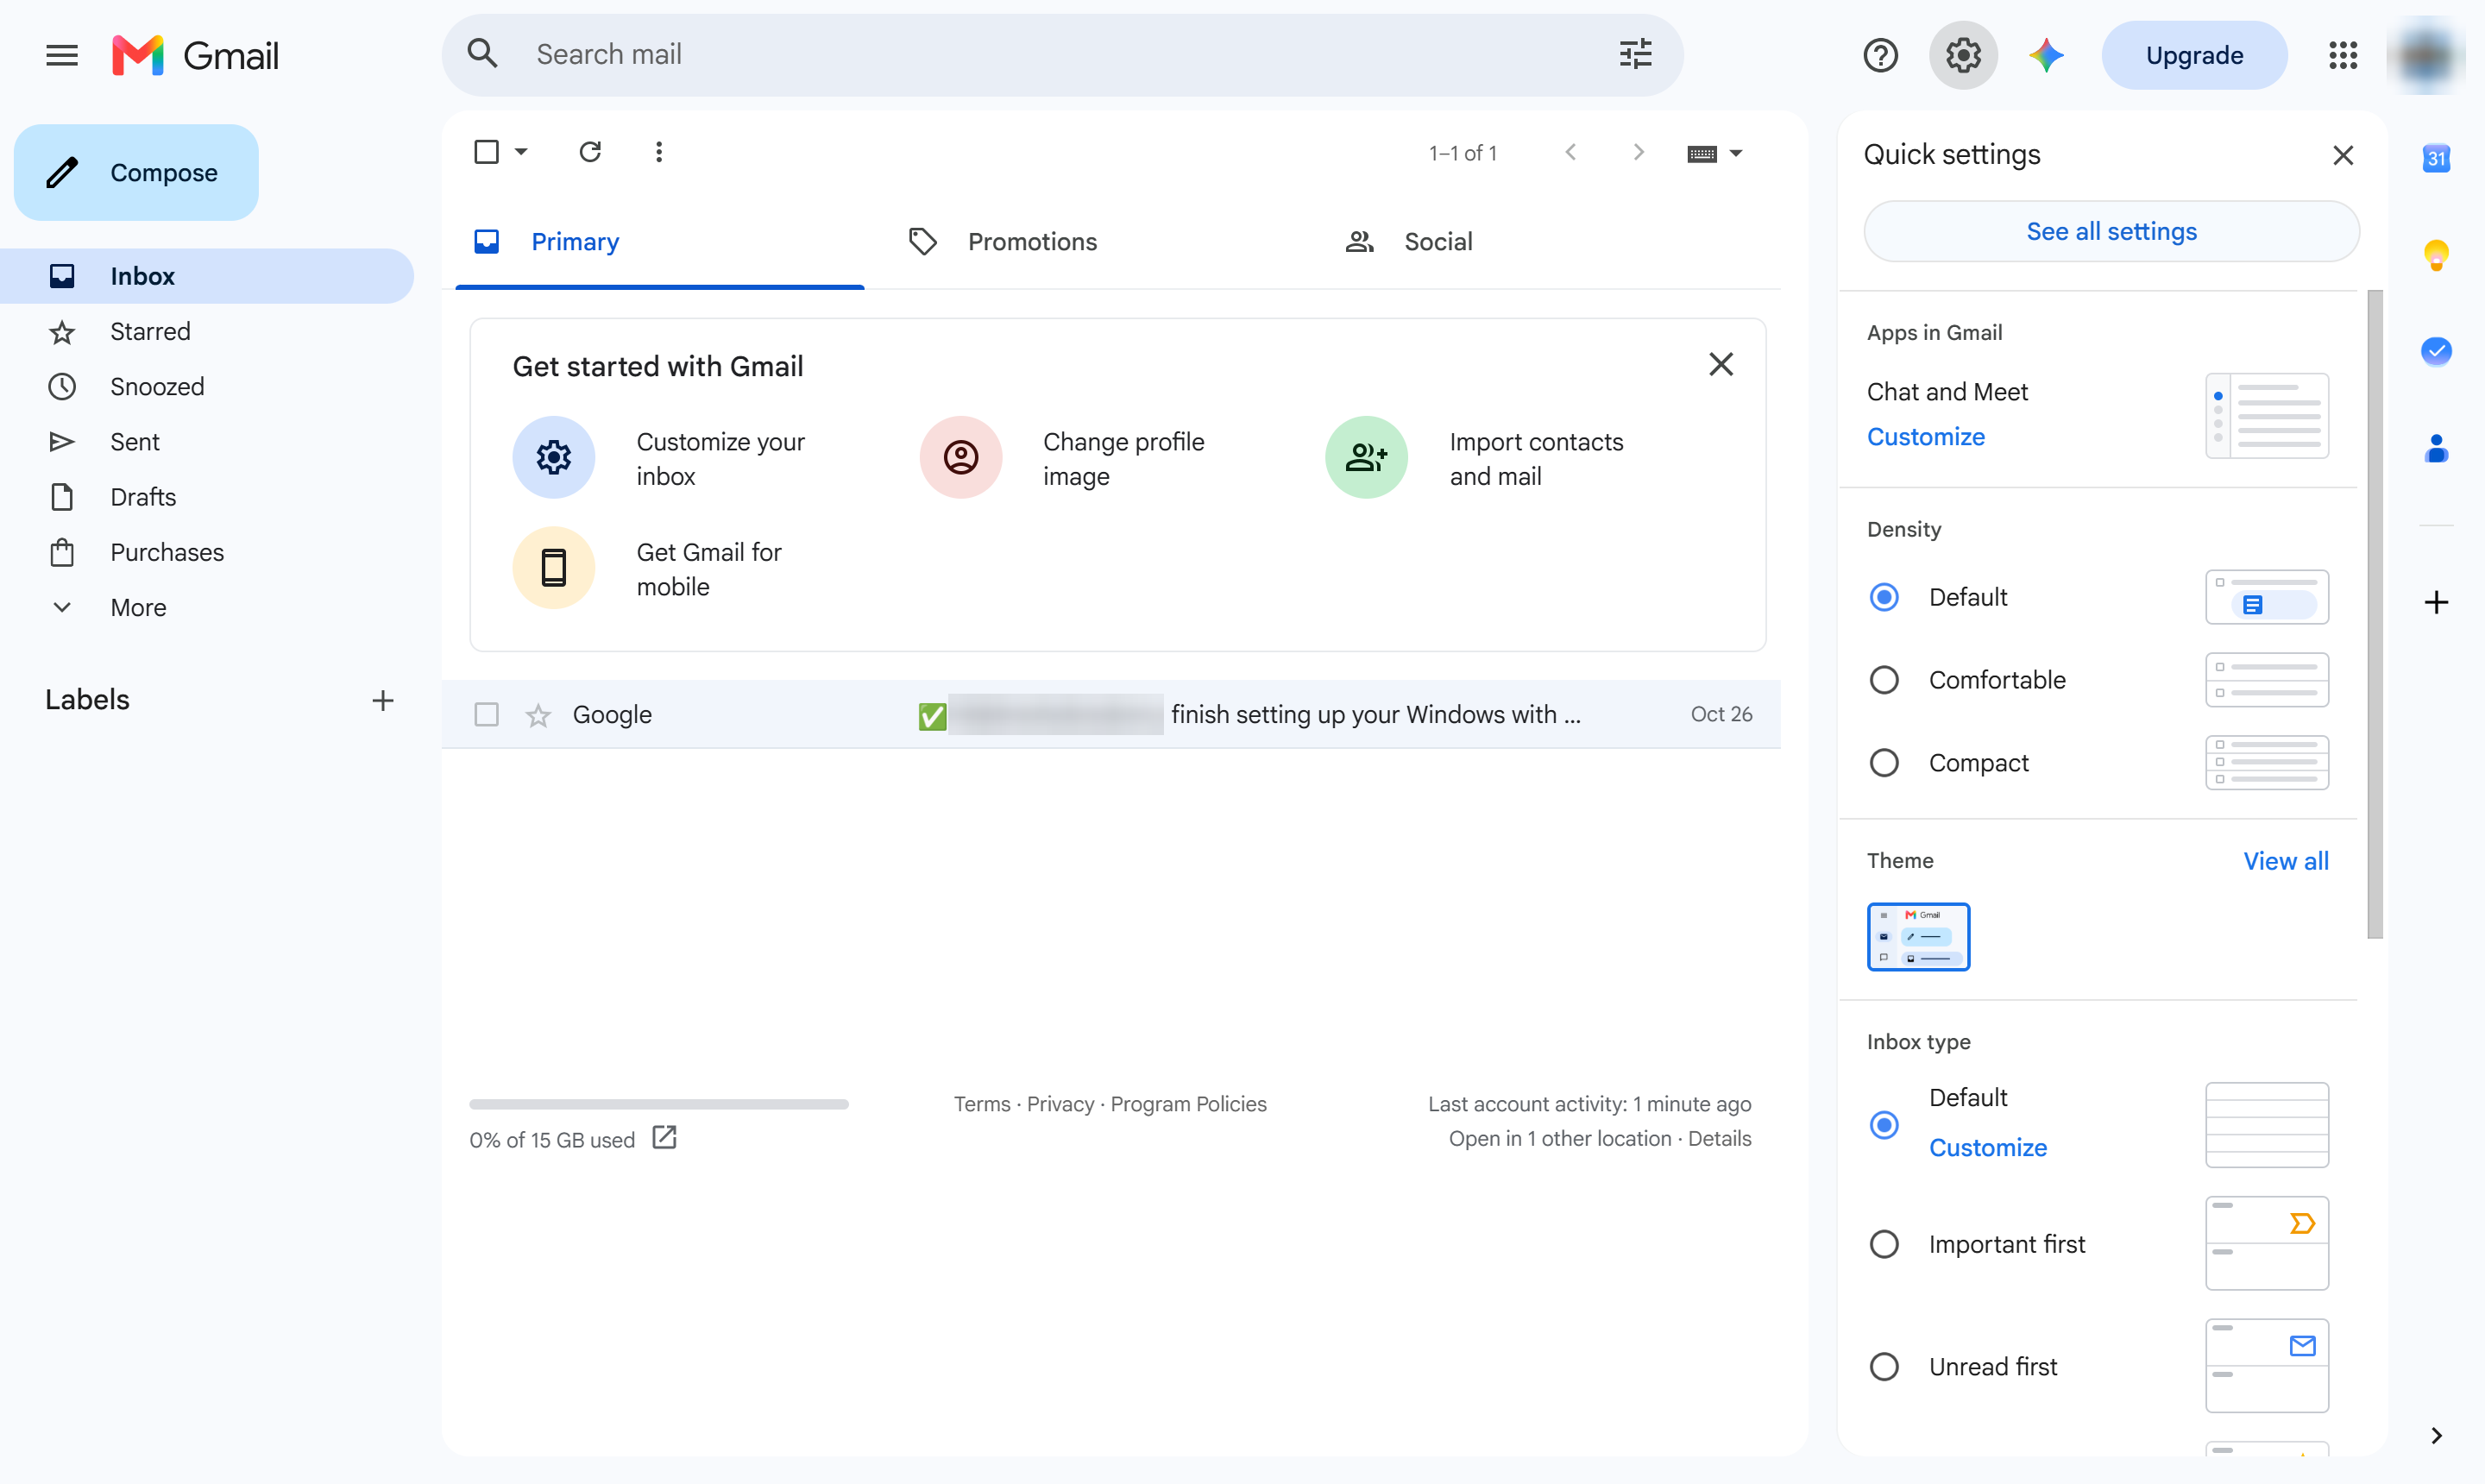
Click See all settings.
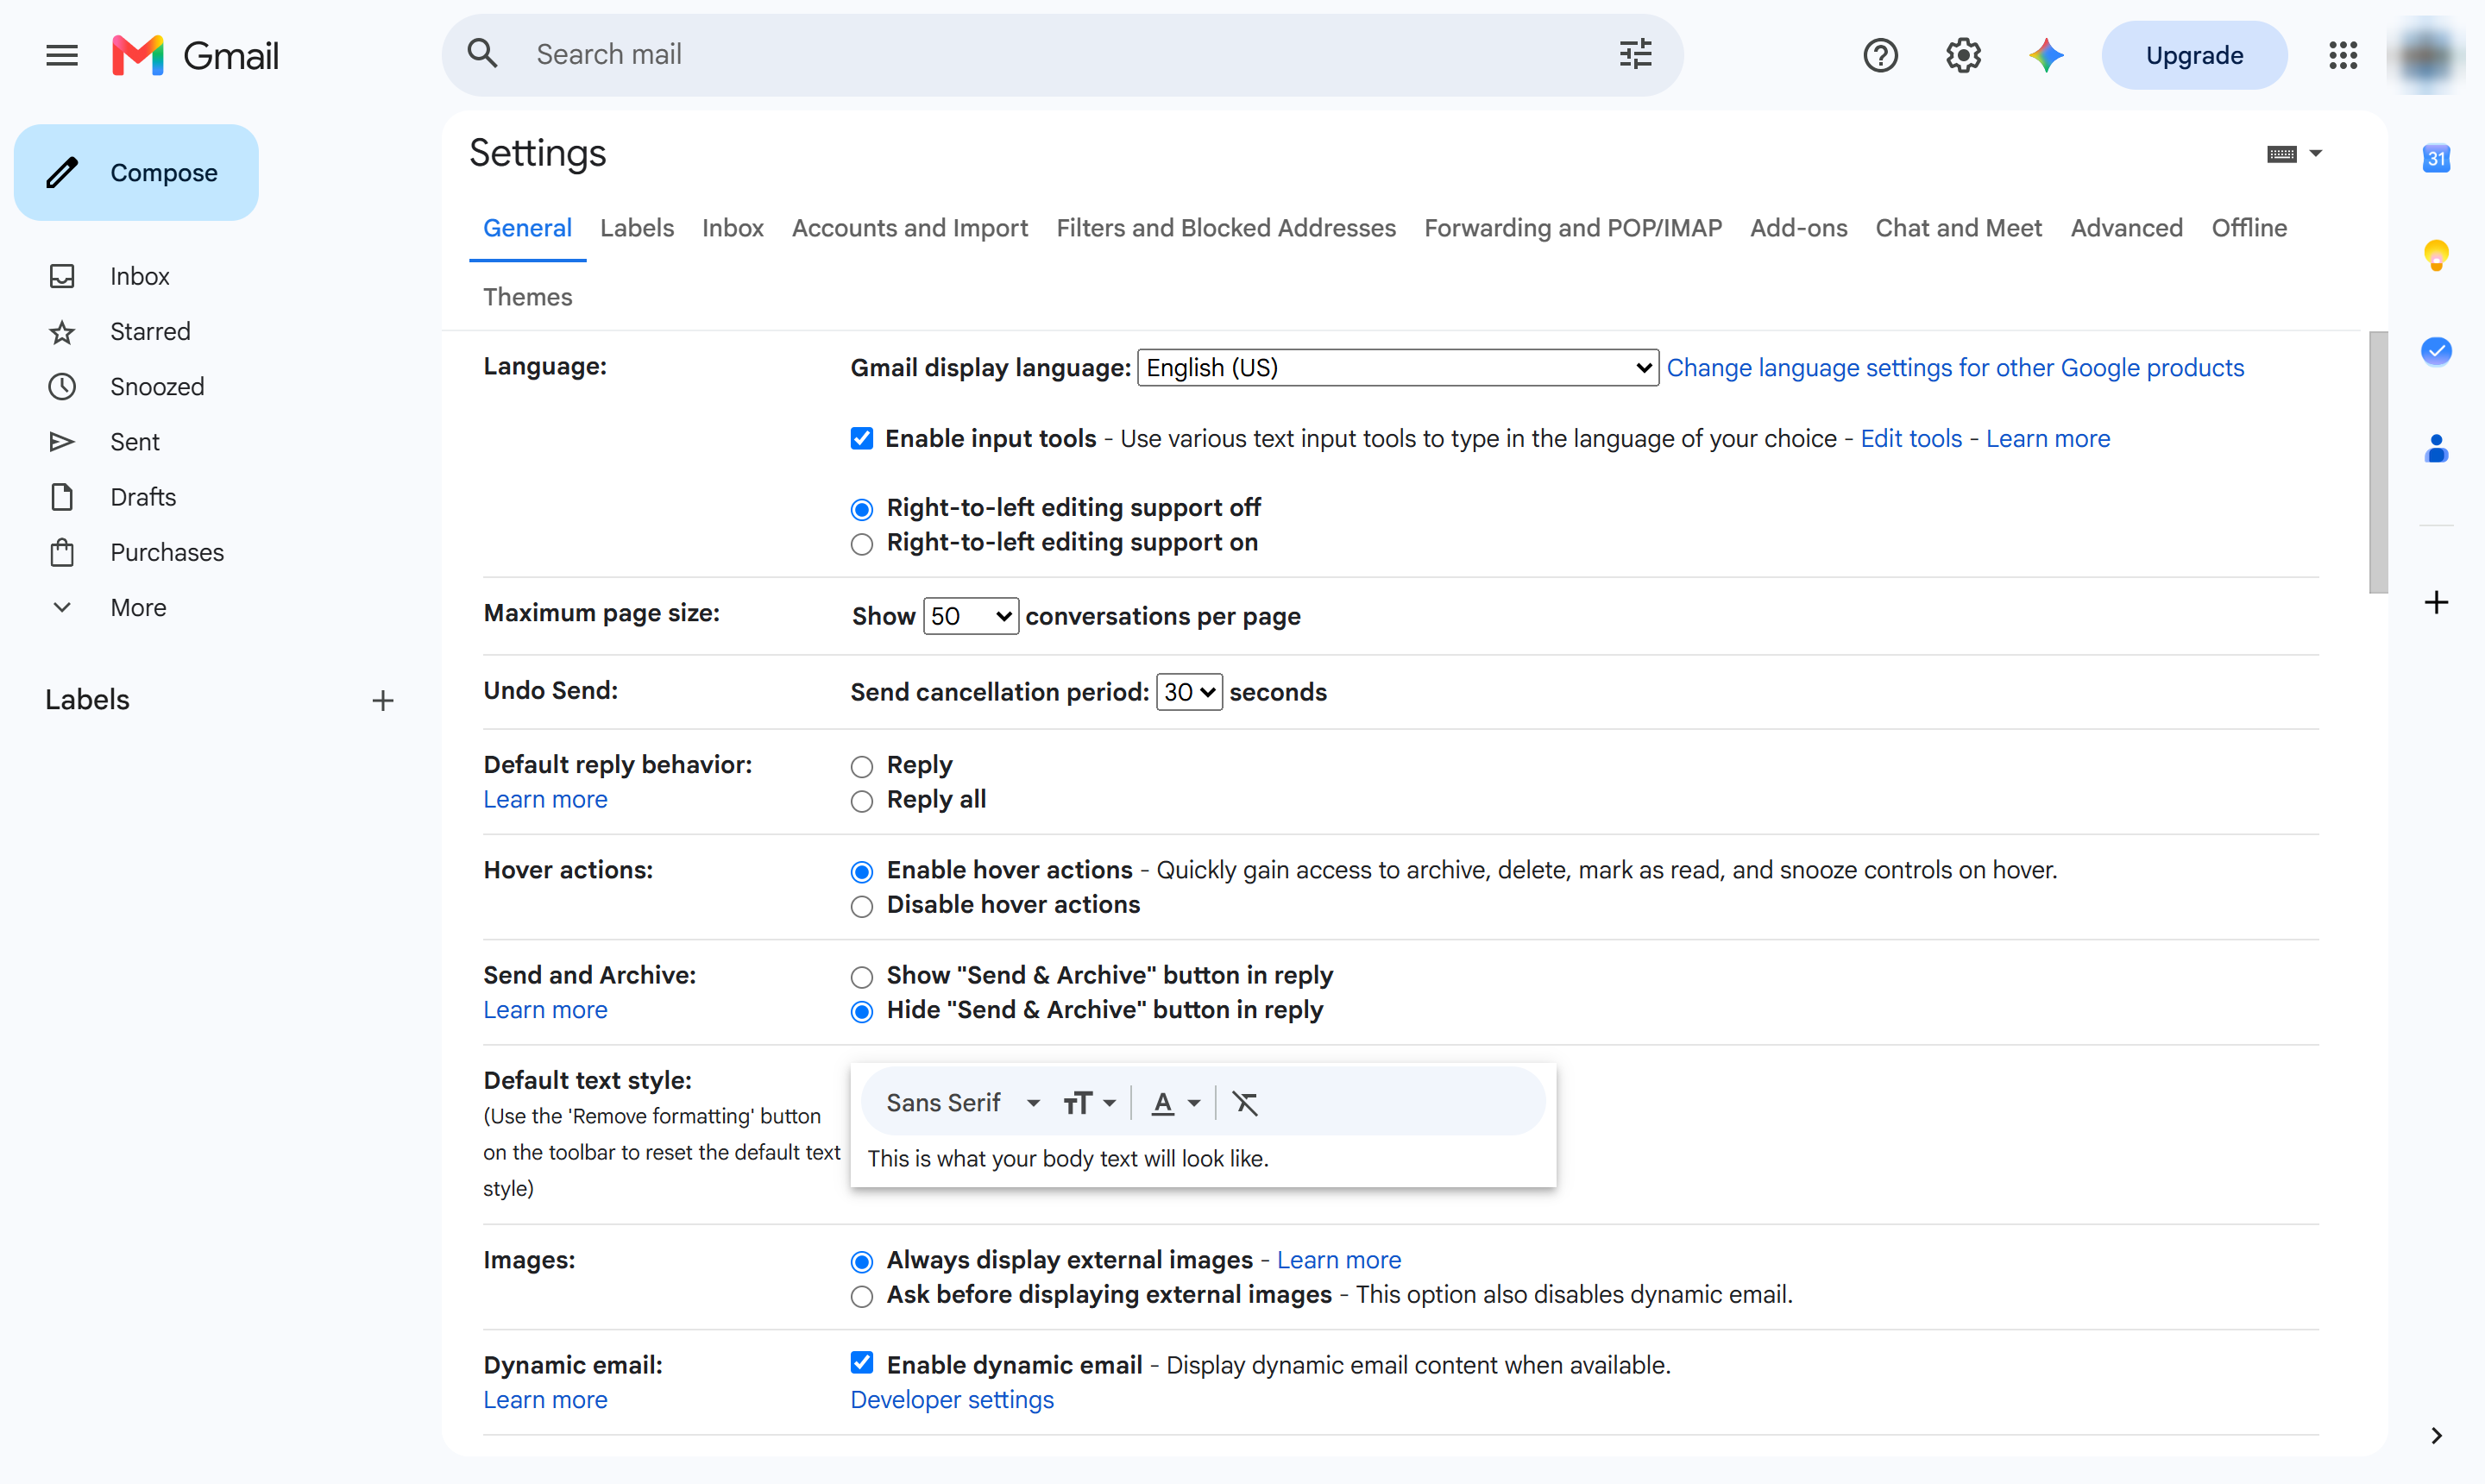
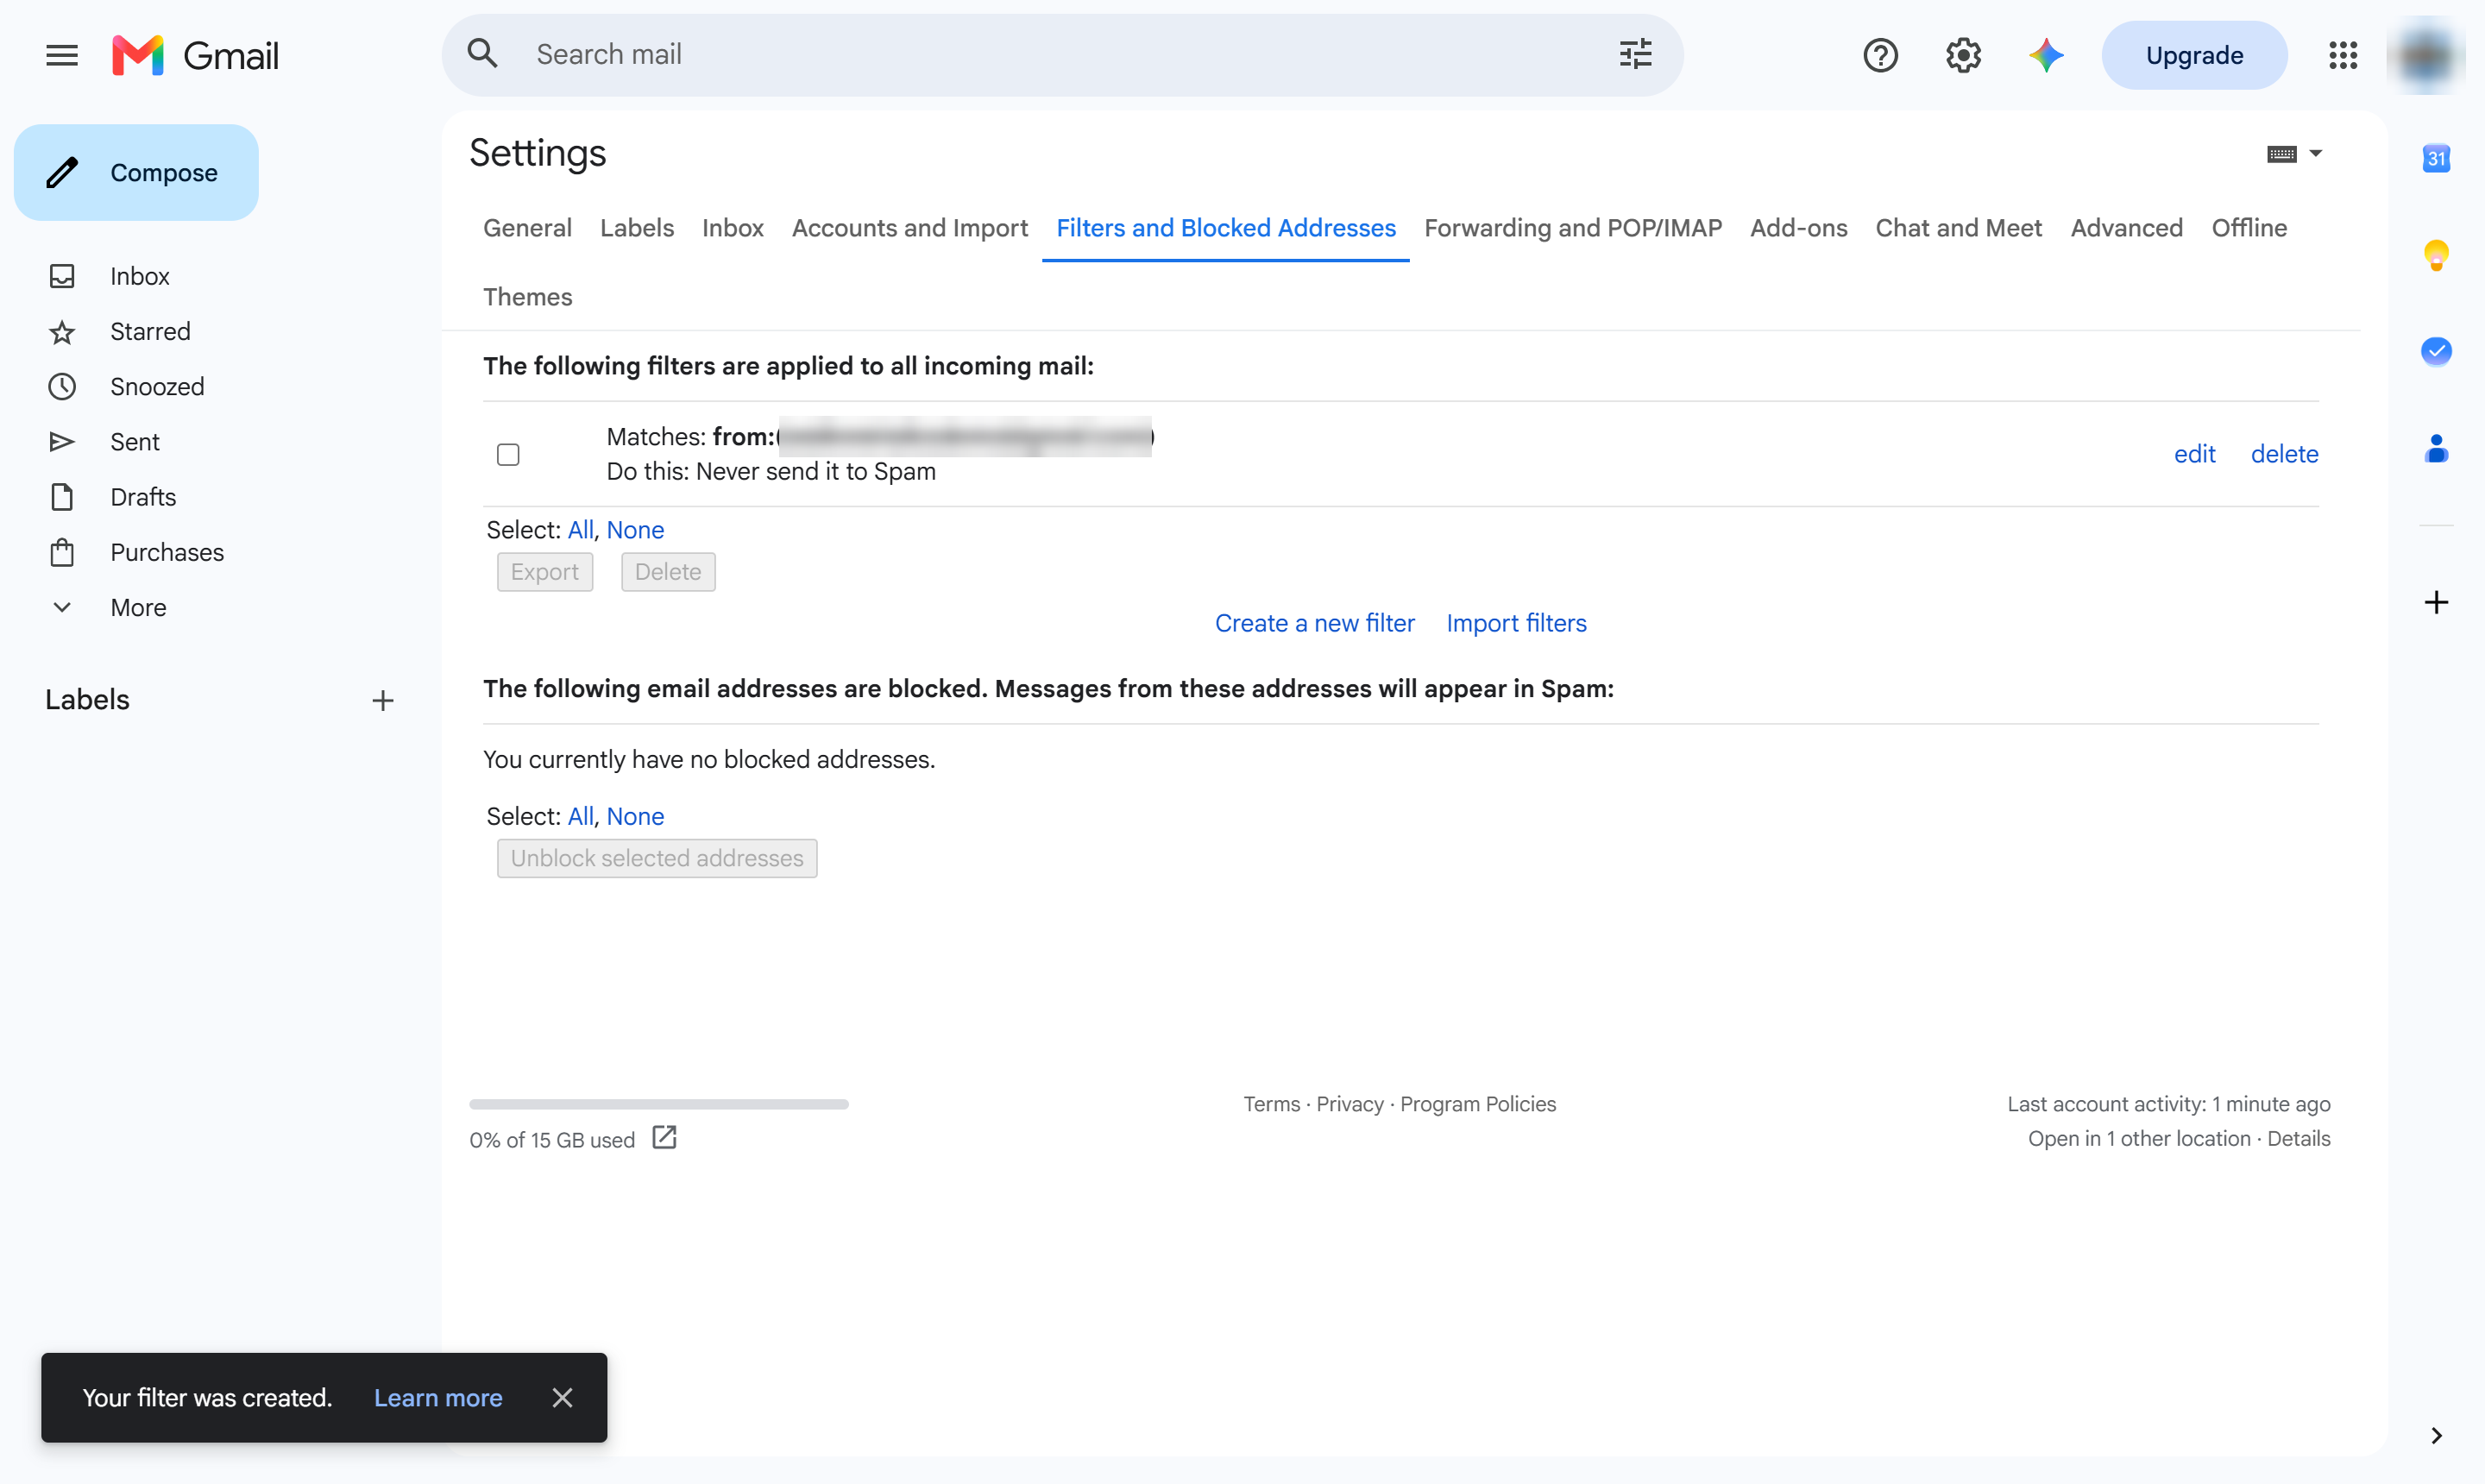
Open the Filters and Blocked Addresses tab.
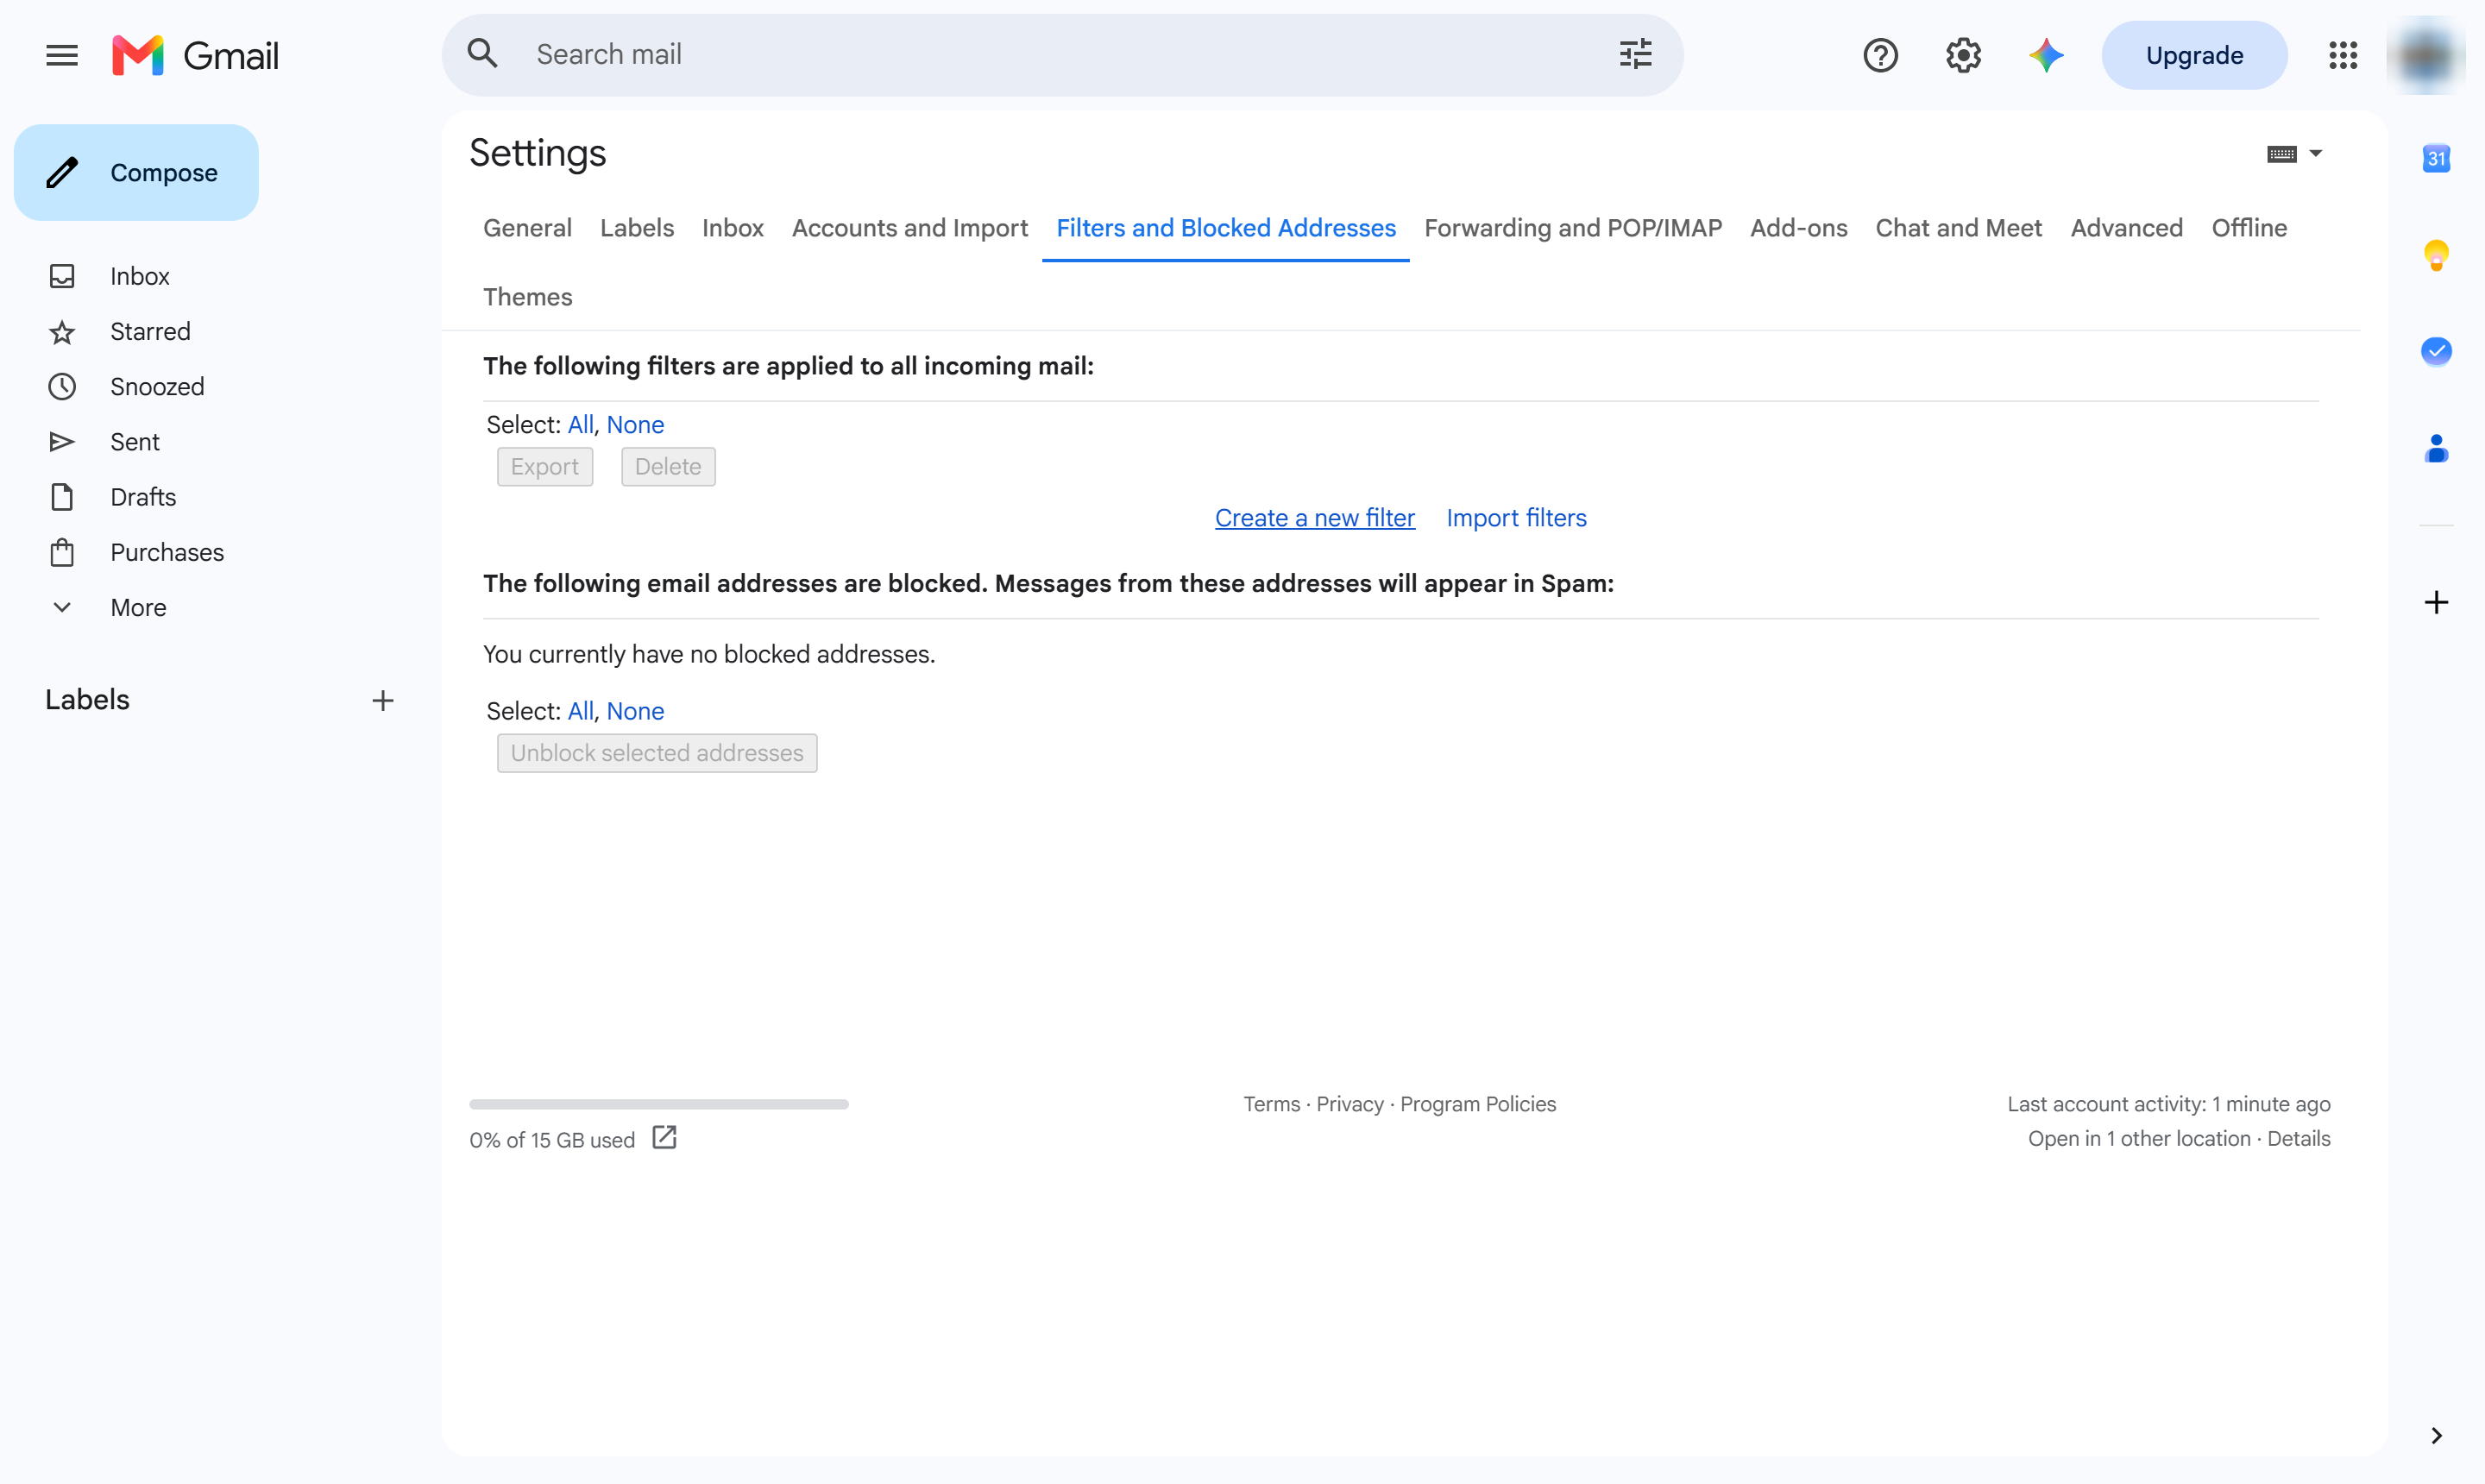
Click Create a new filter.
Click the From box.
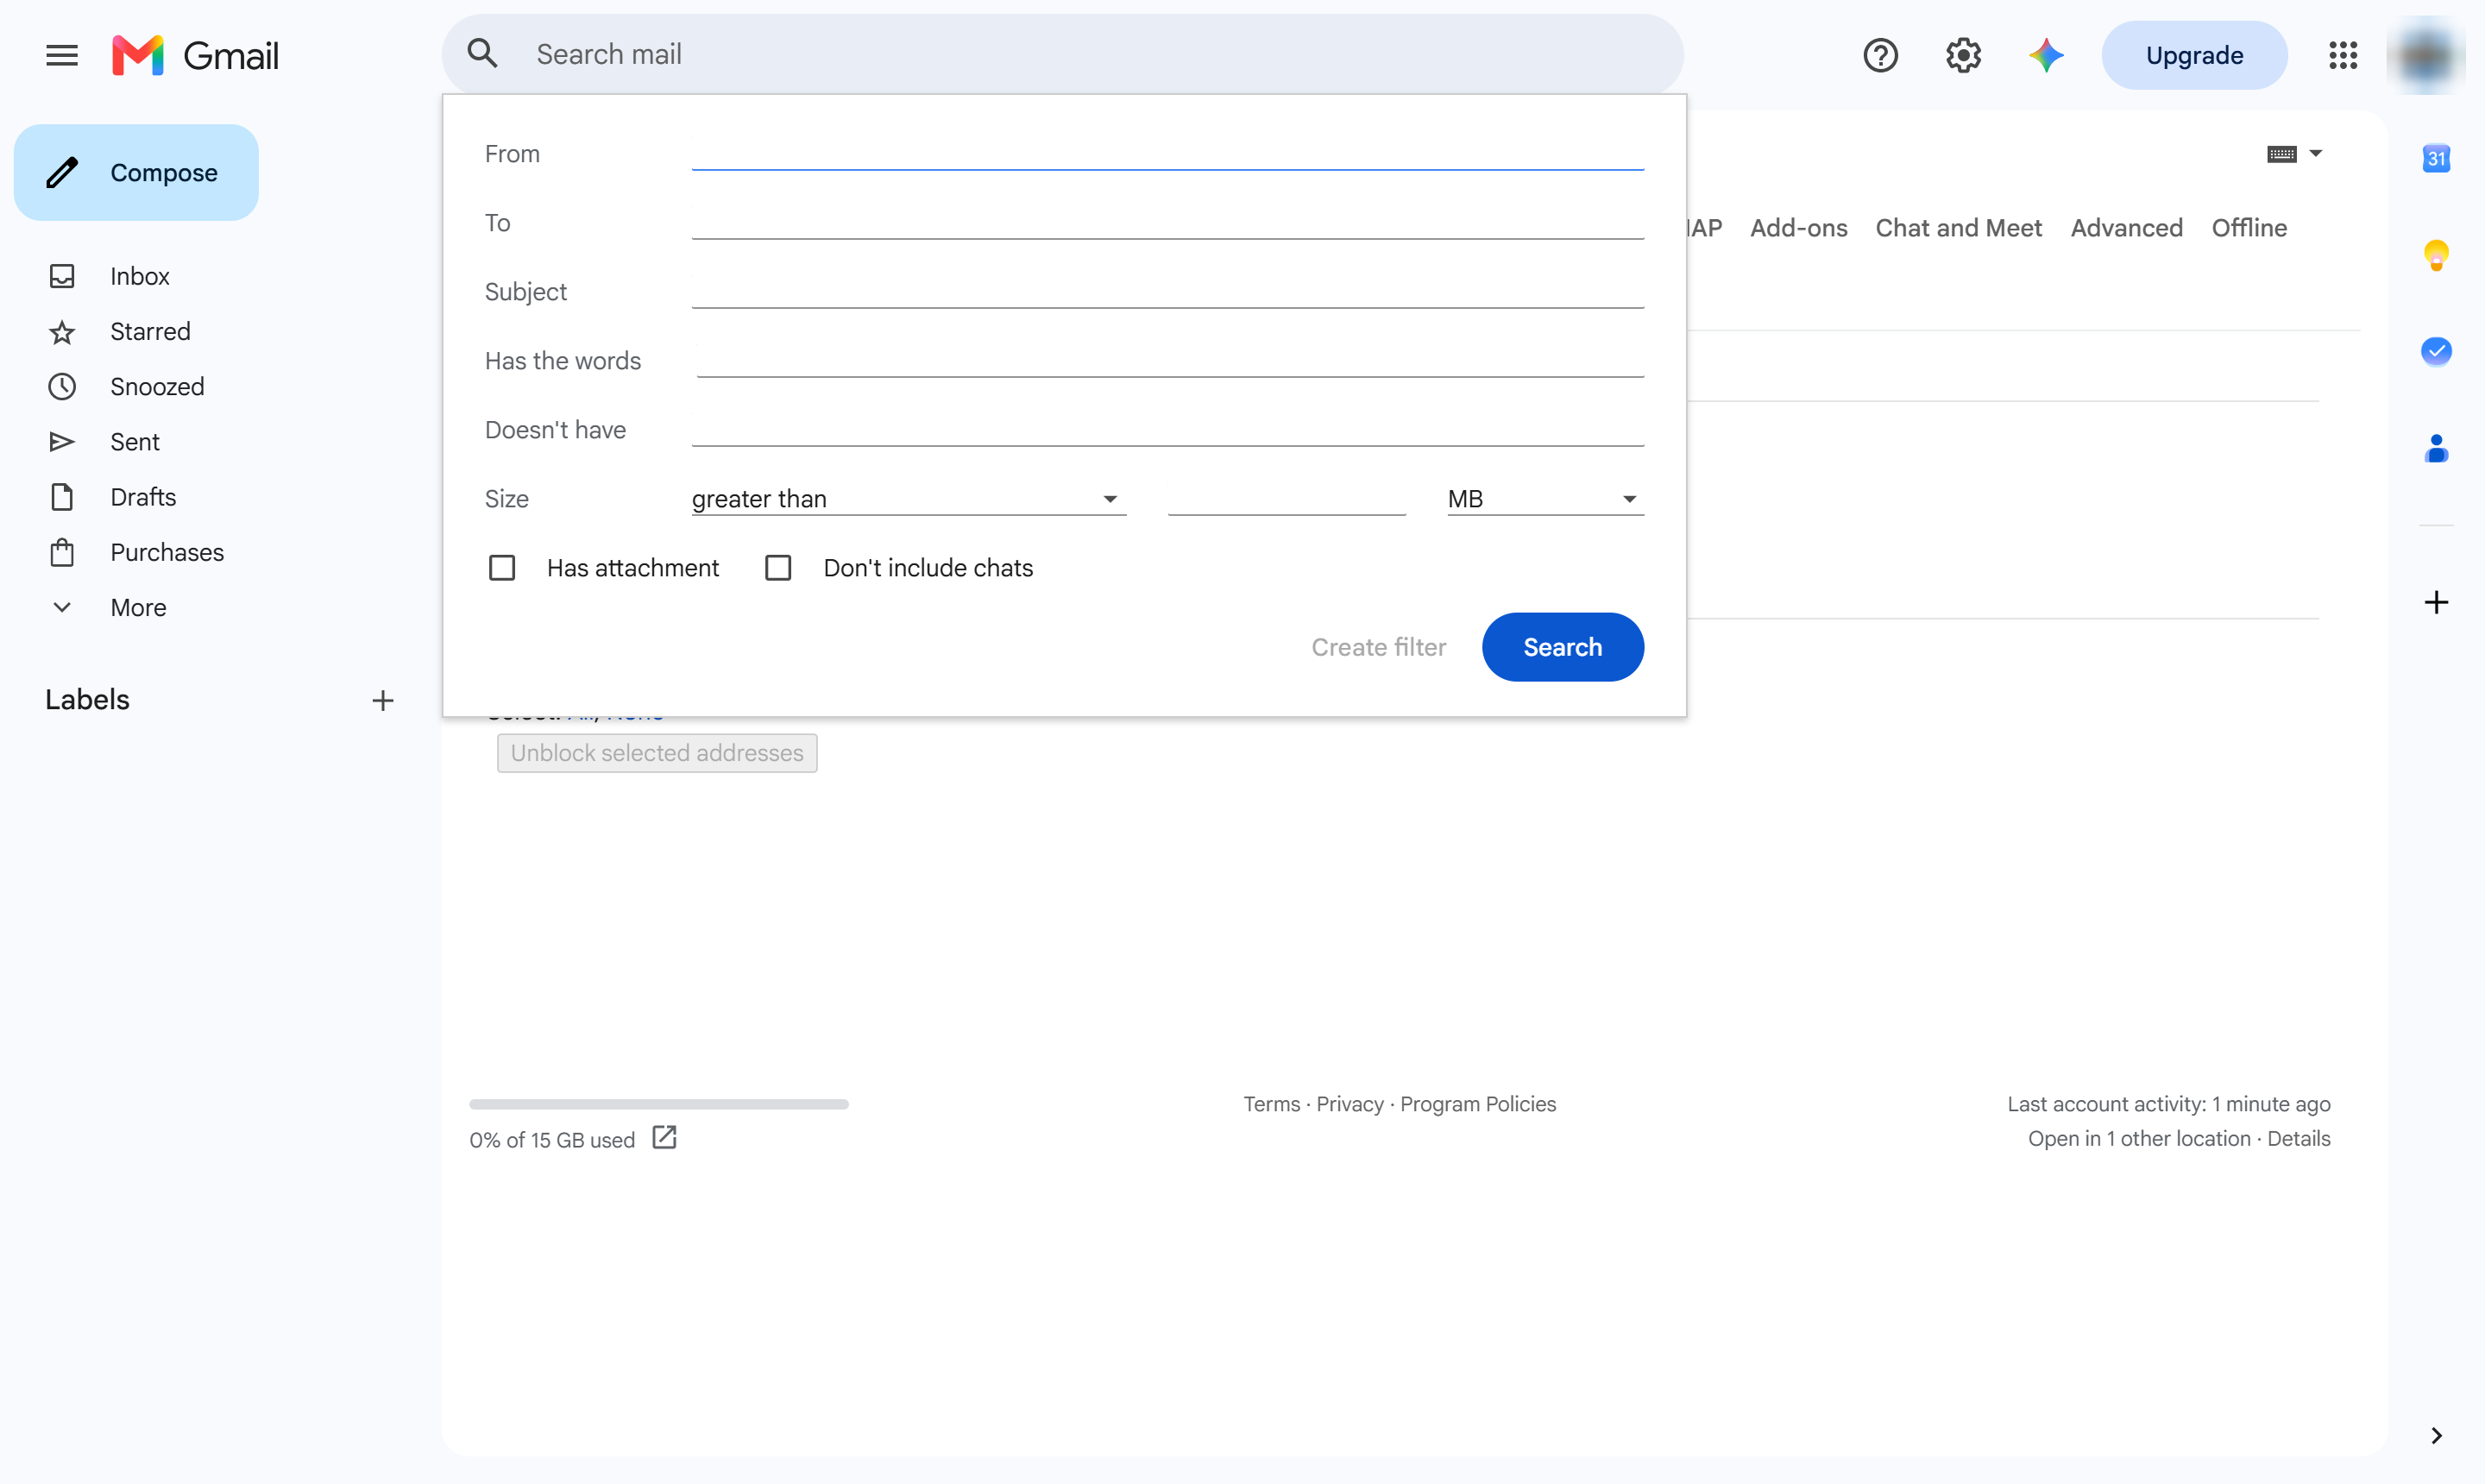
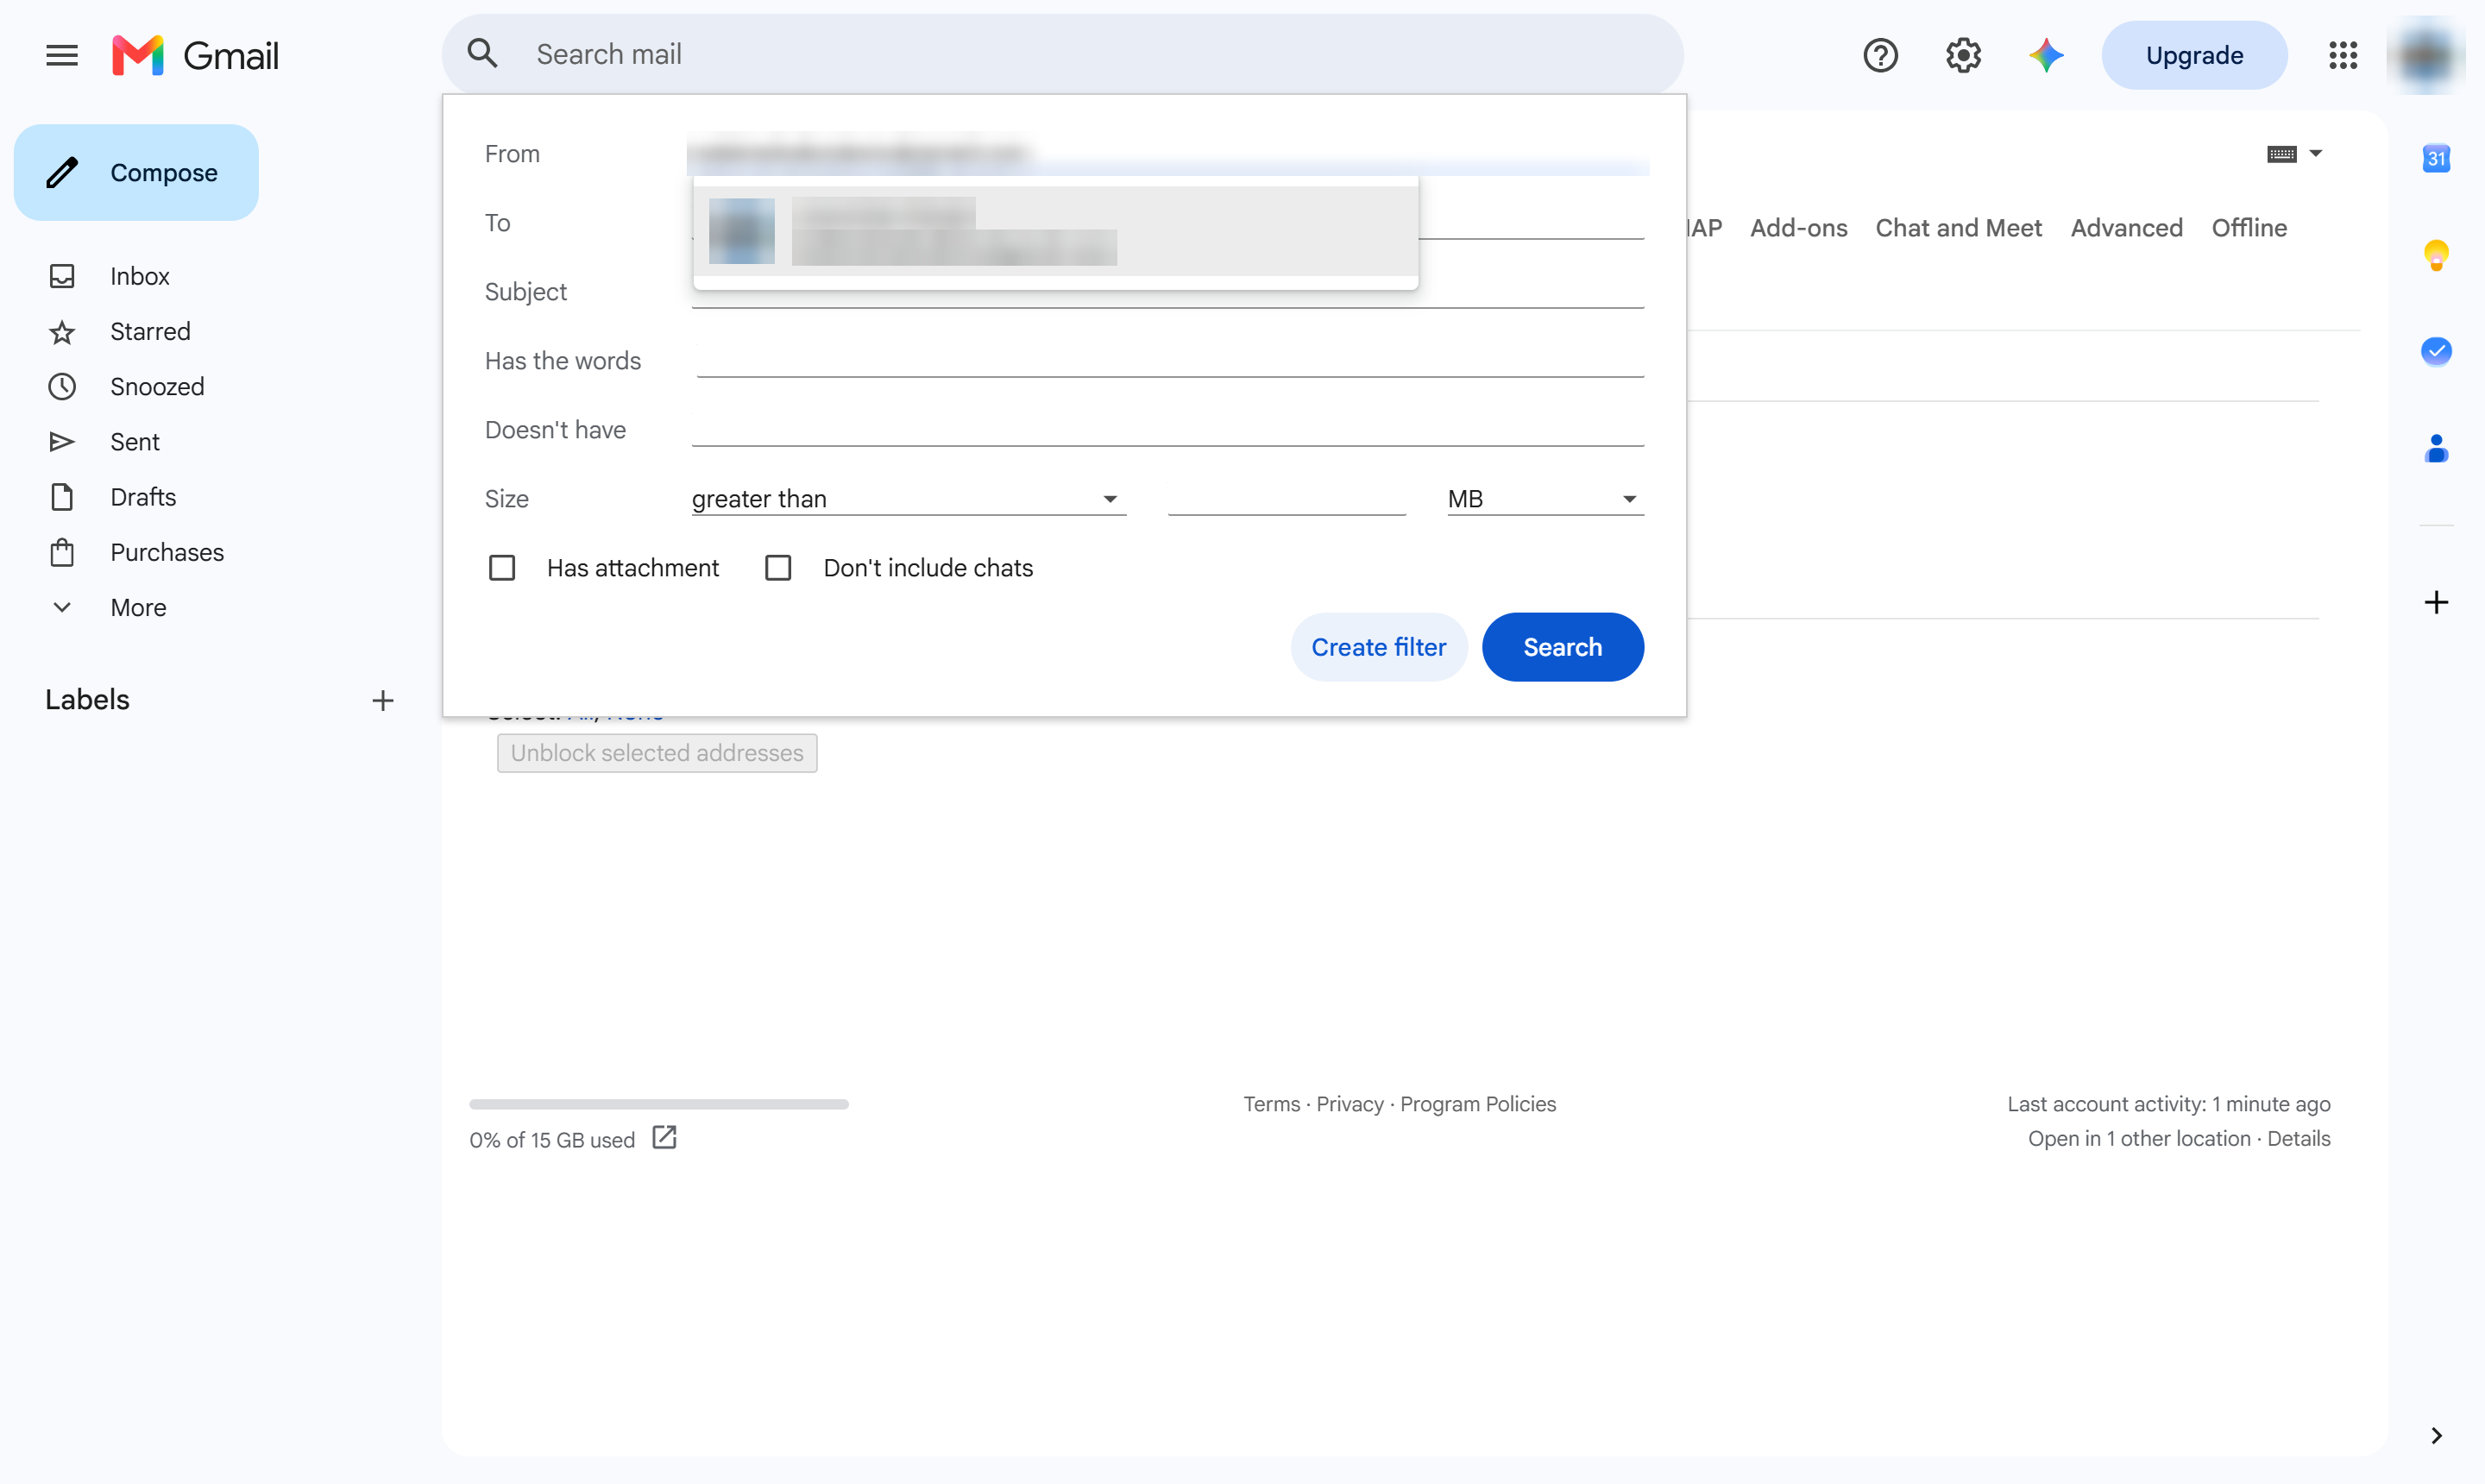
Type the sender's email address.
Click Create filter to choose what happens to their mail.
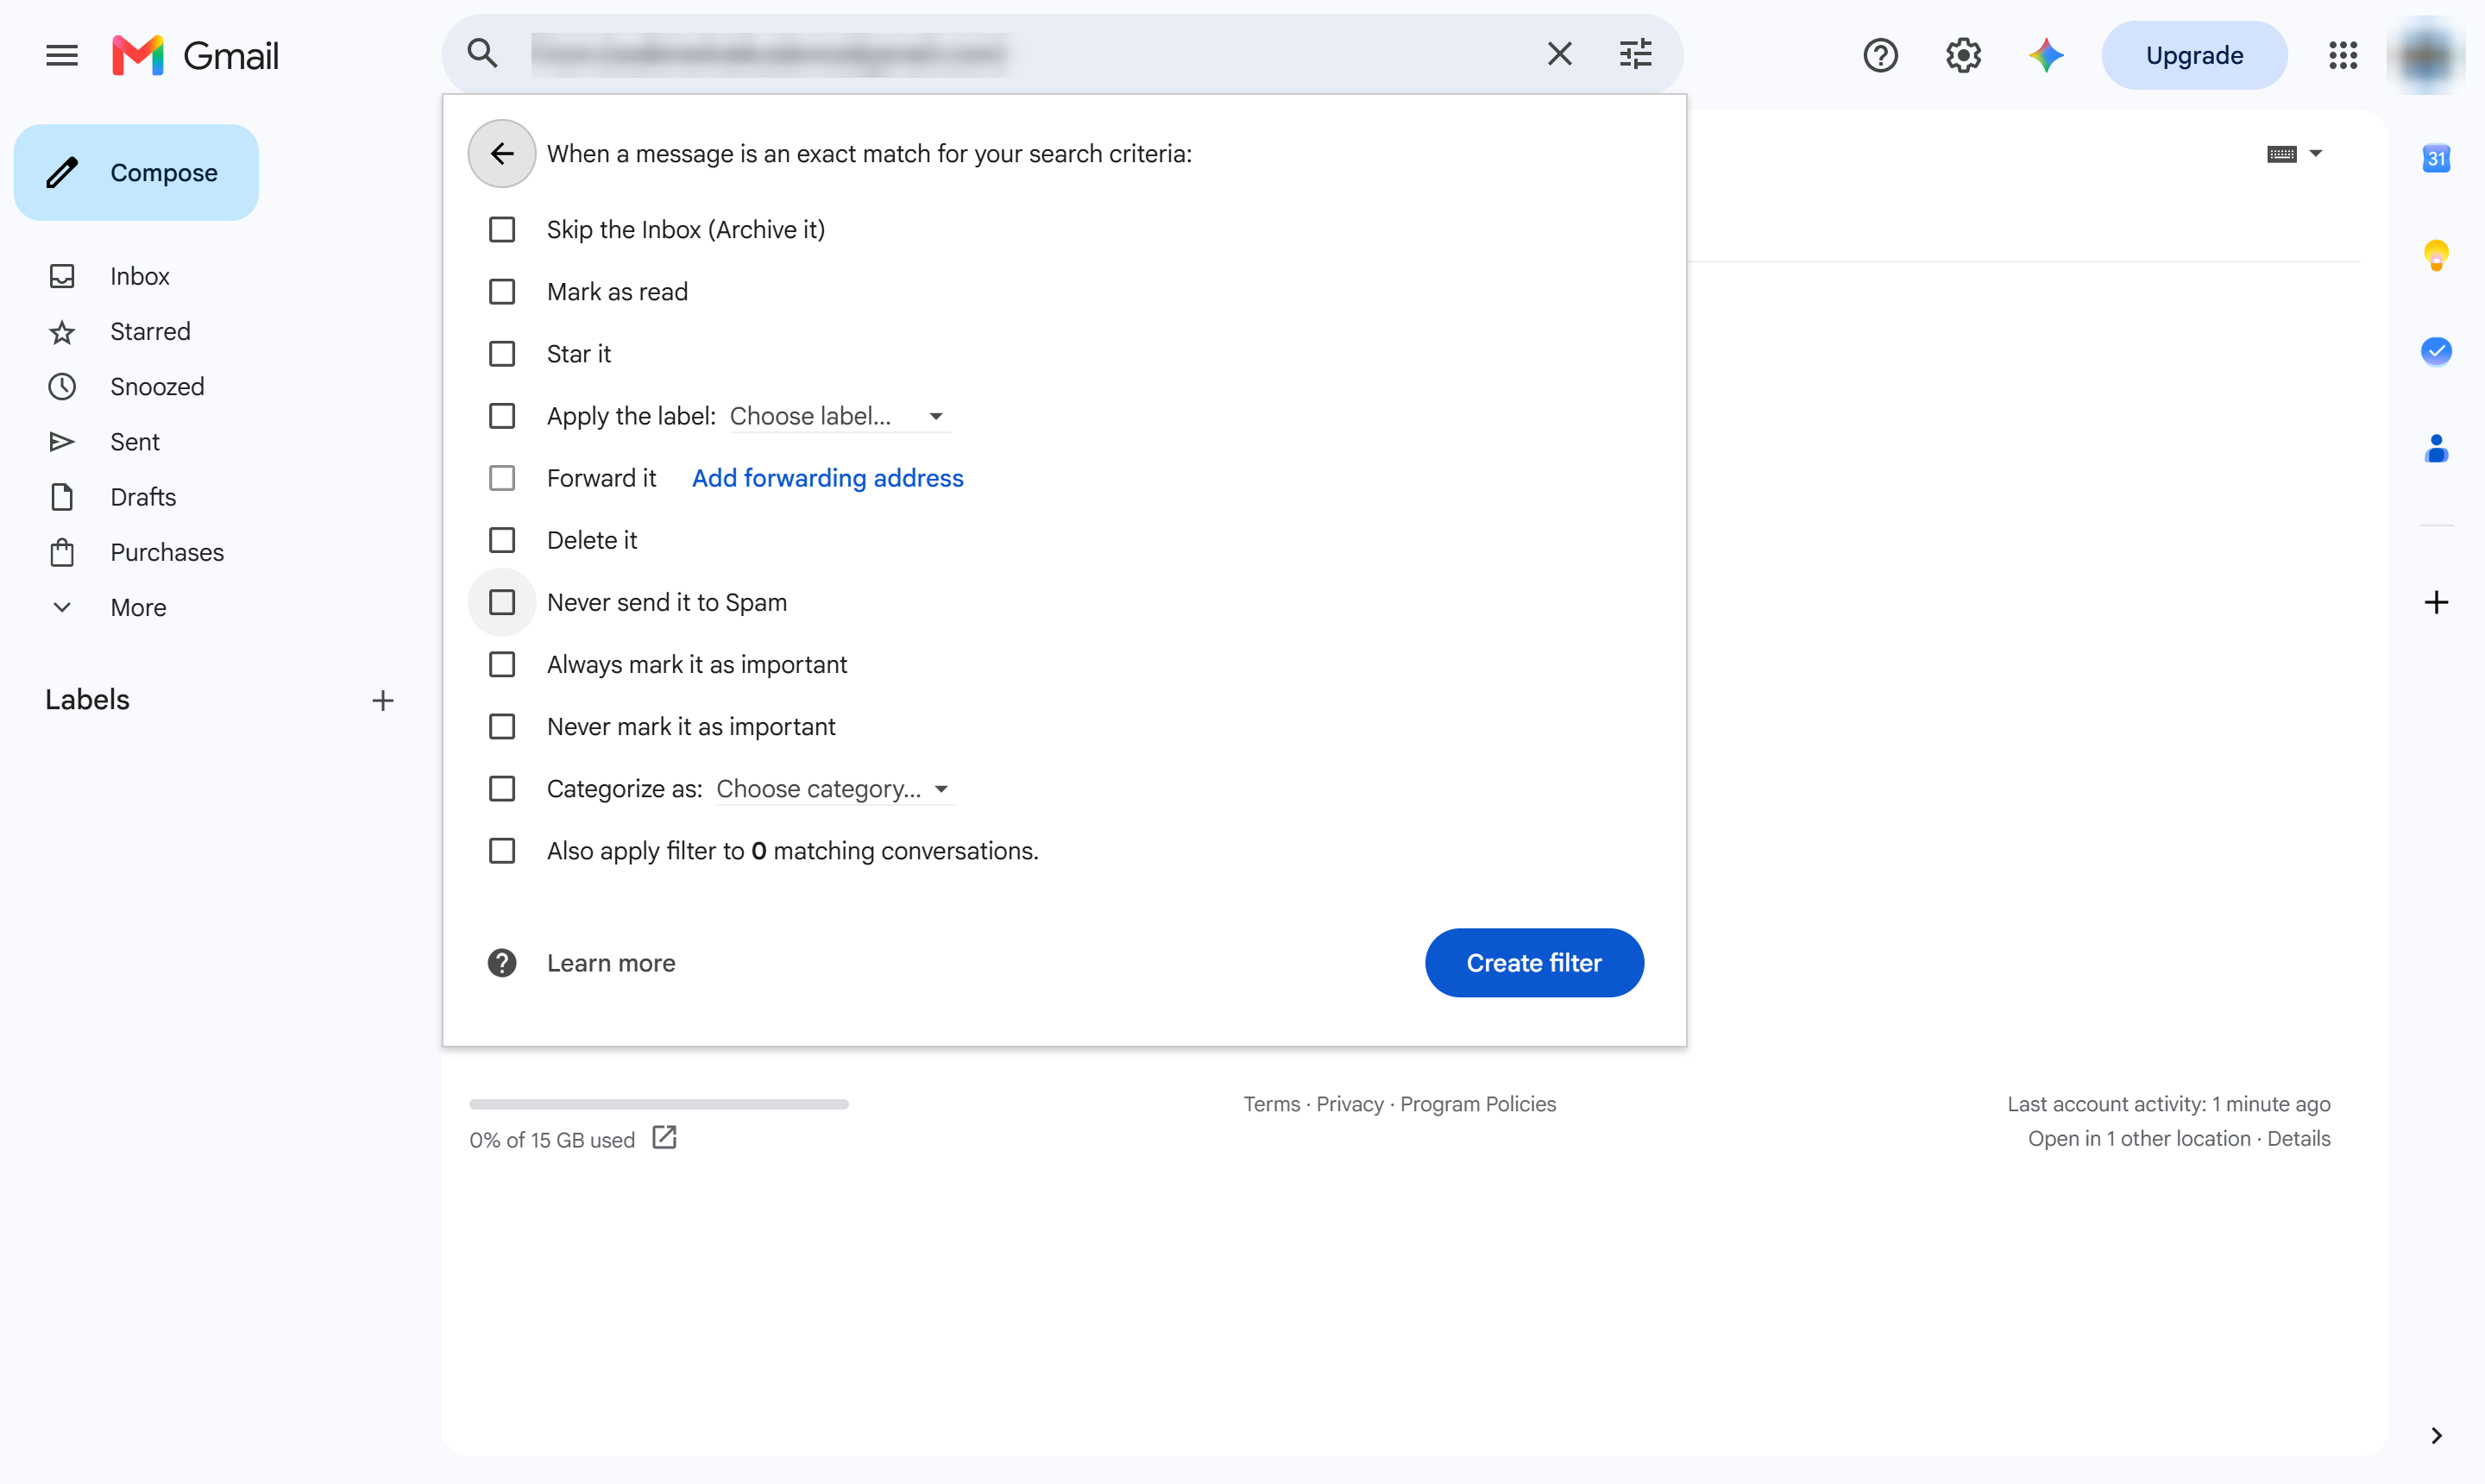
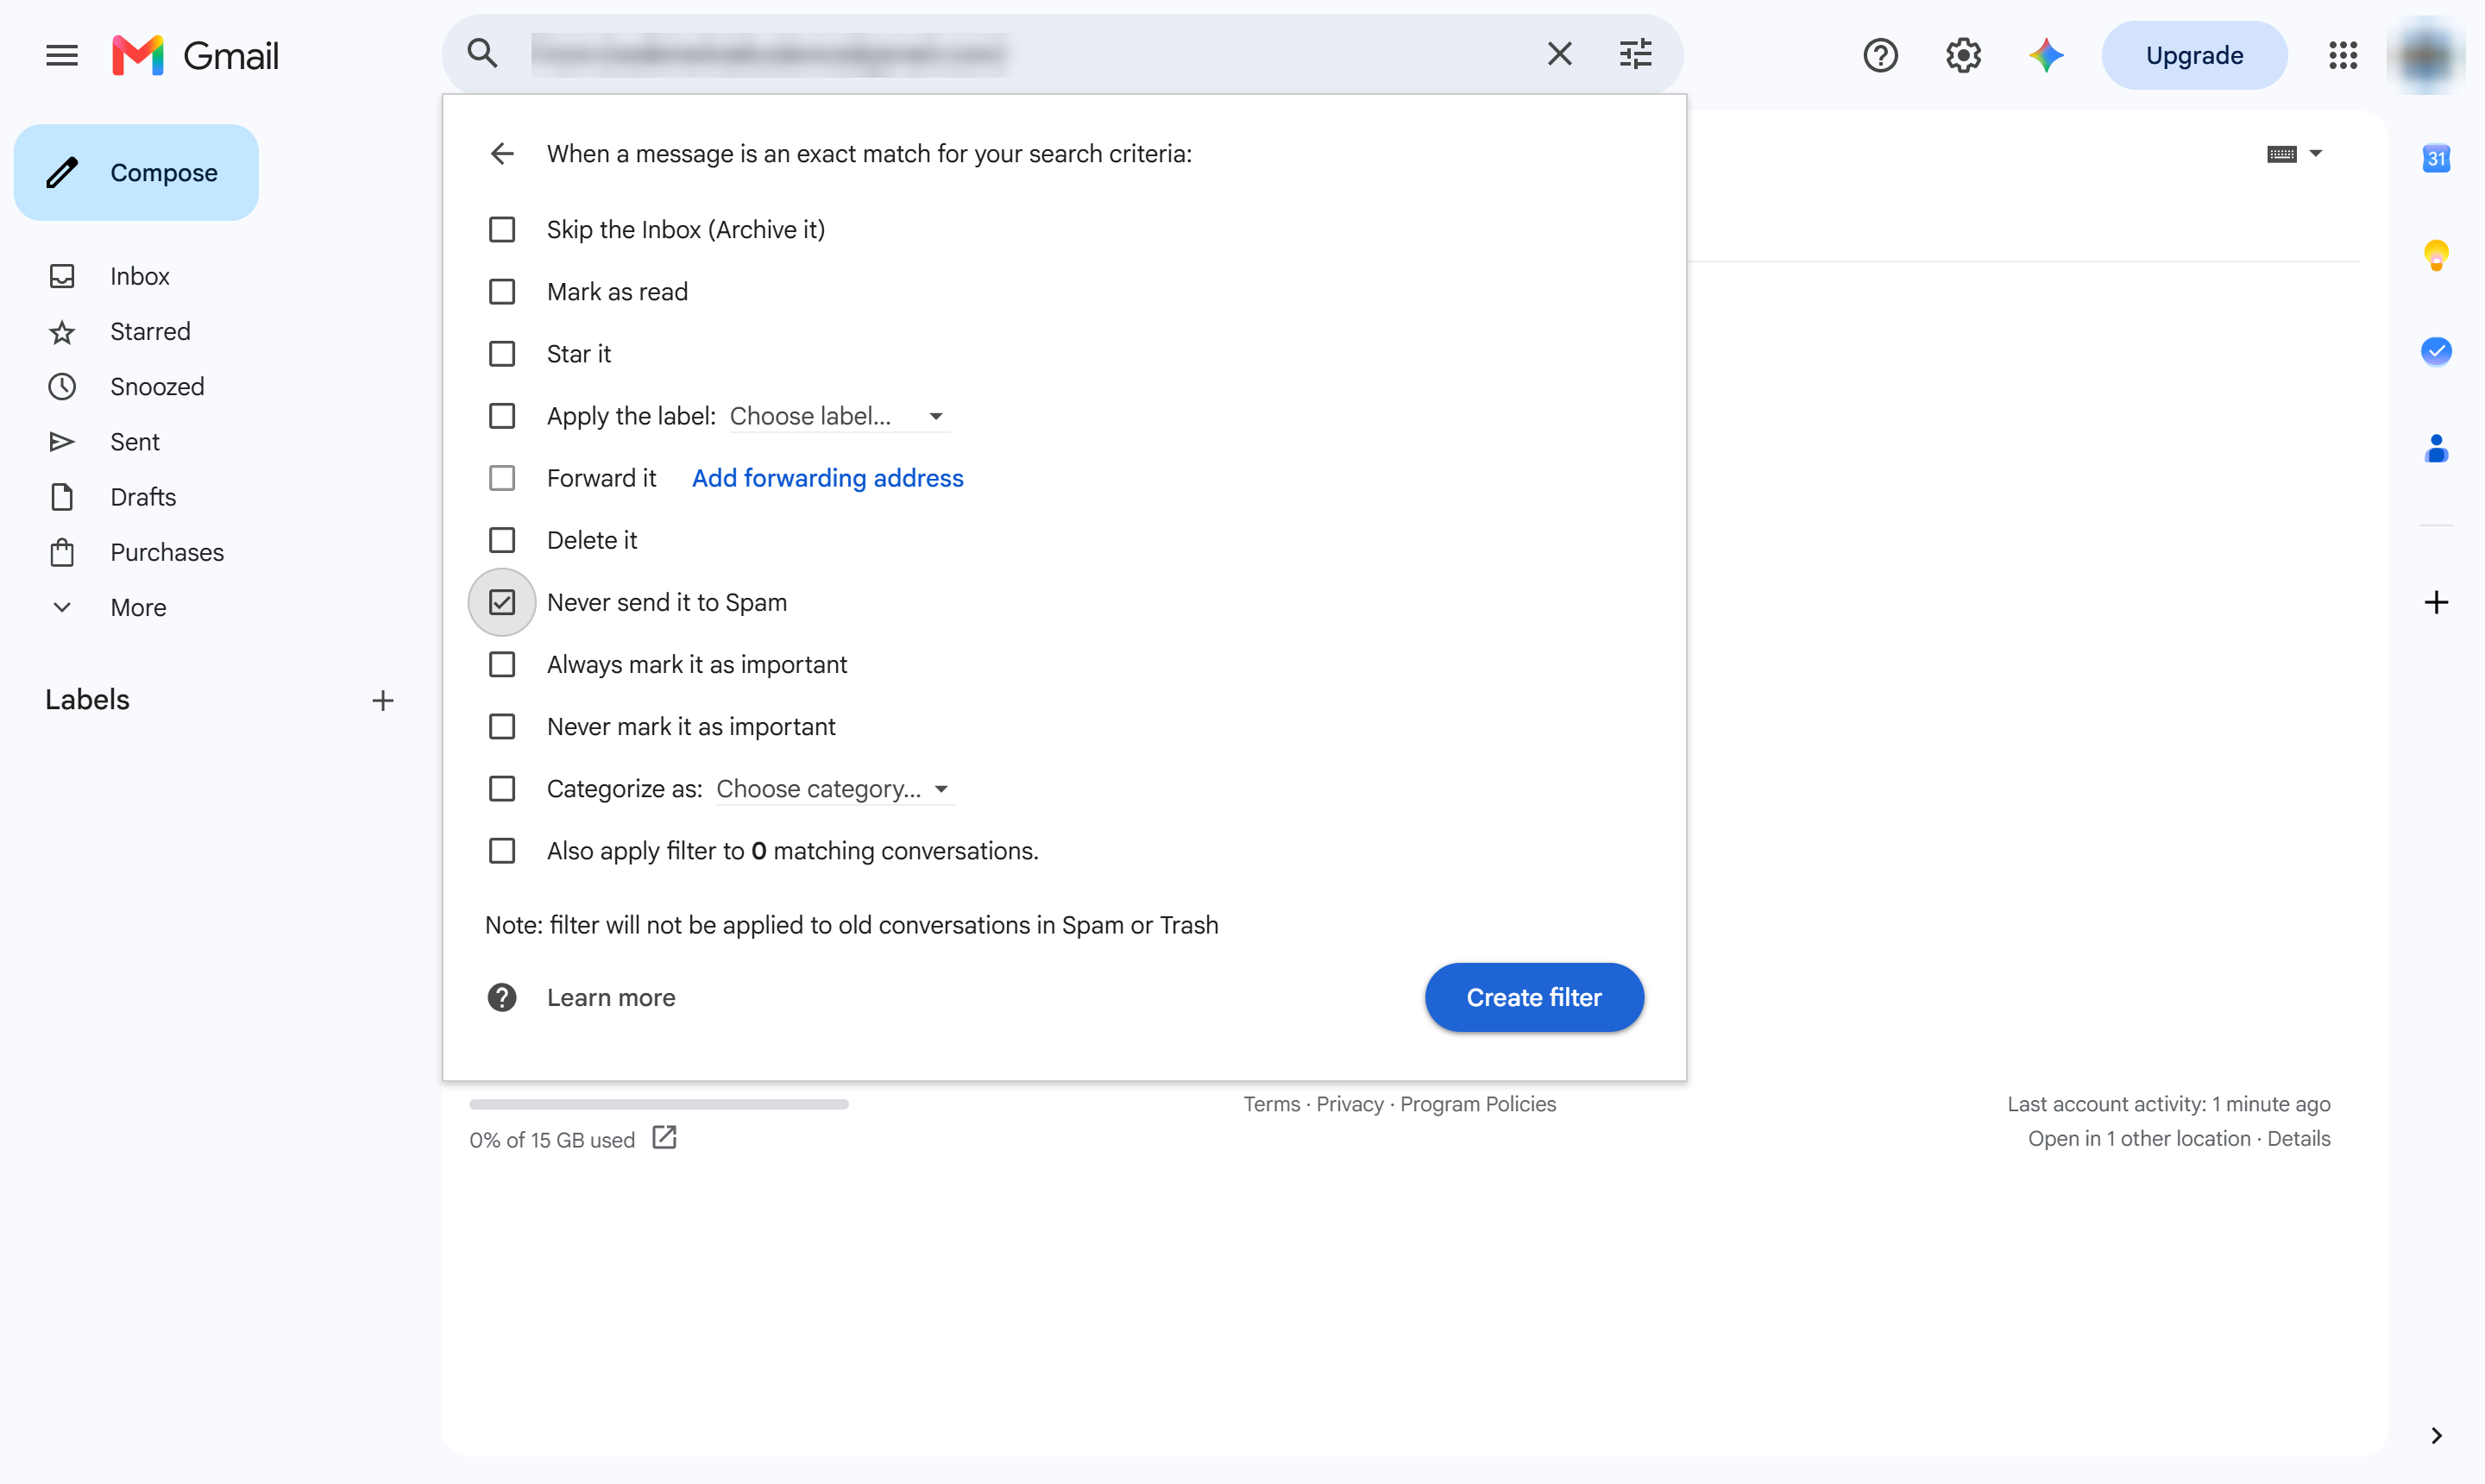
Tick "Never send it to Spam".
Click Create filter to save it.
Mail from that address always reaches your inbox from now on. Open the filter again from this list to edit or delete it.
Duplicate this template, swap in your own screens, and share it with your team. Free to start — no credit card.
Fill out the form and we'll get back to you as soon as possible.
Tell us about your team and we'll find the right plan together.