1
Open the Google Sheets document
Open the Google Sheets document
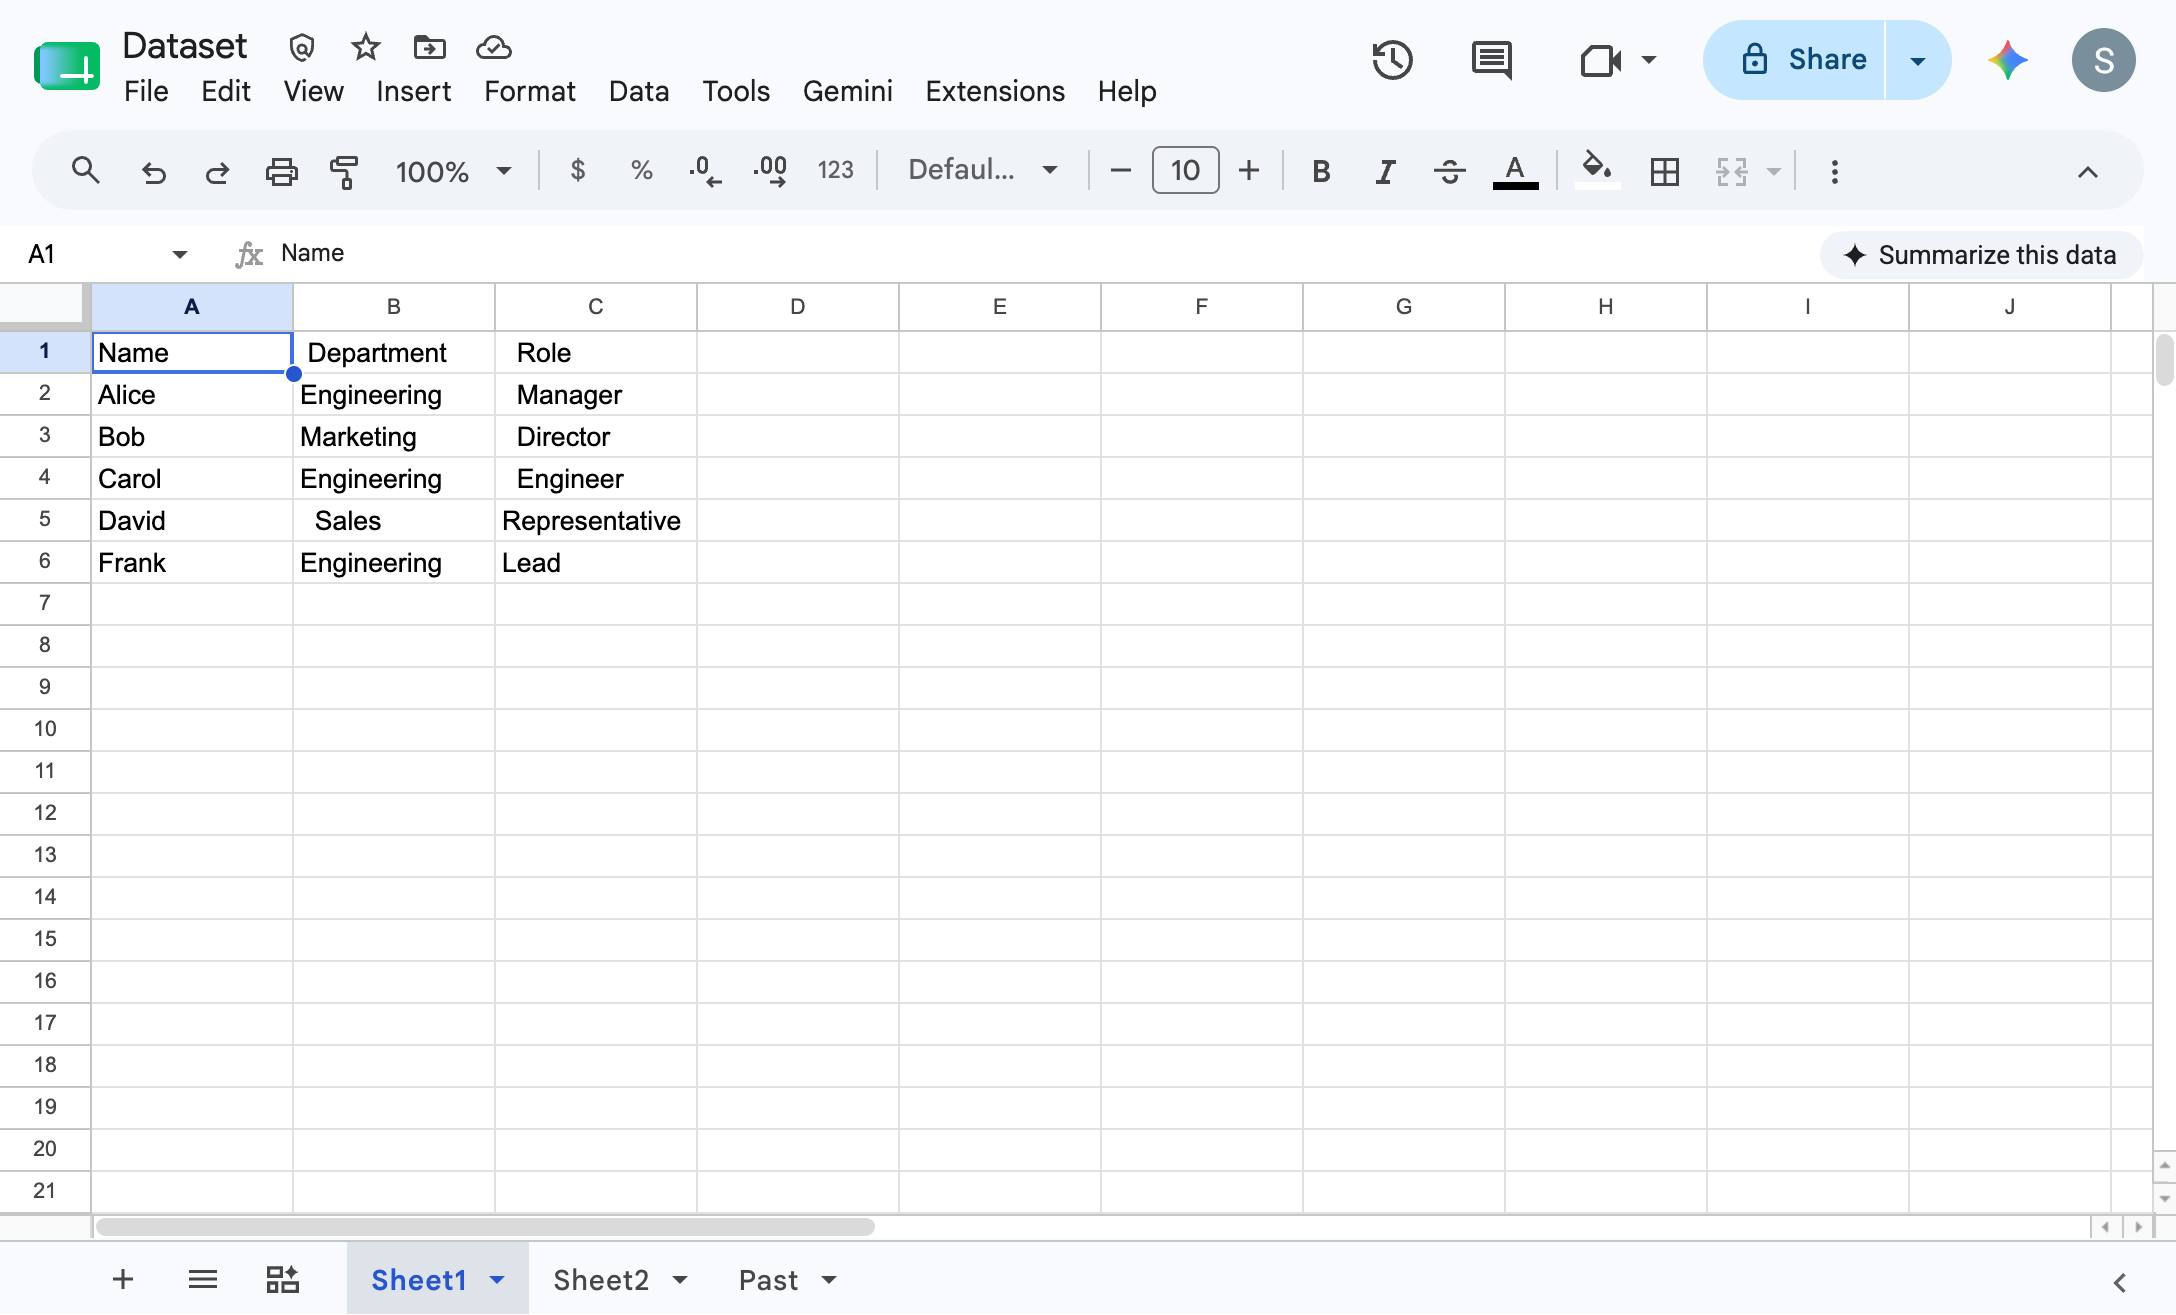

This guide provides step-by-step instructions on how to lock a row on Google Sheets. It explains why someone might want to do this, such as preventing others from making changes or receiving a warning when changes are made. The guide also covers additional features like setting permissions and creating custom permissions
Open the Google Sheets document
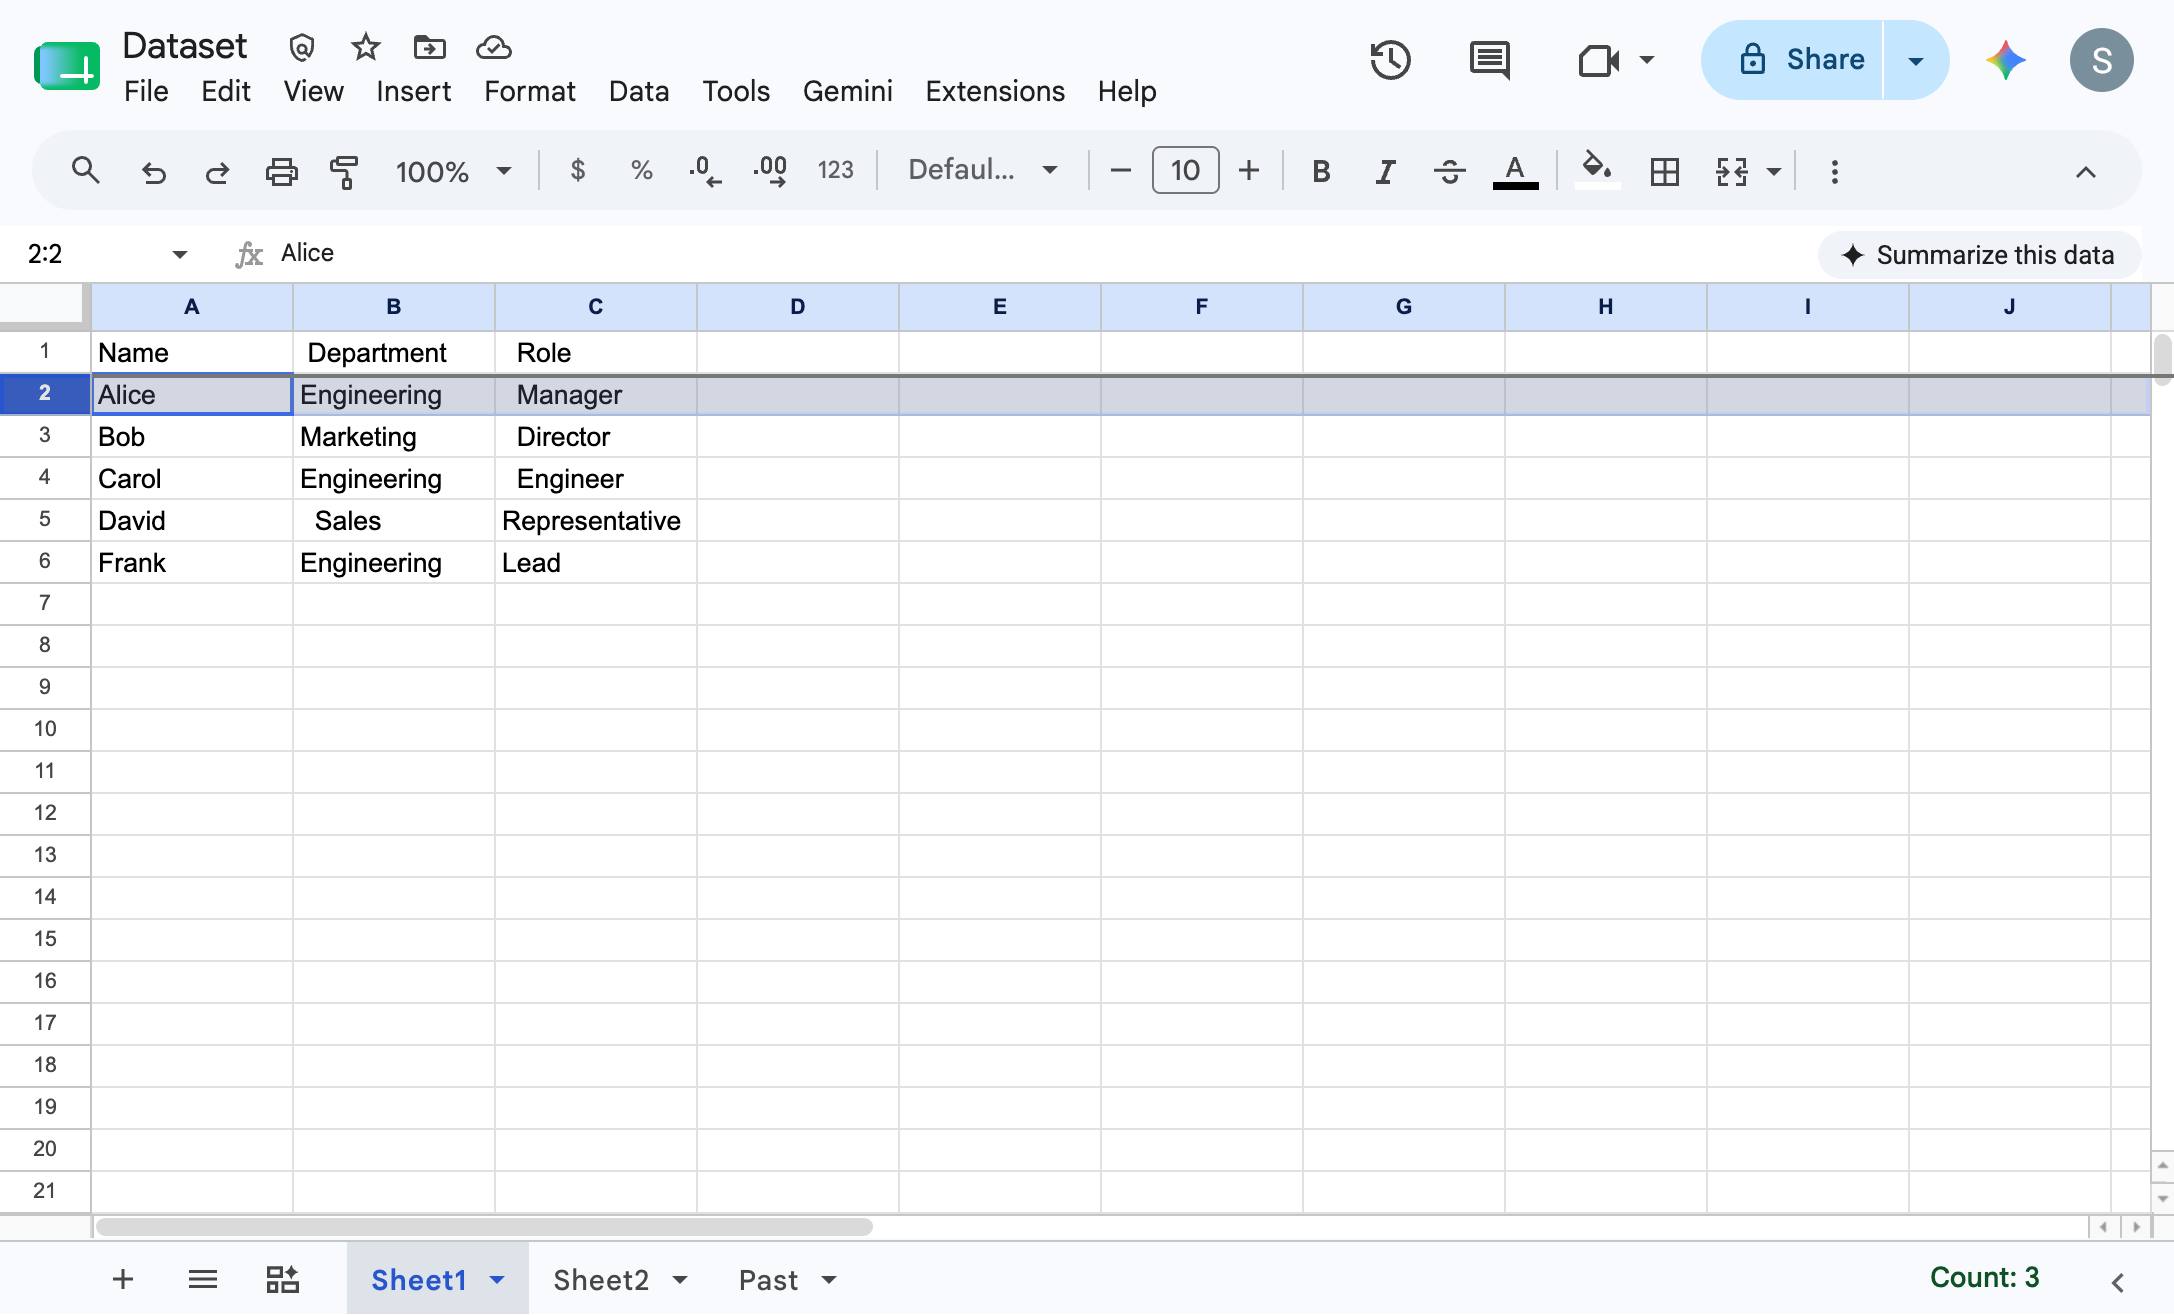
Right click on the row you want to lock
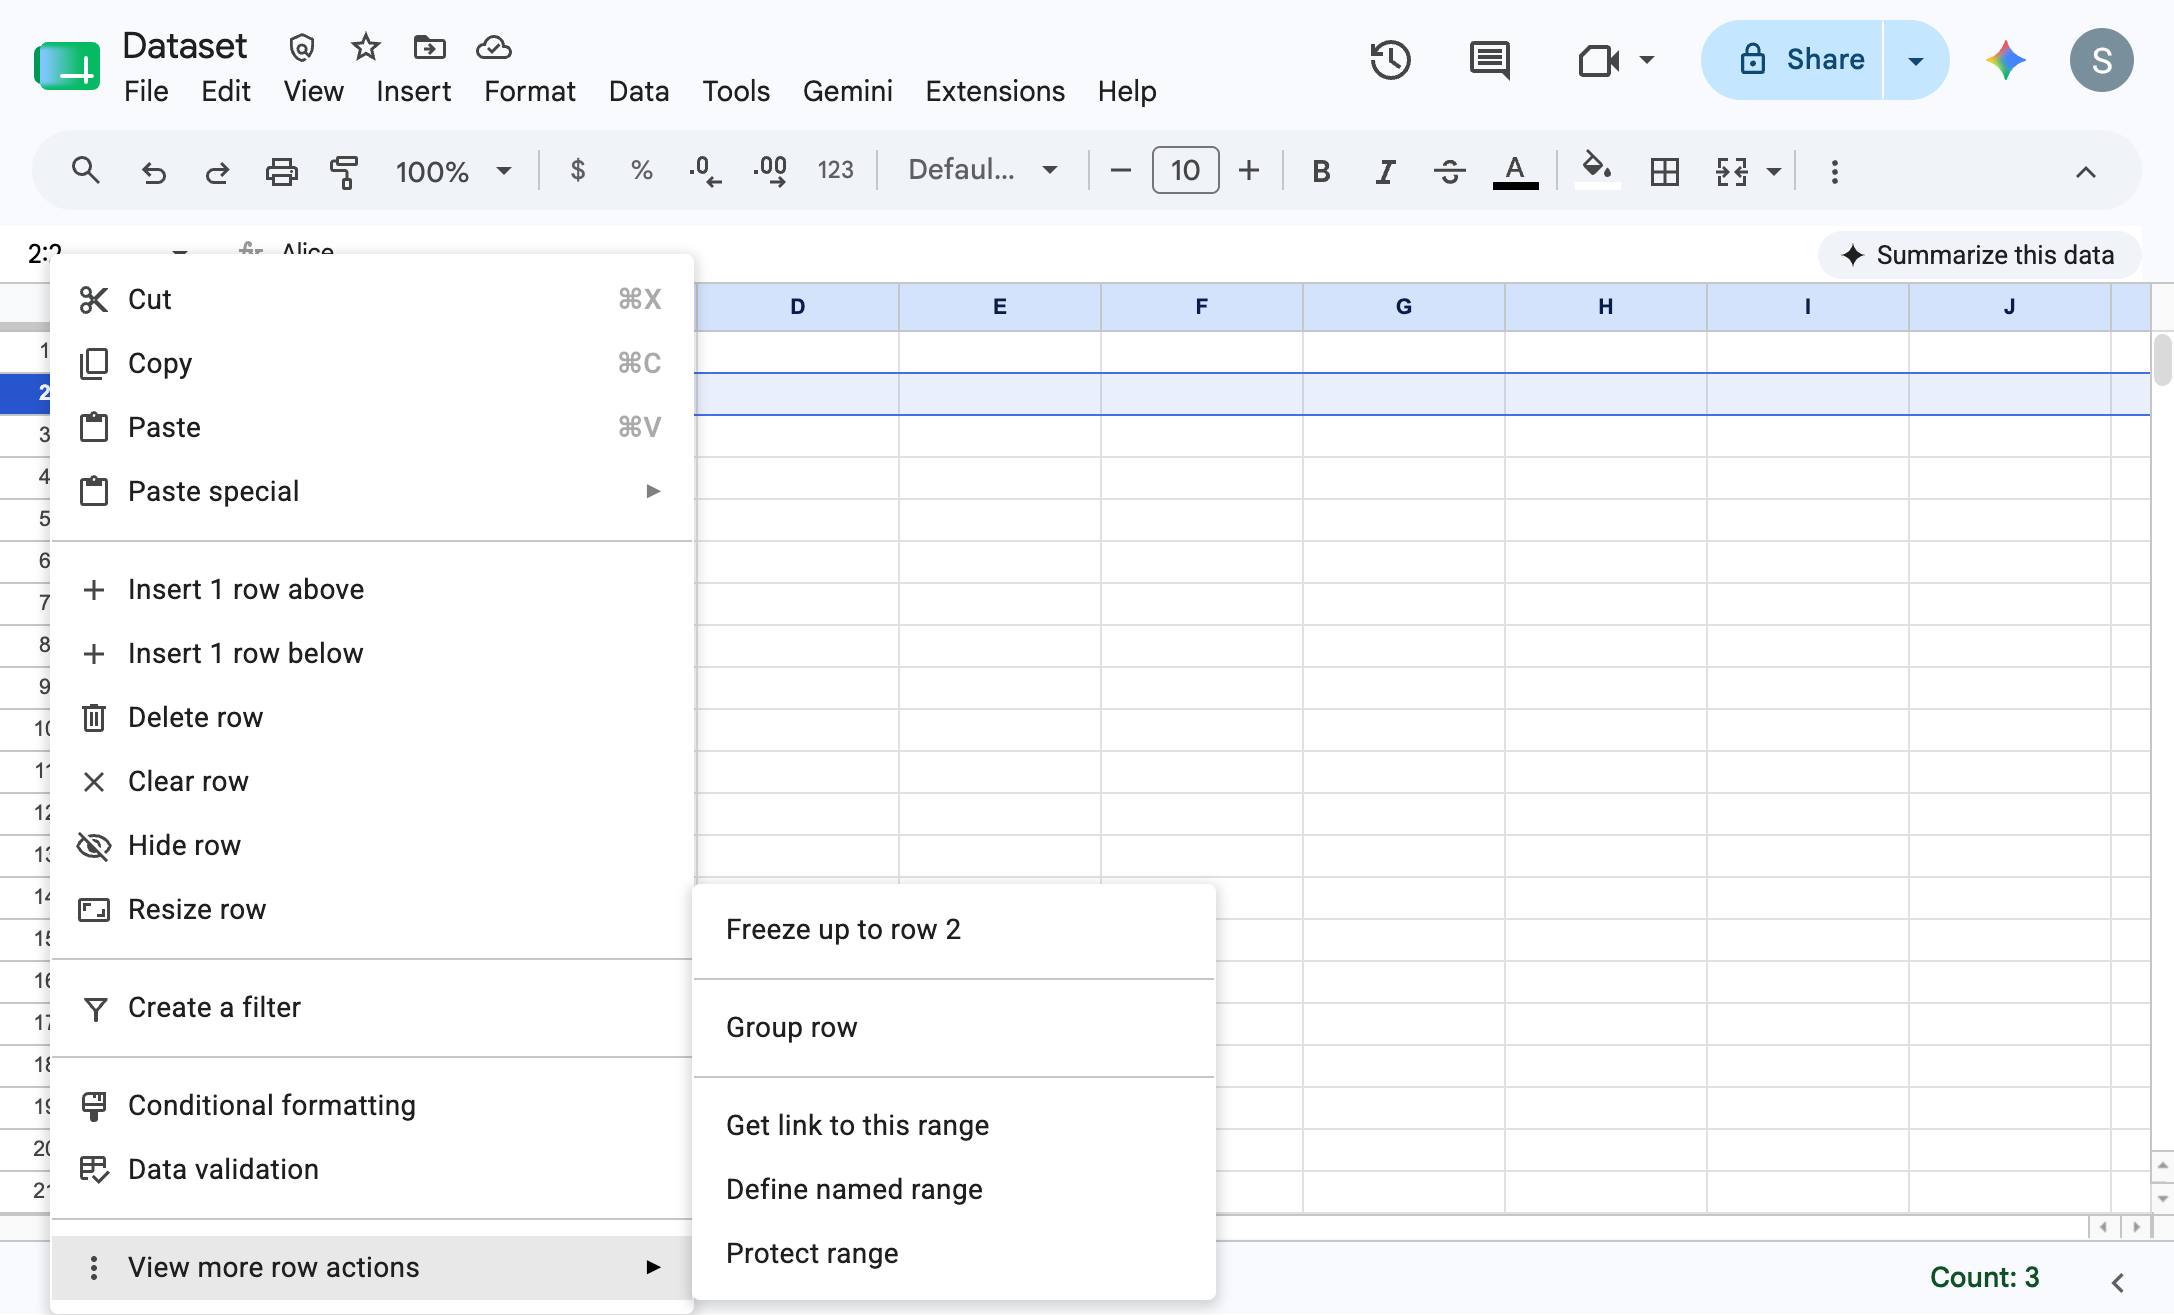
Click the "View more row actions" option at the bottom of the context menu to reveal additional settings.
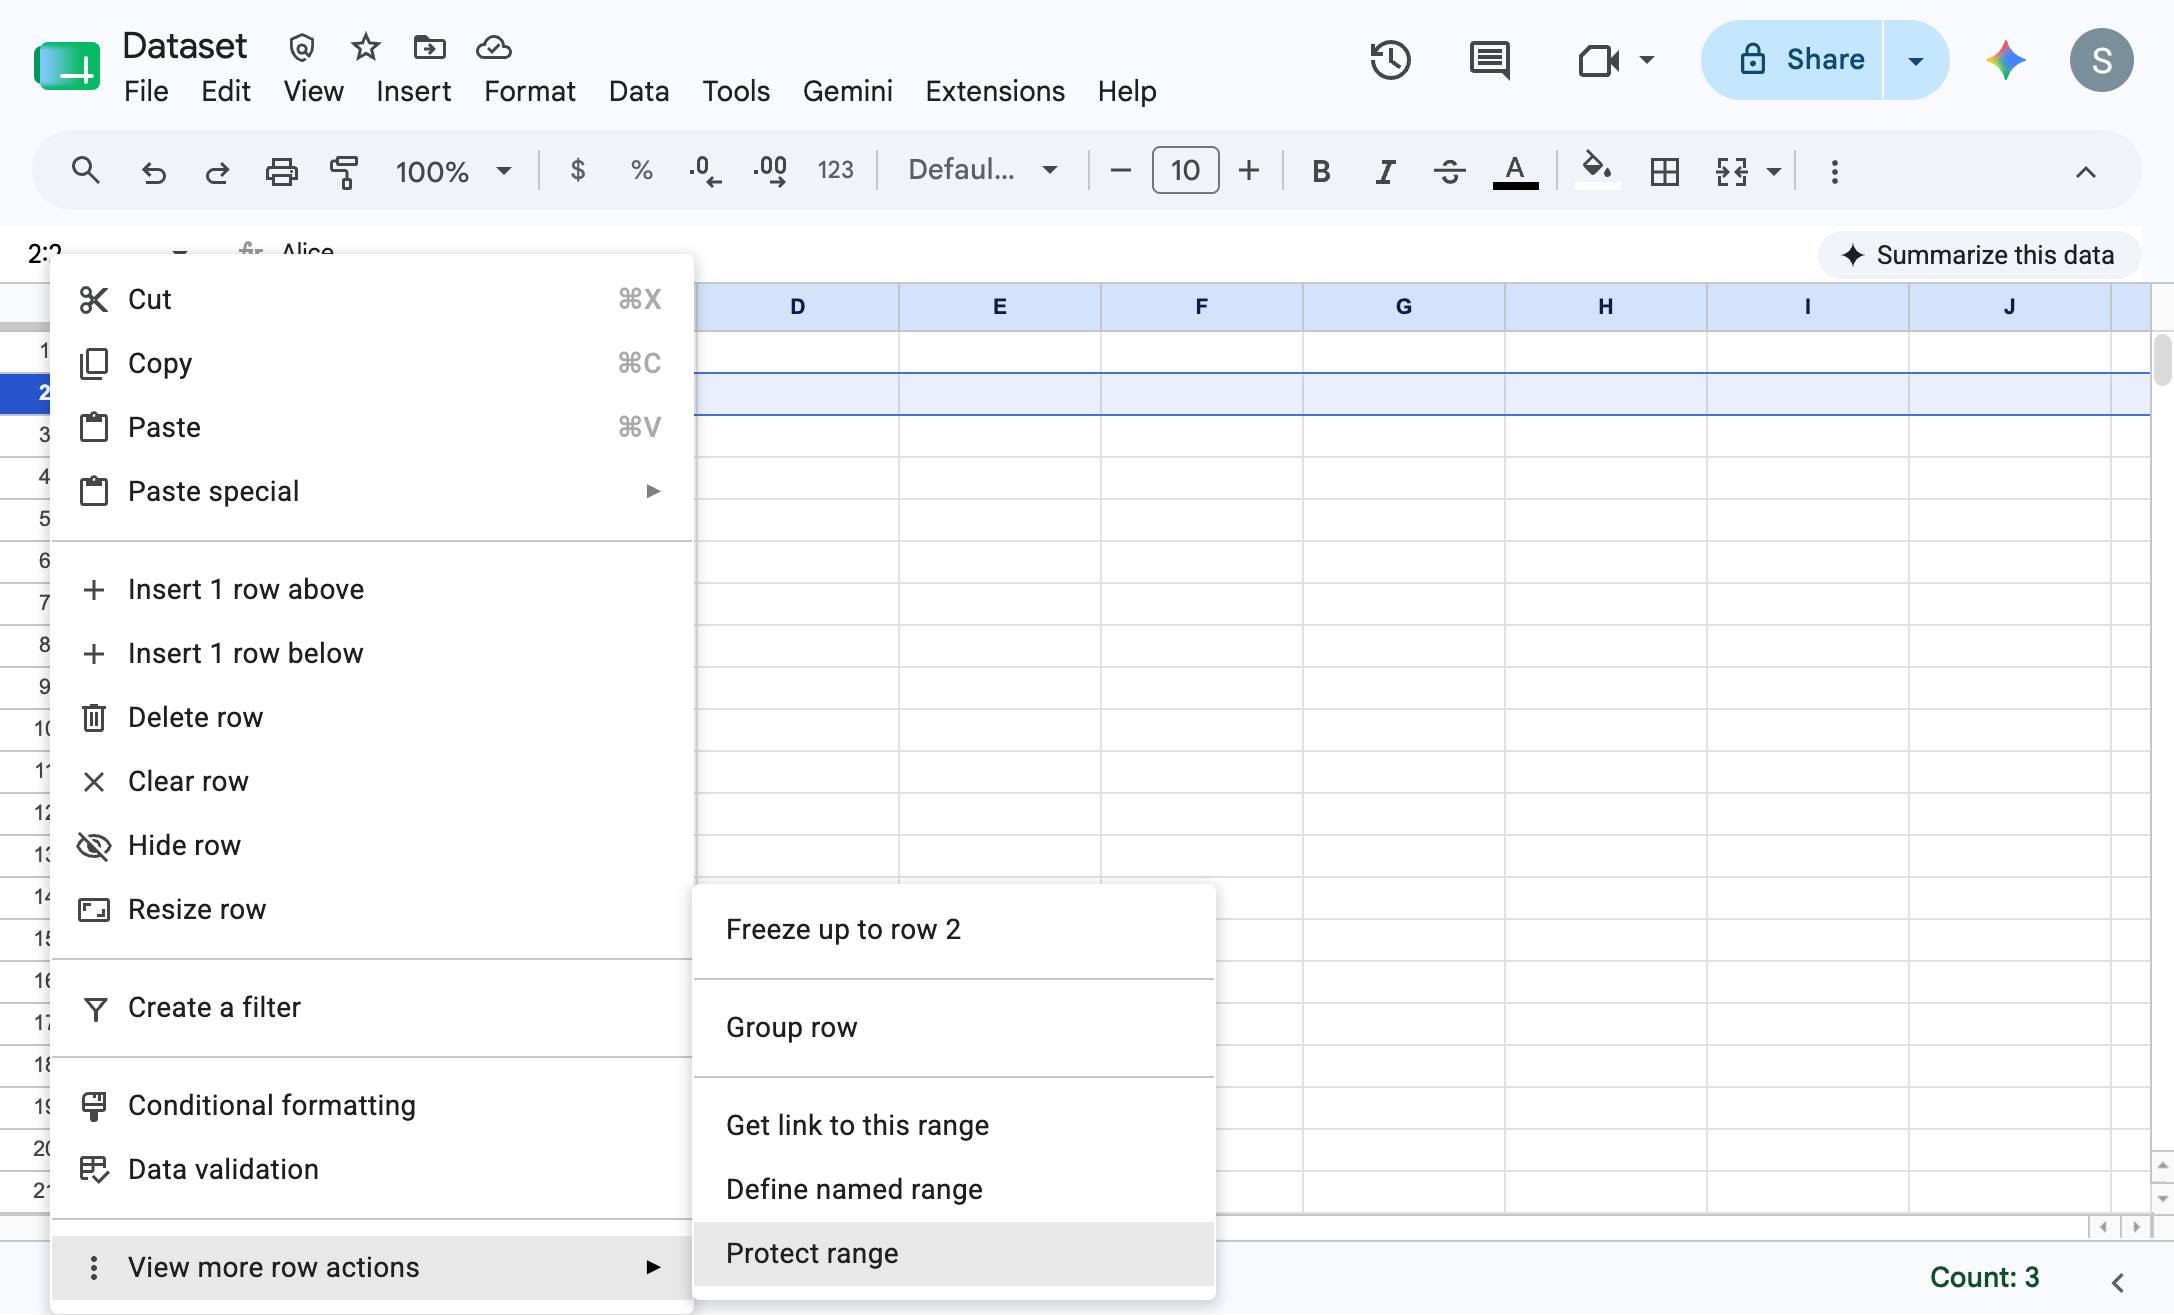
Click the "Protect range" option in the sub-menu to open the protection settings.
Optionally, you can give your range a title. For example, this locked row is called "Lead List"
Click the grid icon inside the range input field in the sidebar to choose the cells you want to protect.
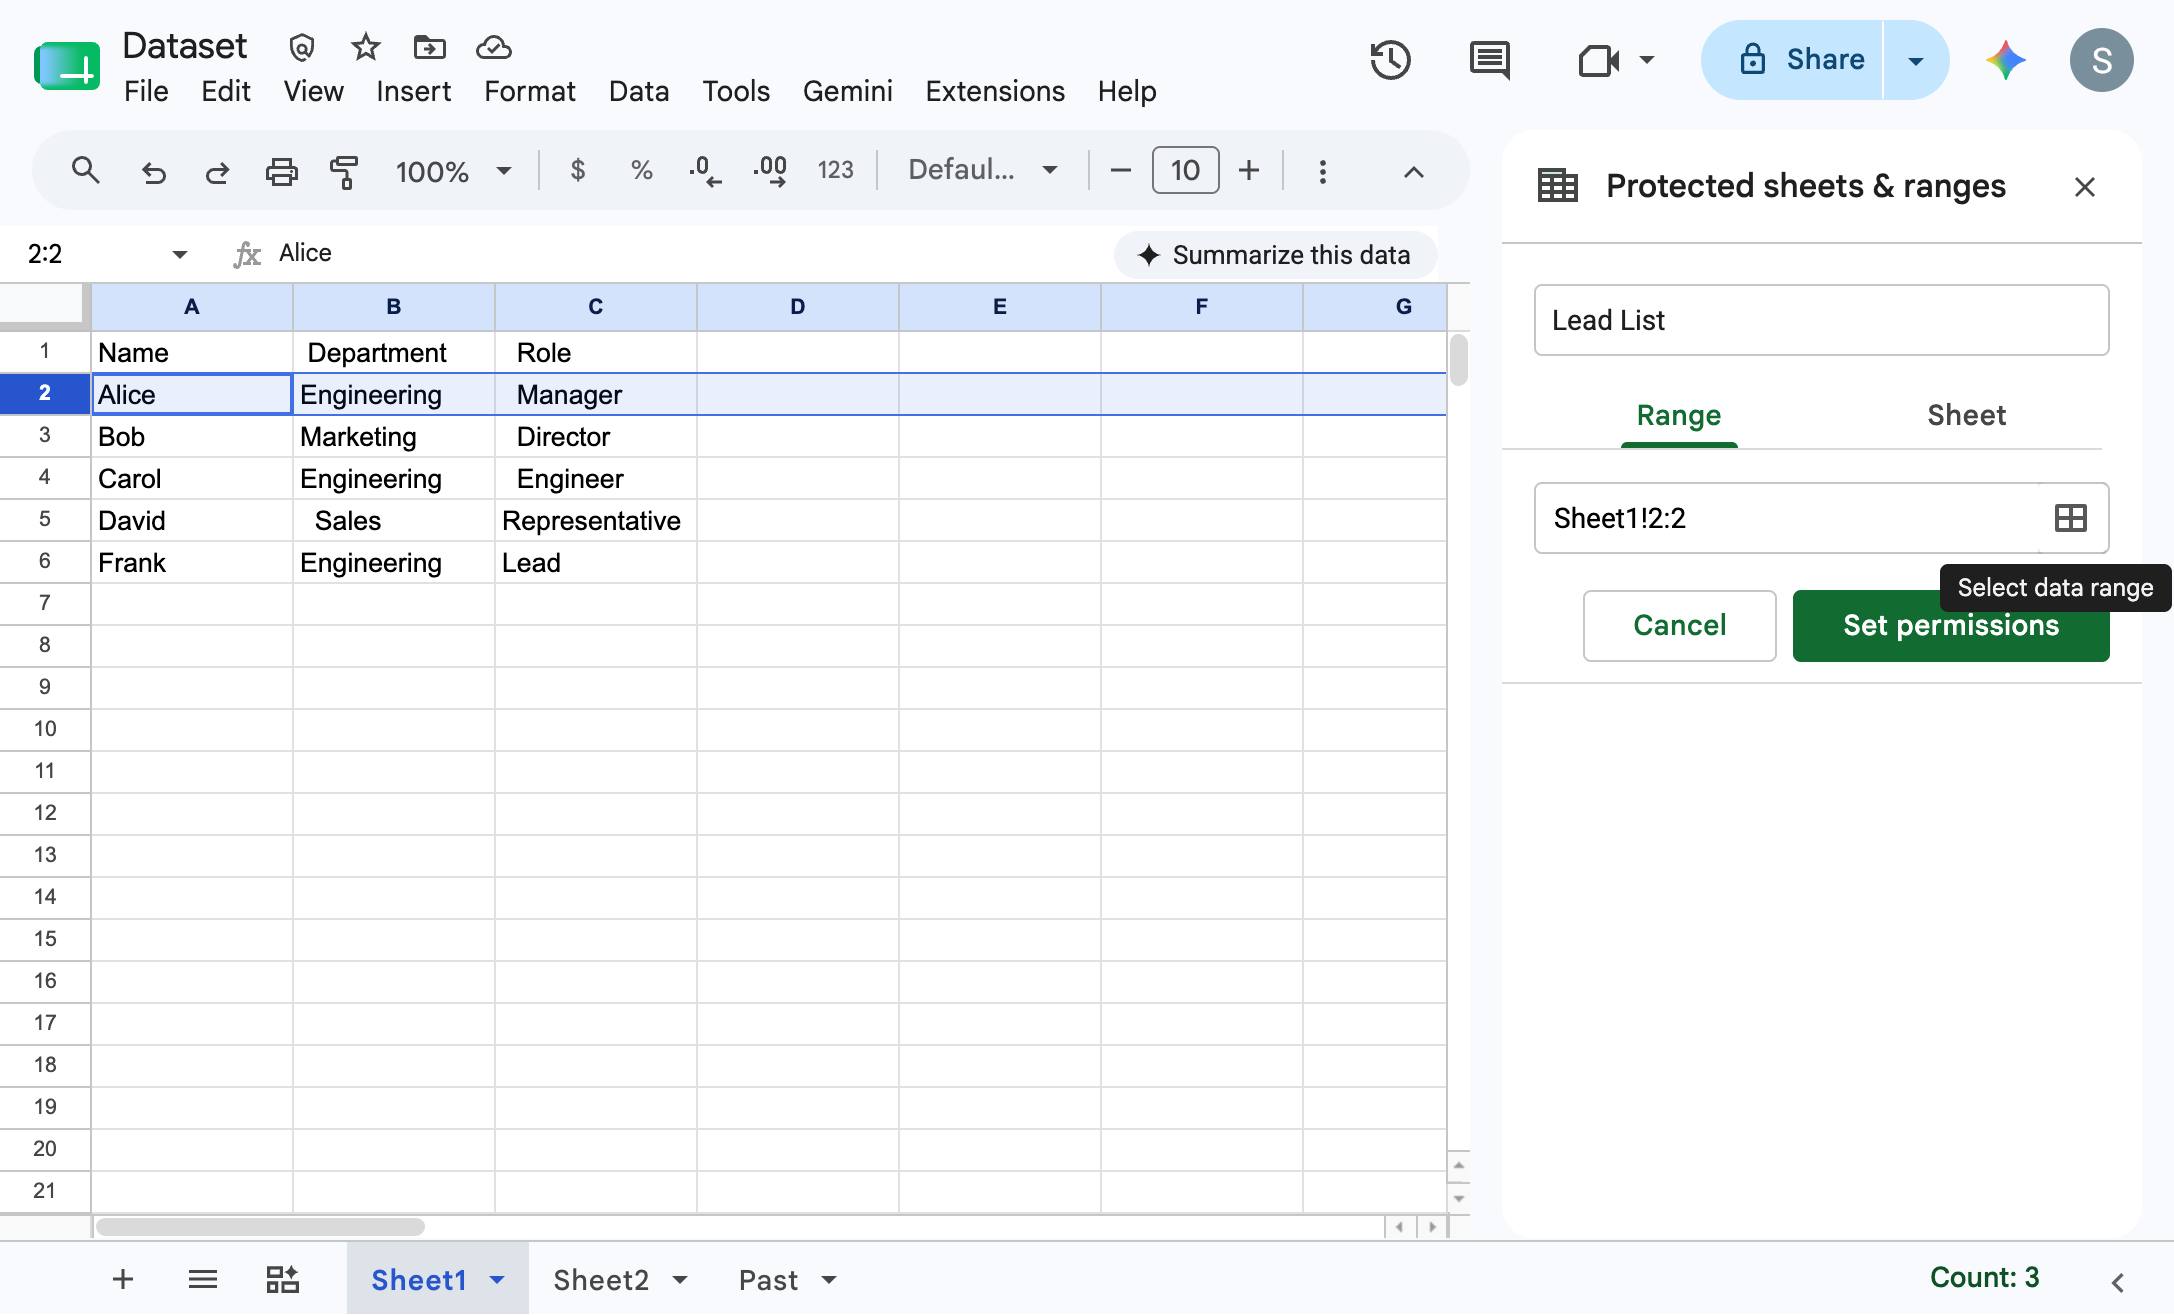
Click the "Ok" button in the Protected sheets & ranges sidebar to confirm the selected range.
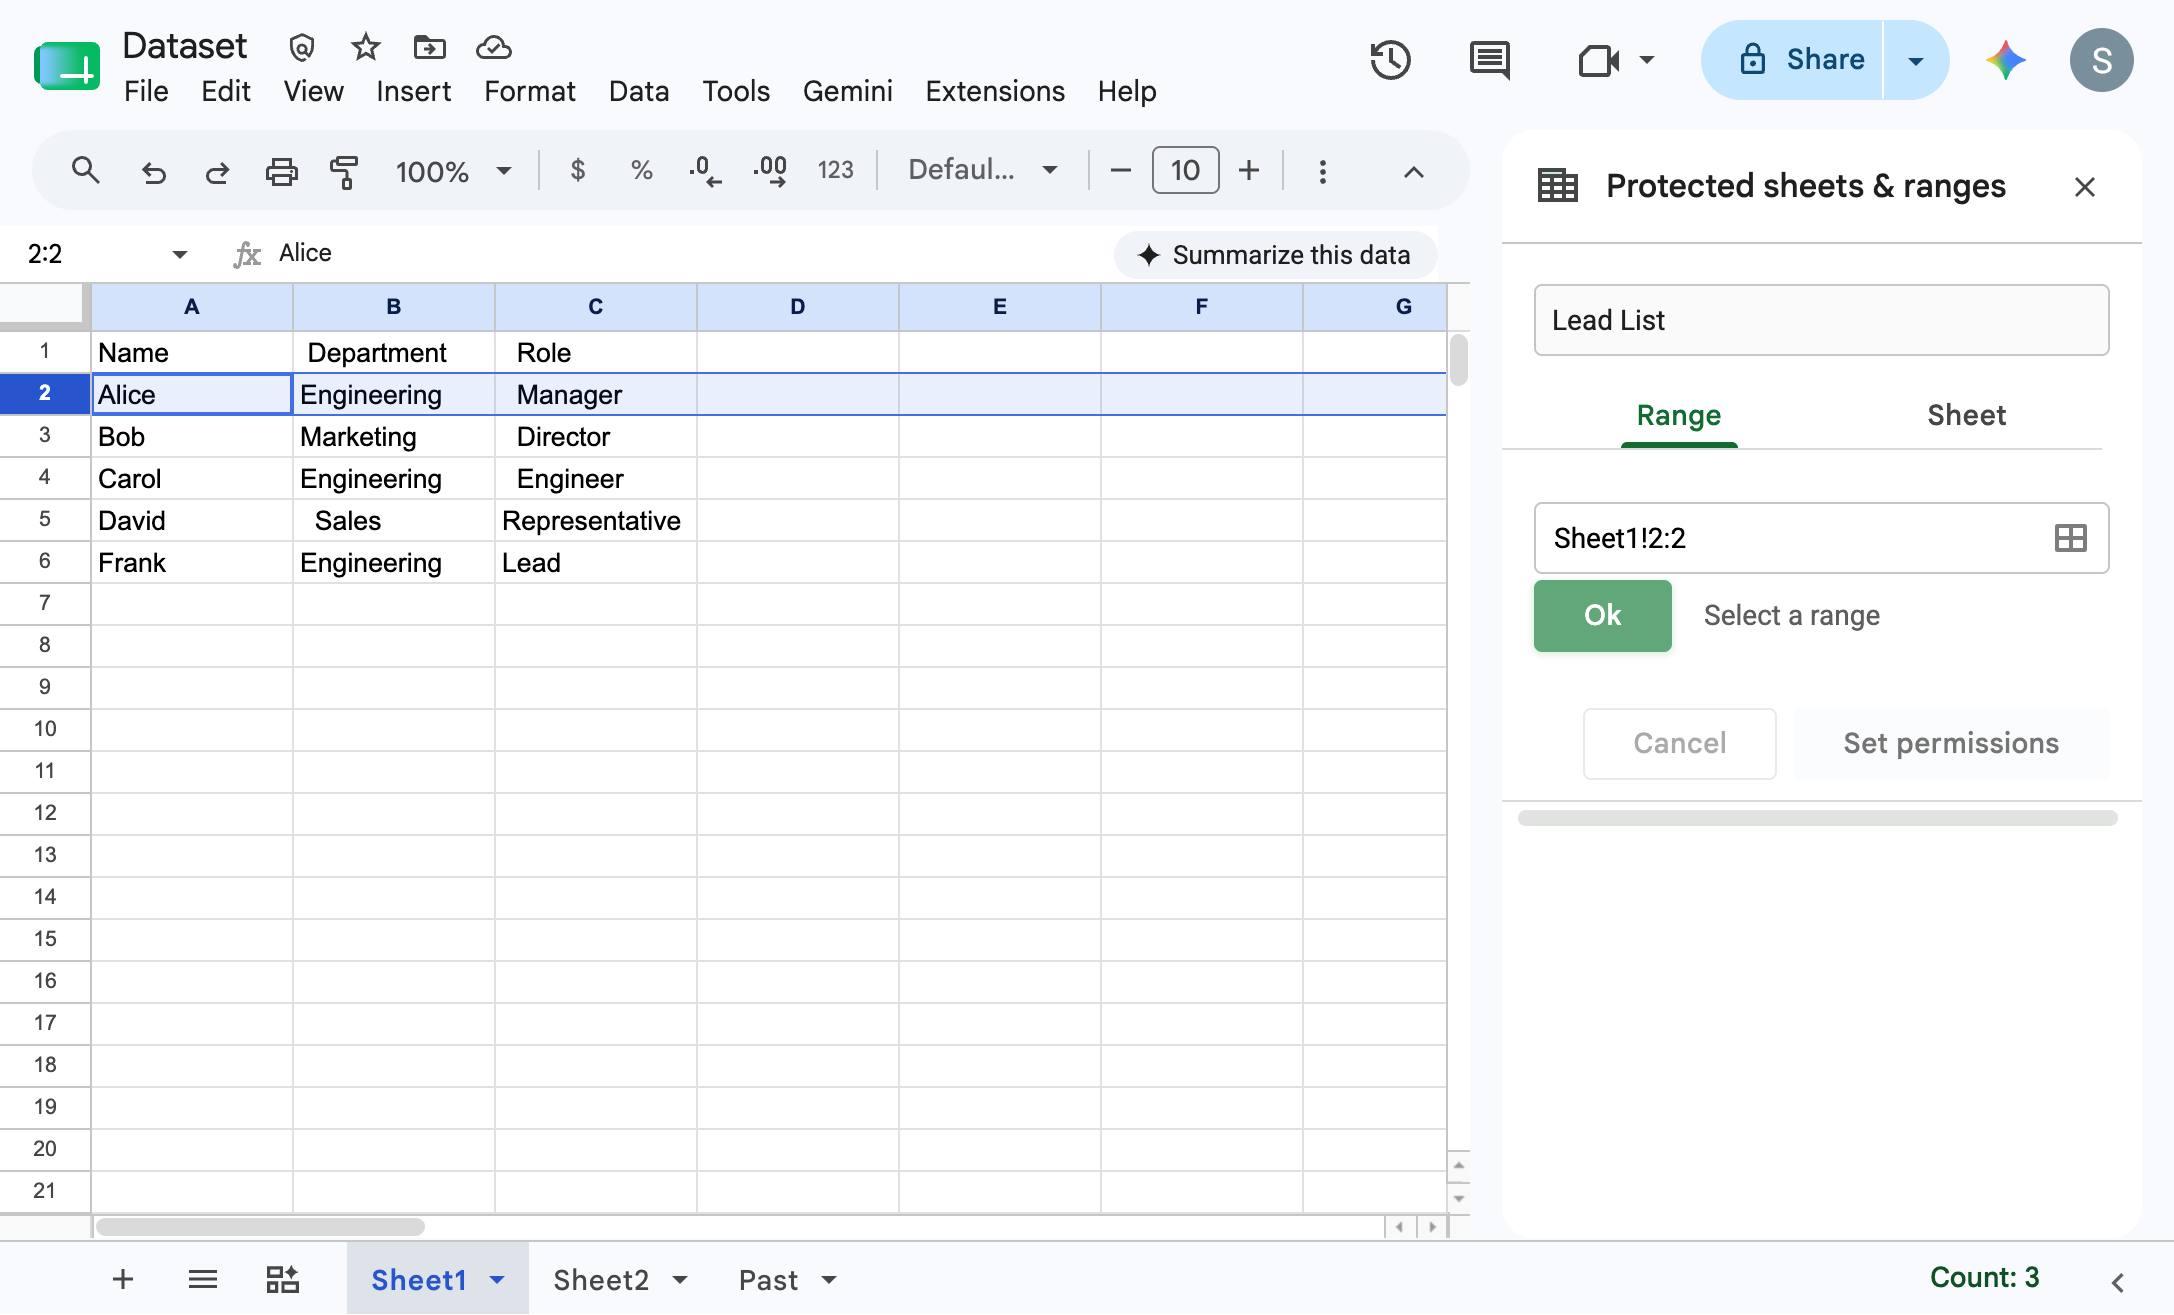
Optionally, change the sheet
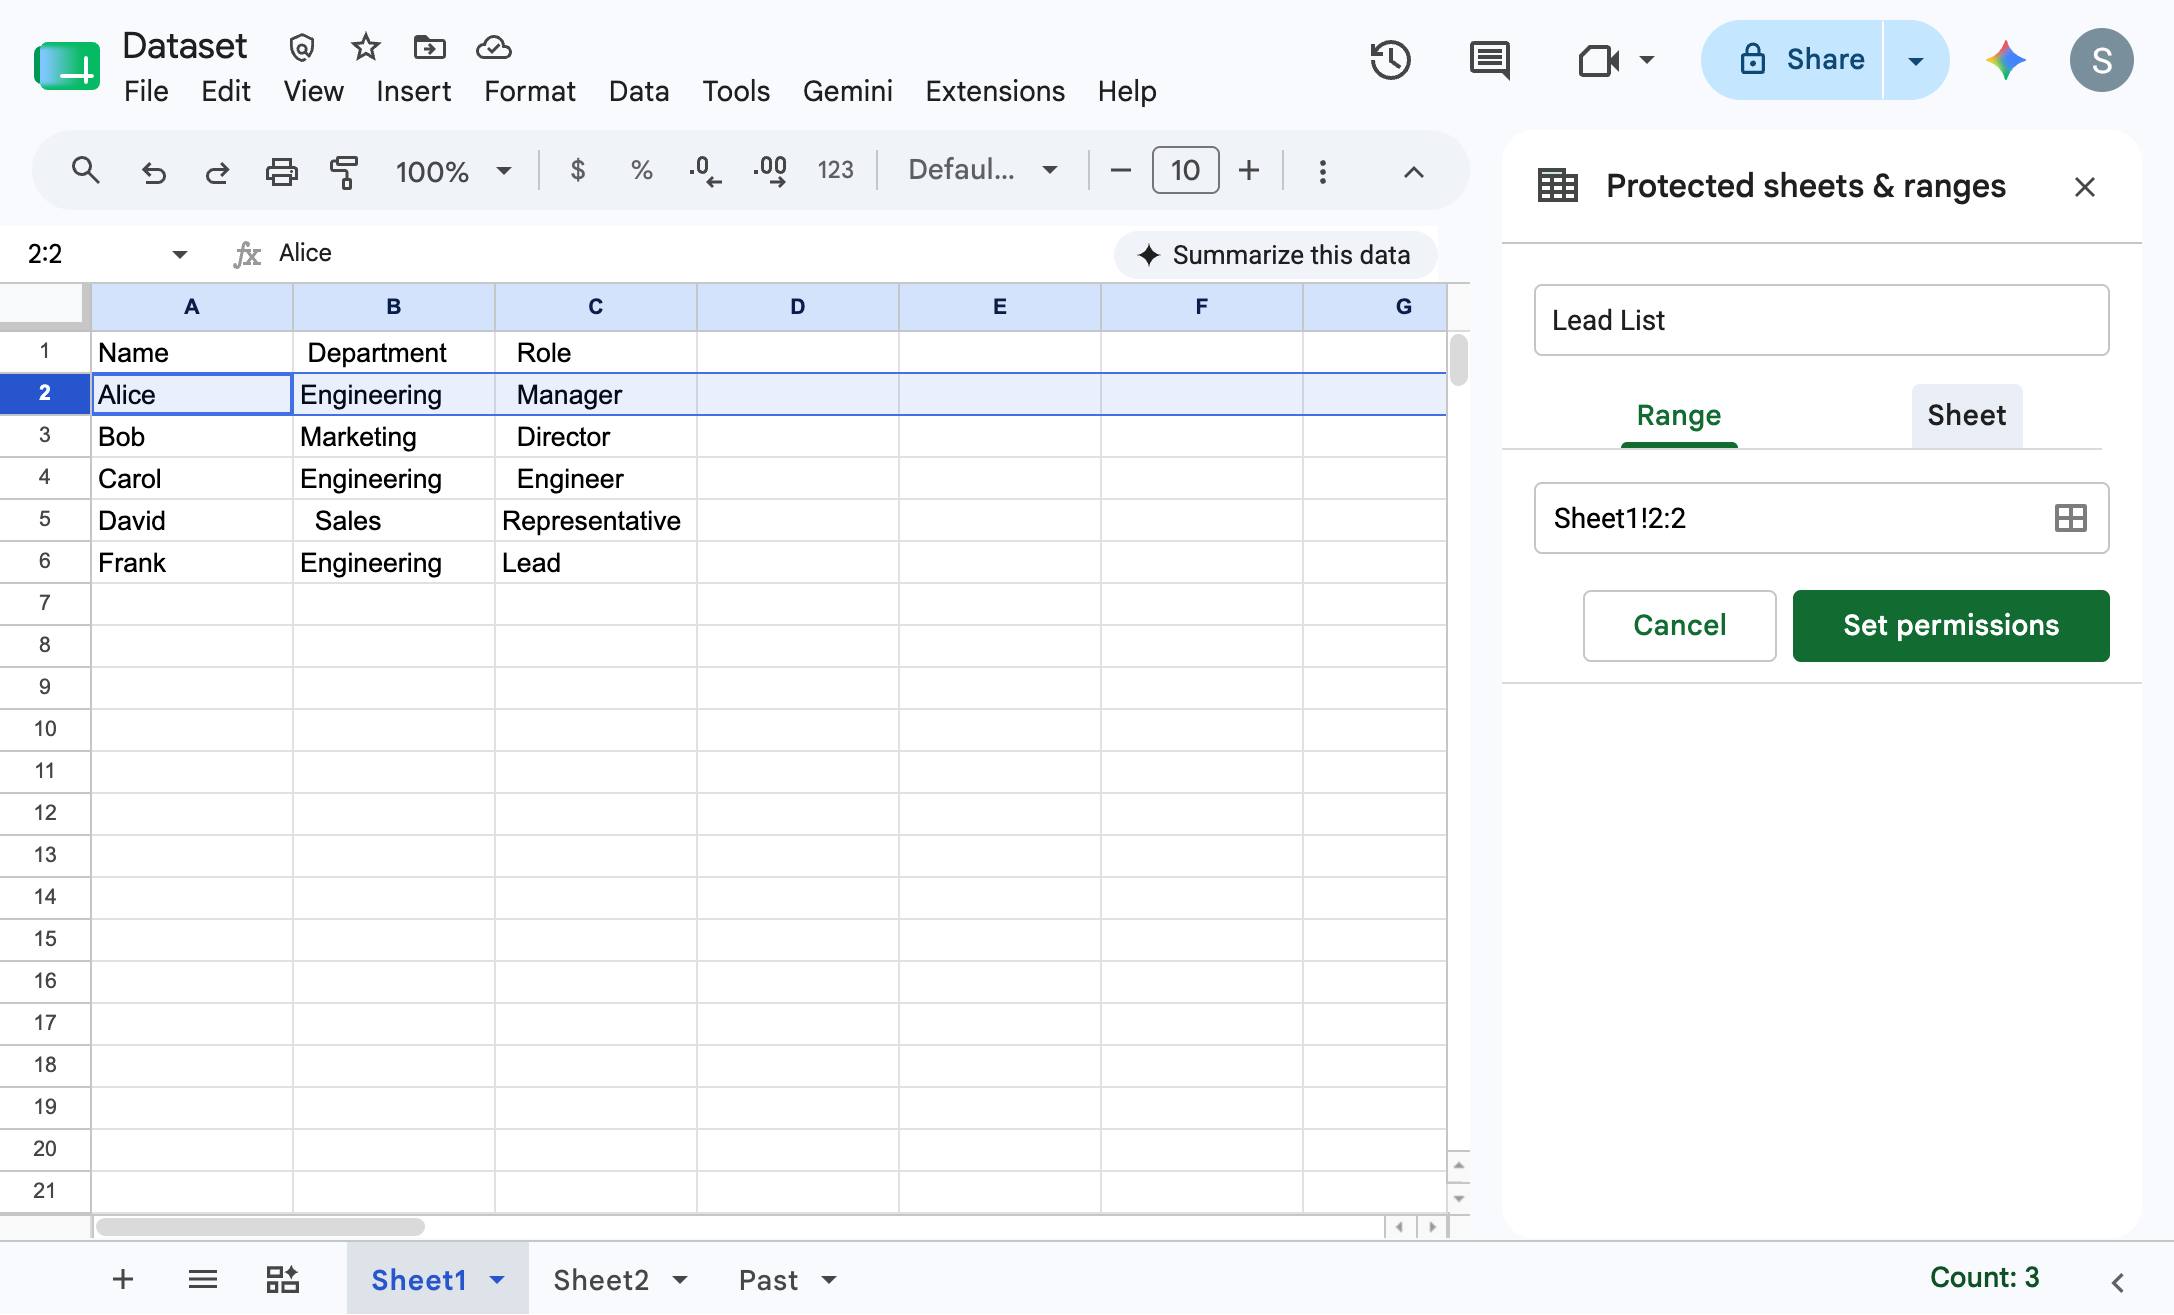
Click the Set permissions button in the Protected sheets & ranges sidebar to configure access for the selected sheet.
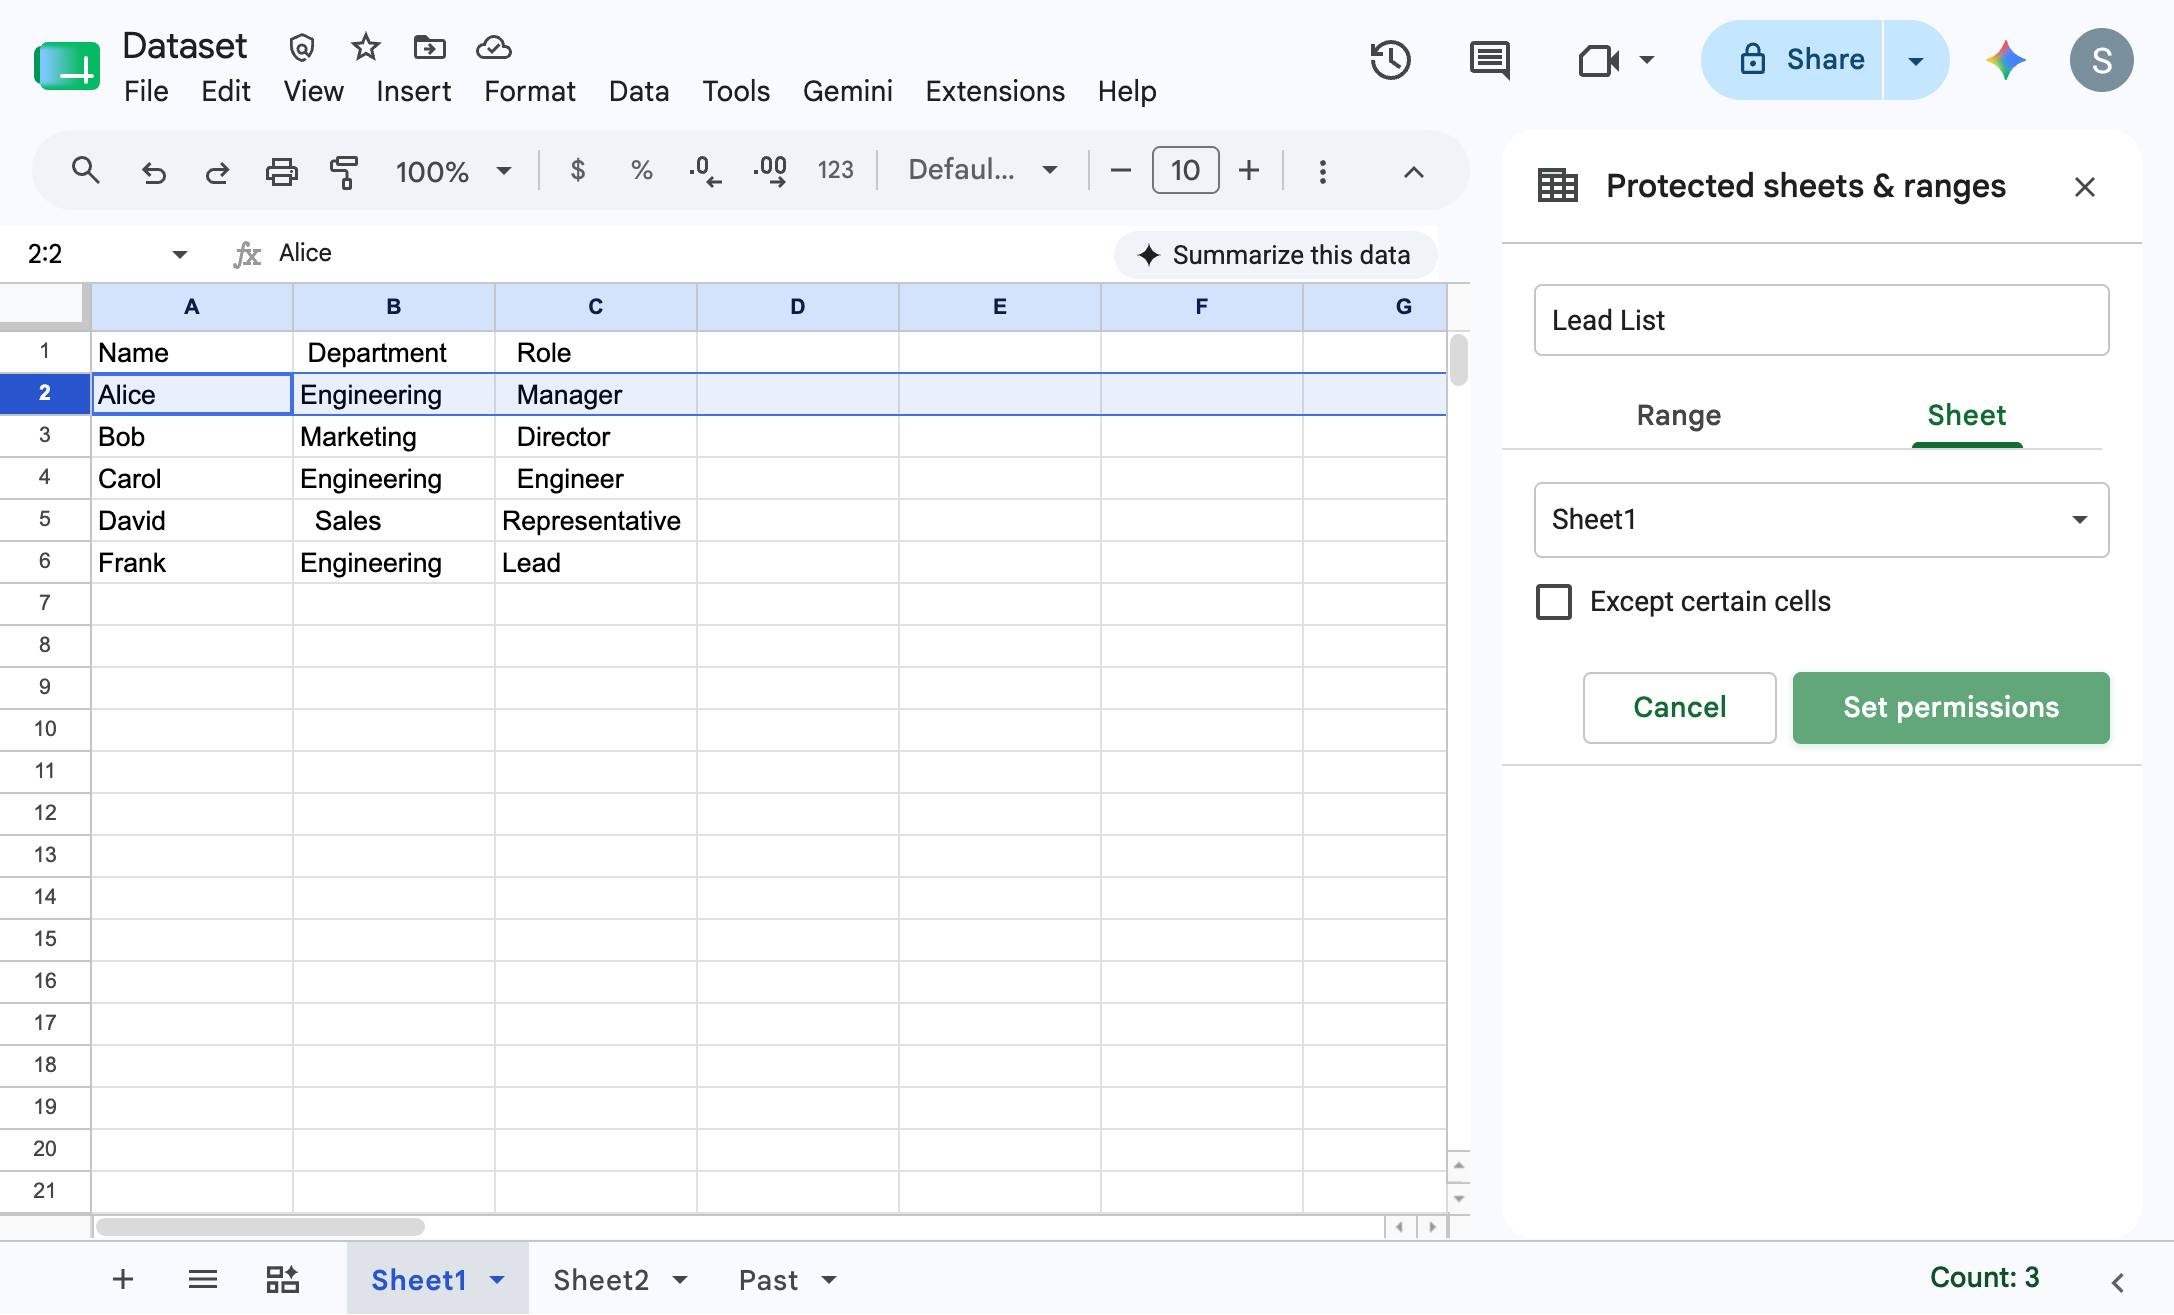
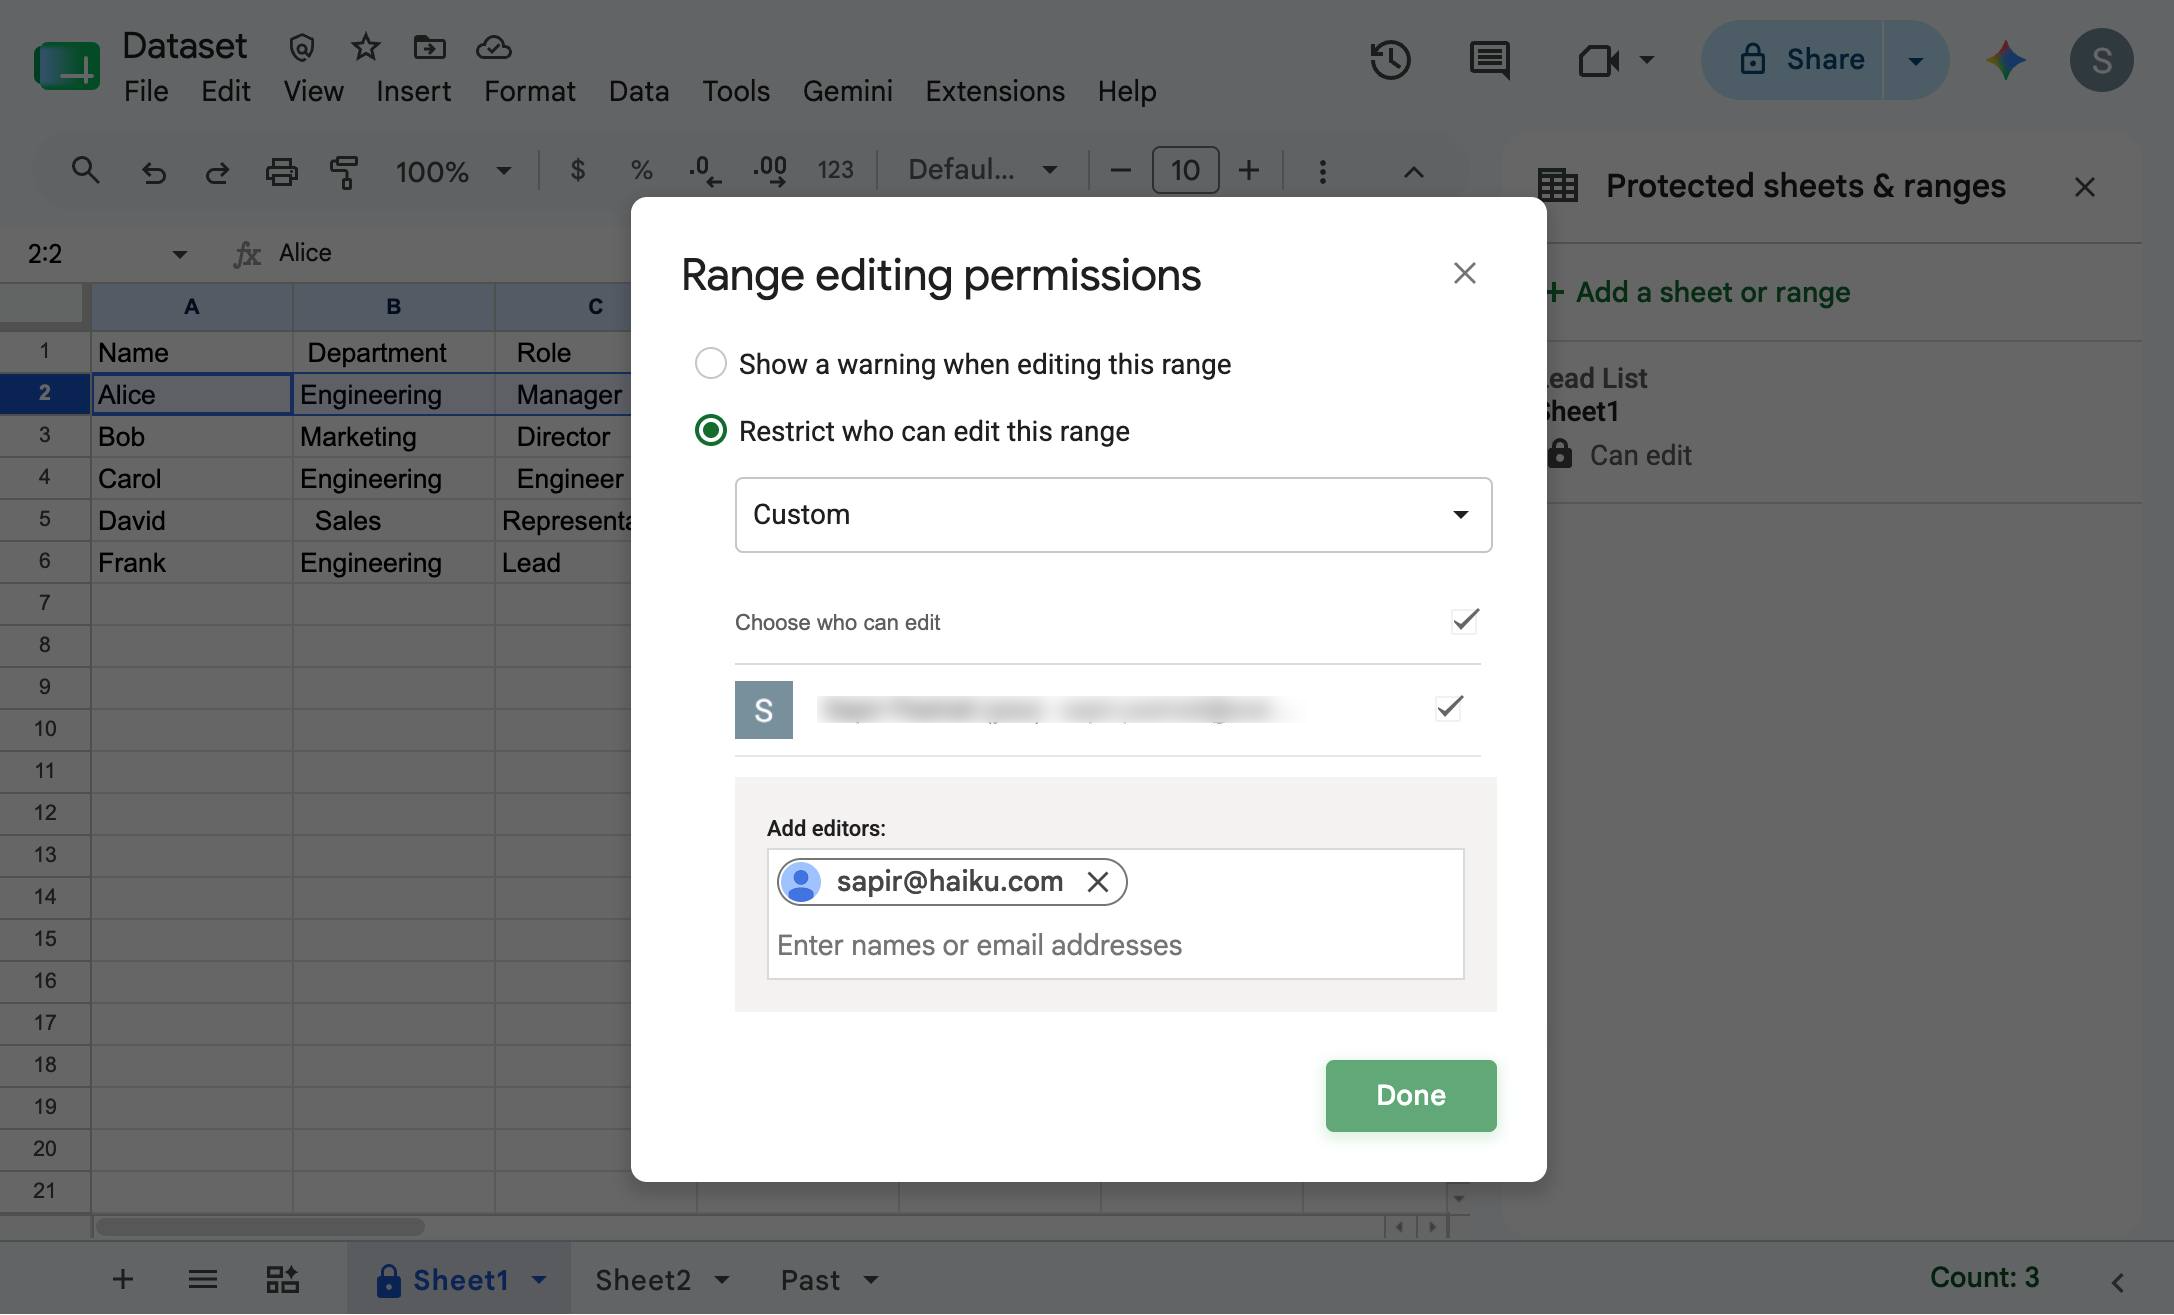
Select if you would like to show a warning when editing the range, or restrict who can edit the range
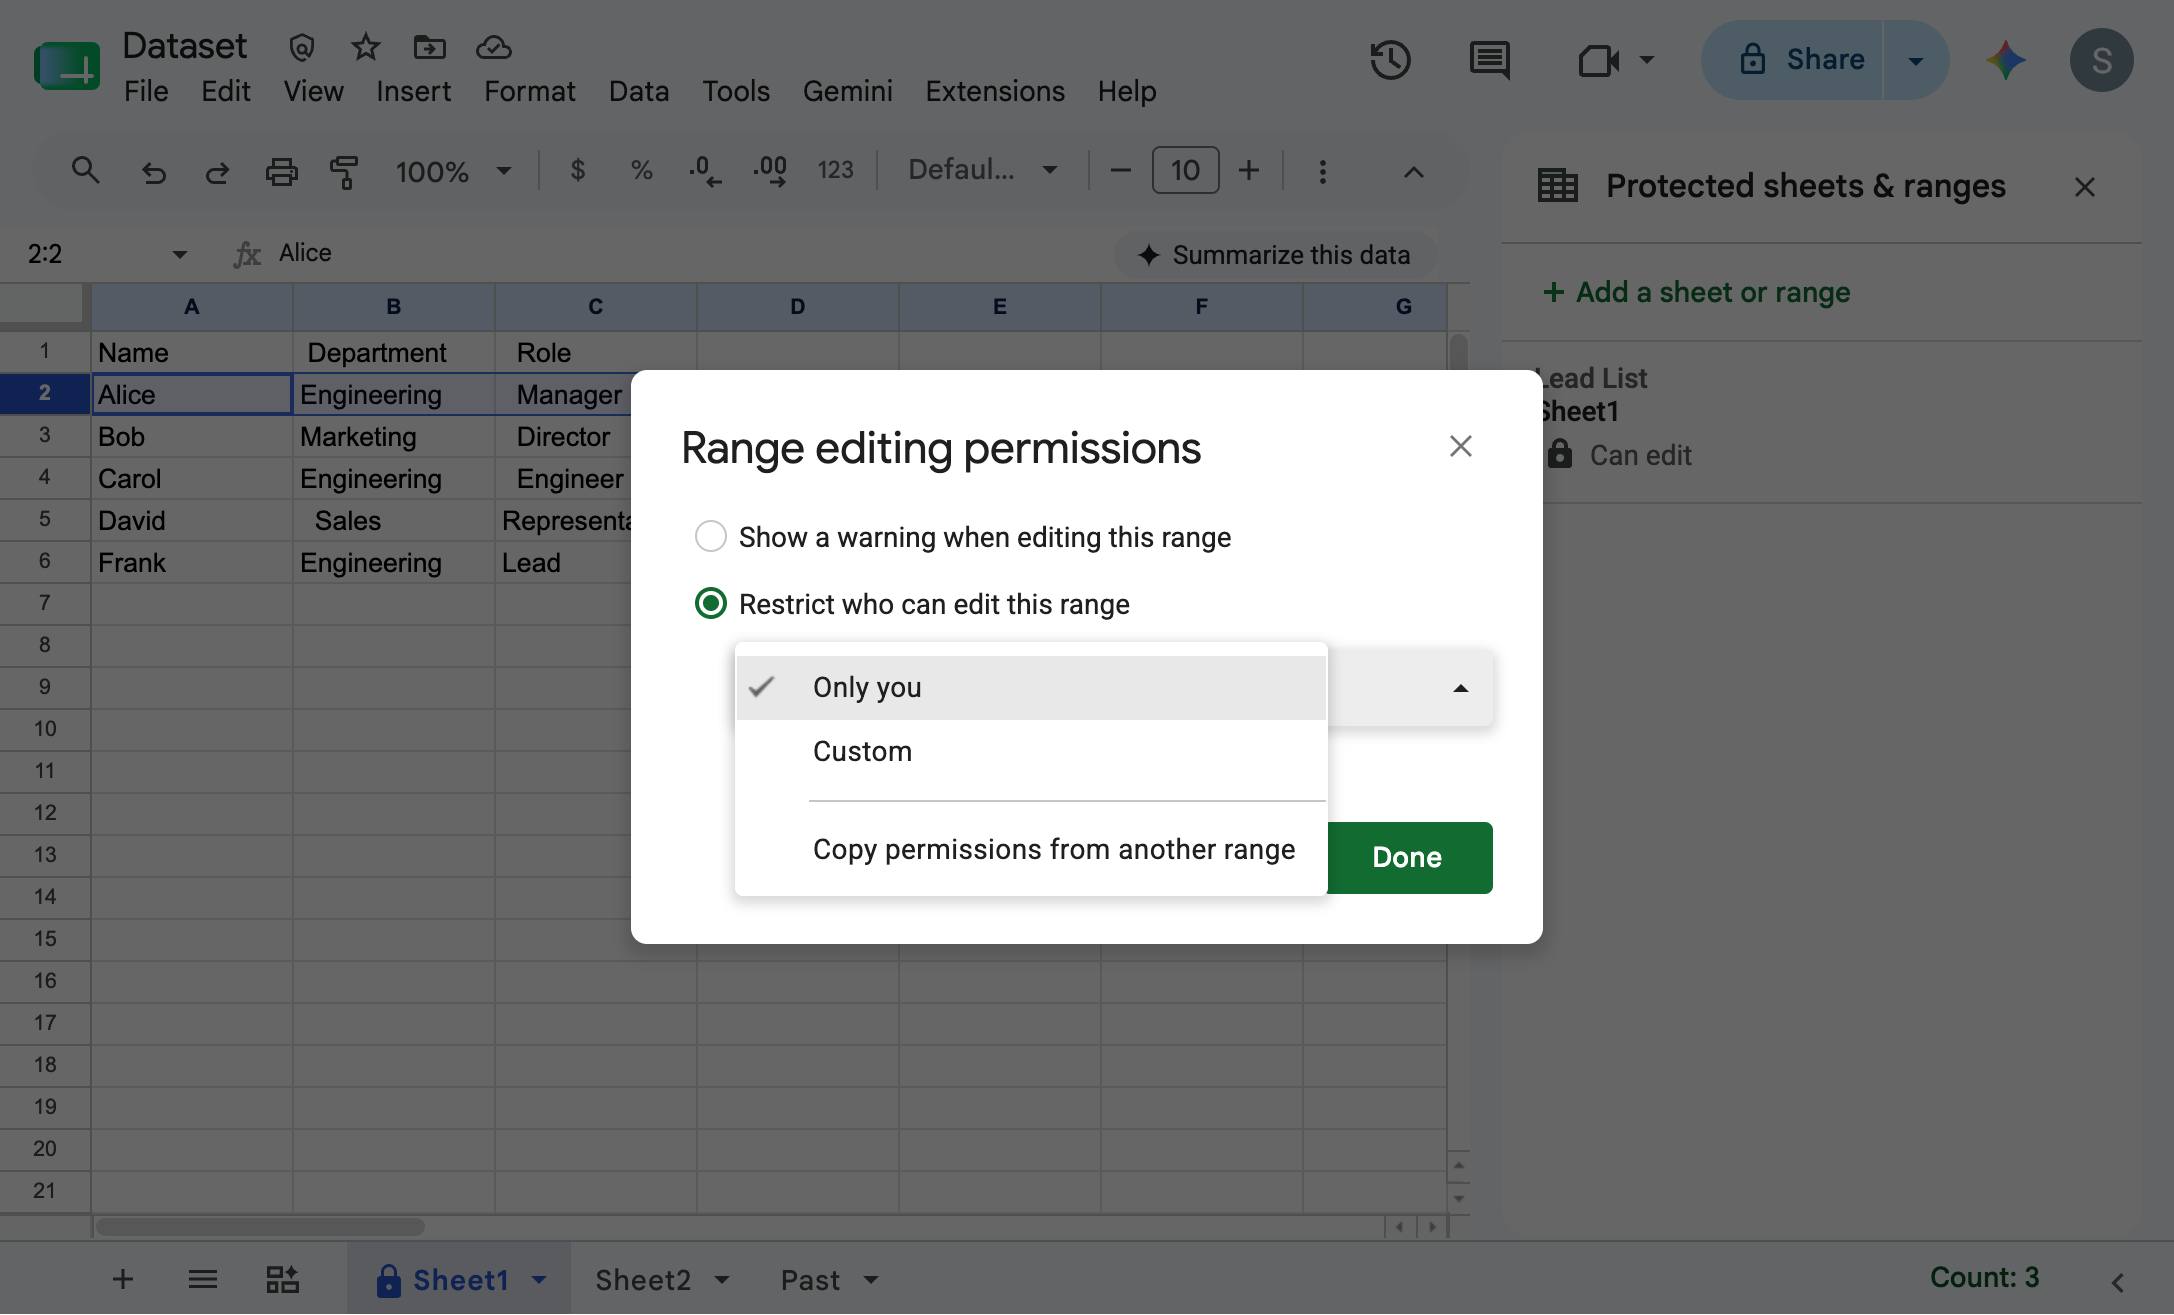
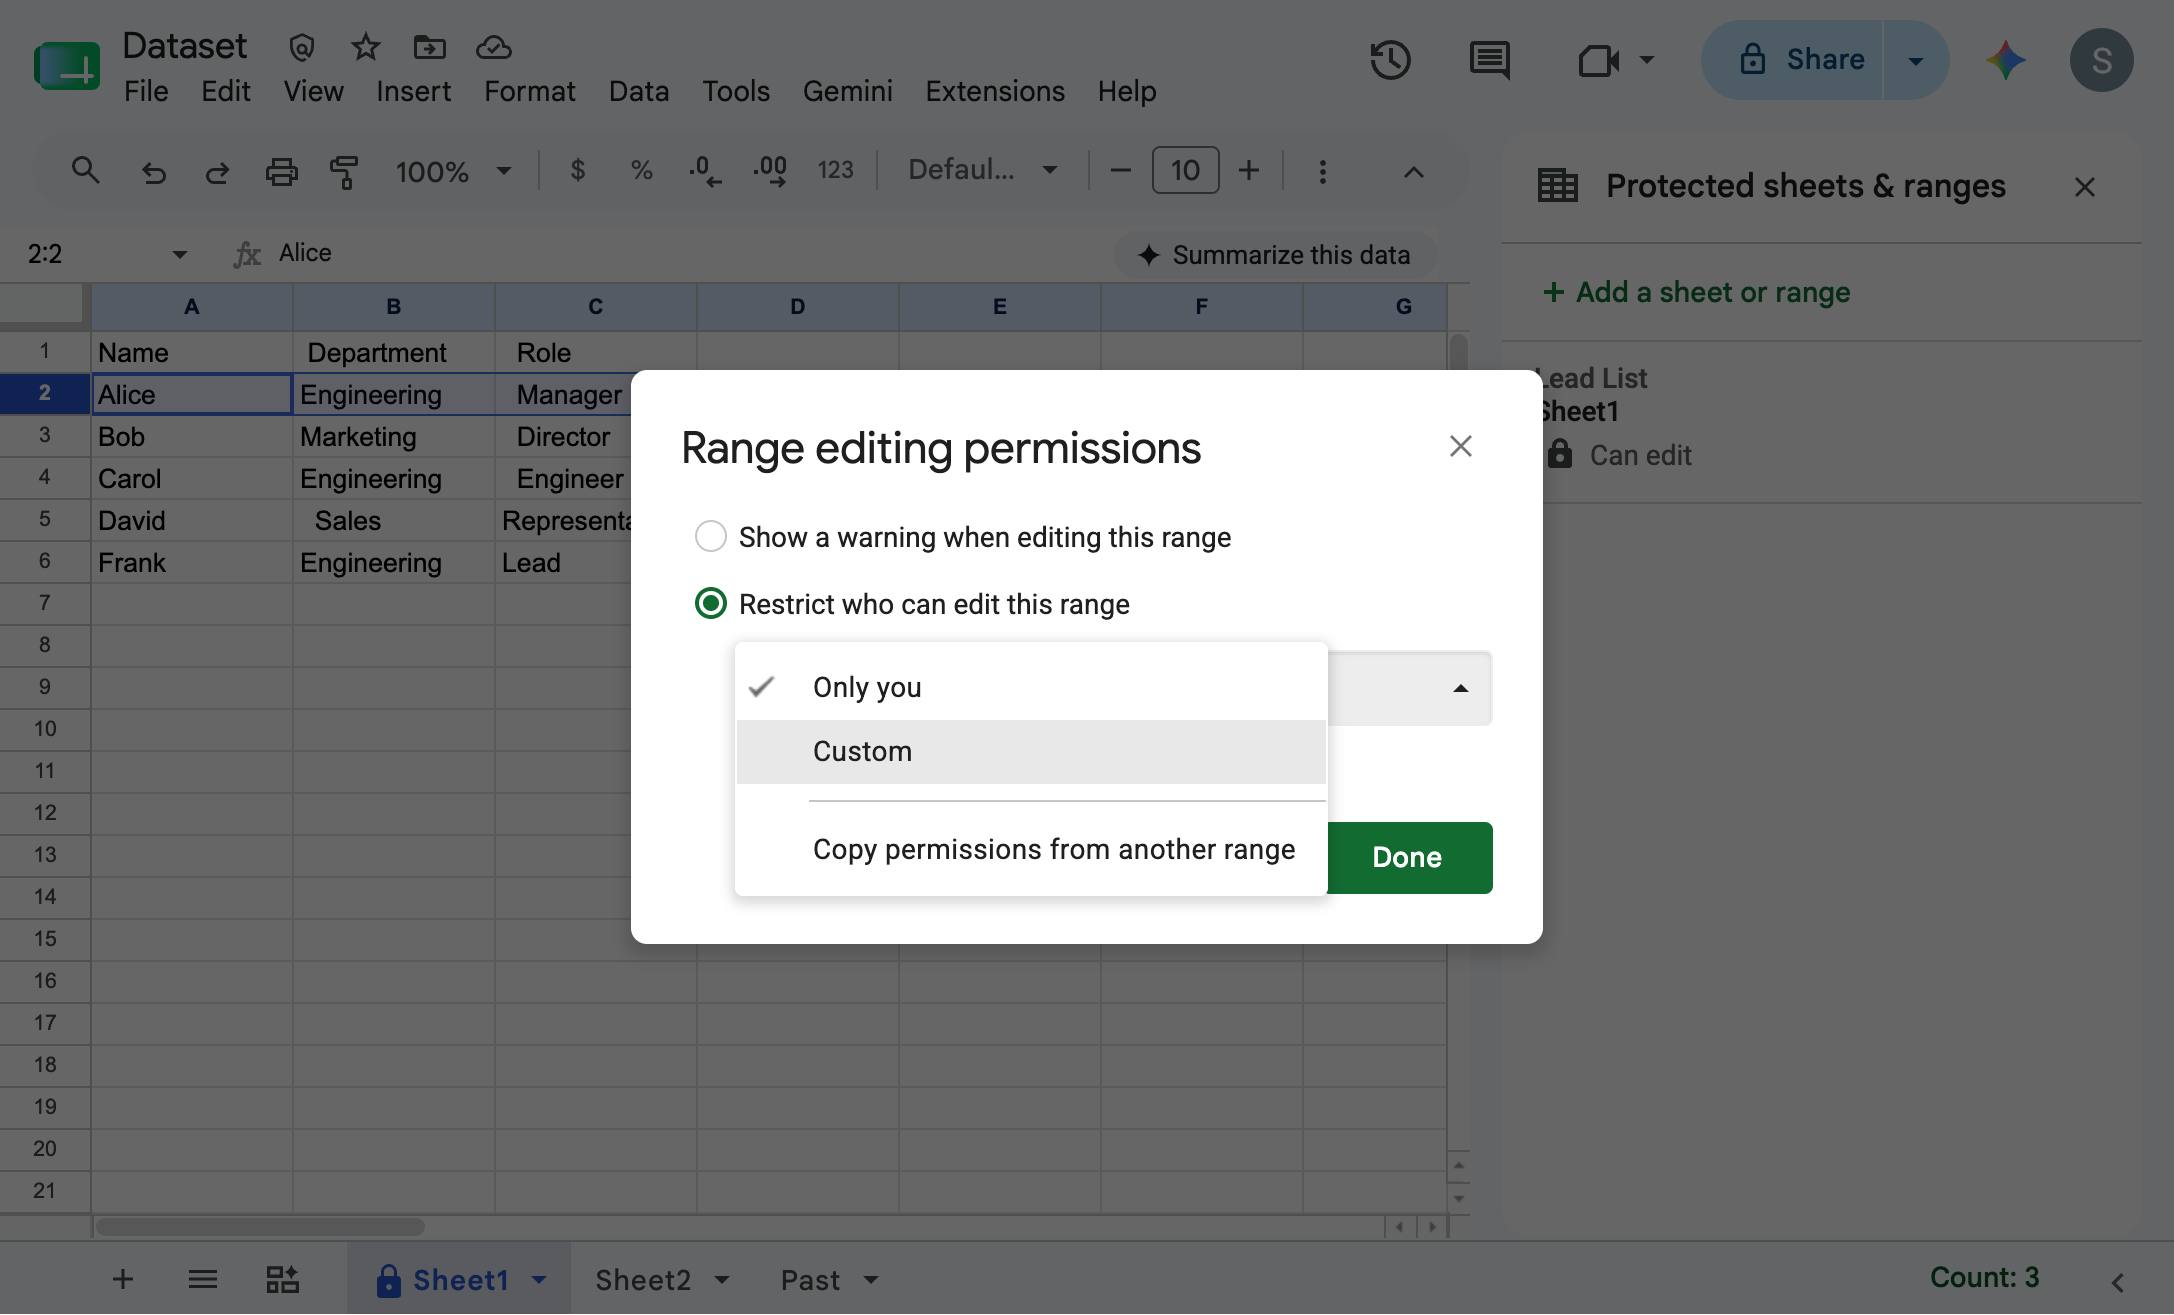
You can create custom permissions by clicking "Custom"
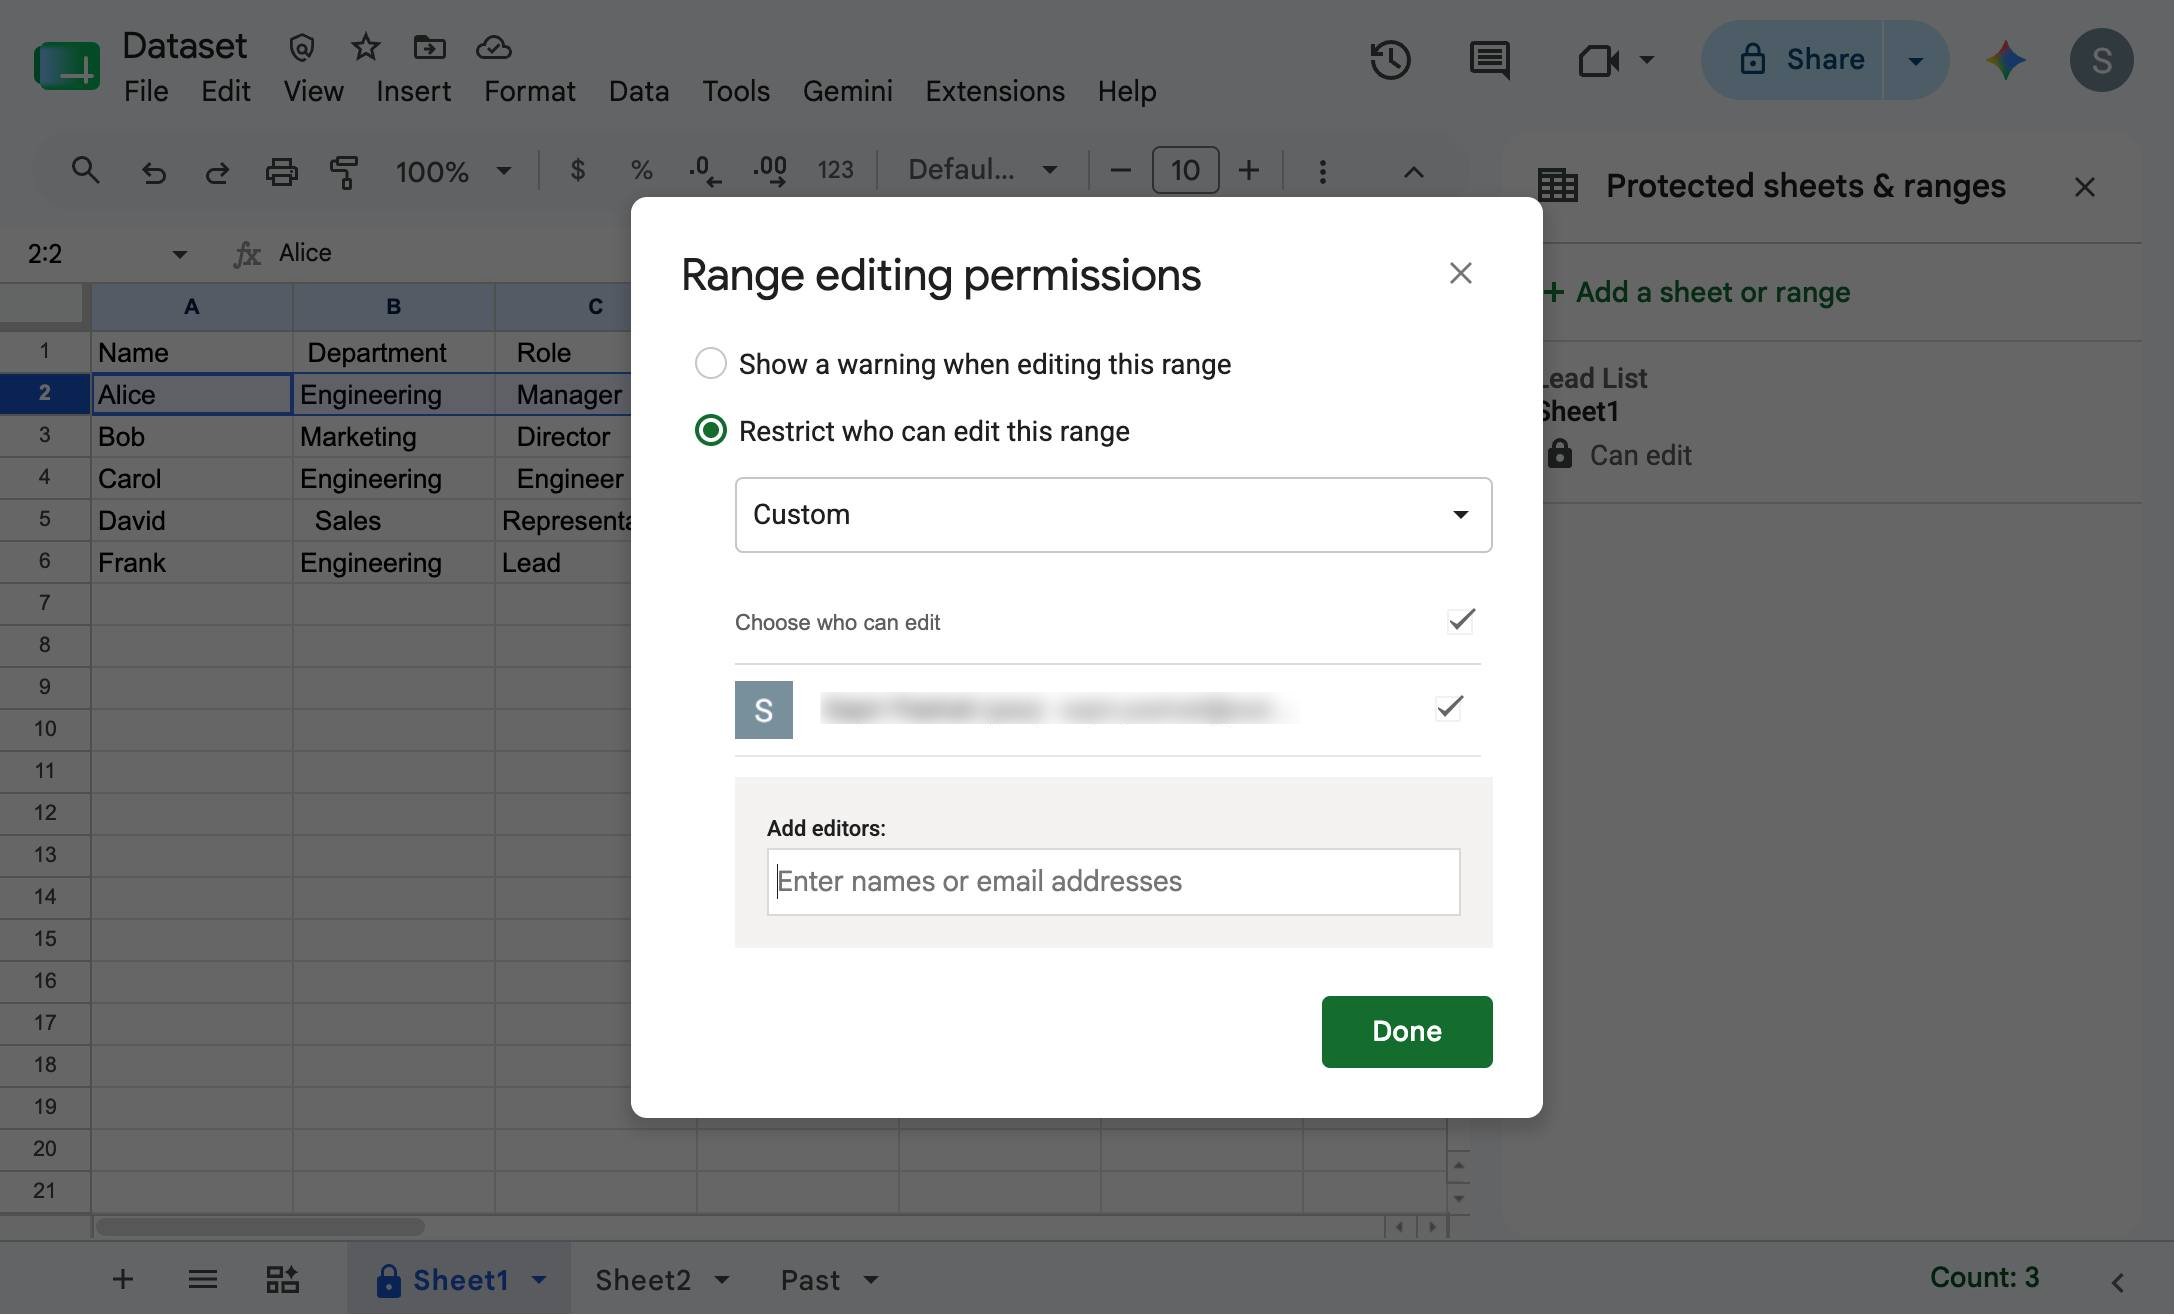
Click the input field under "Add editors:" in the modal to specify who can edit the range.
Click the Add editors input field in the Range editing permissions modal to enter the email address of the person you want to grant access to.
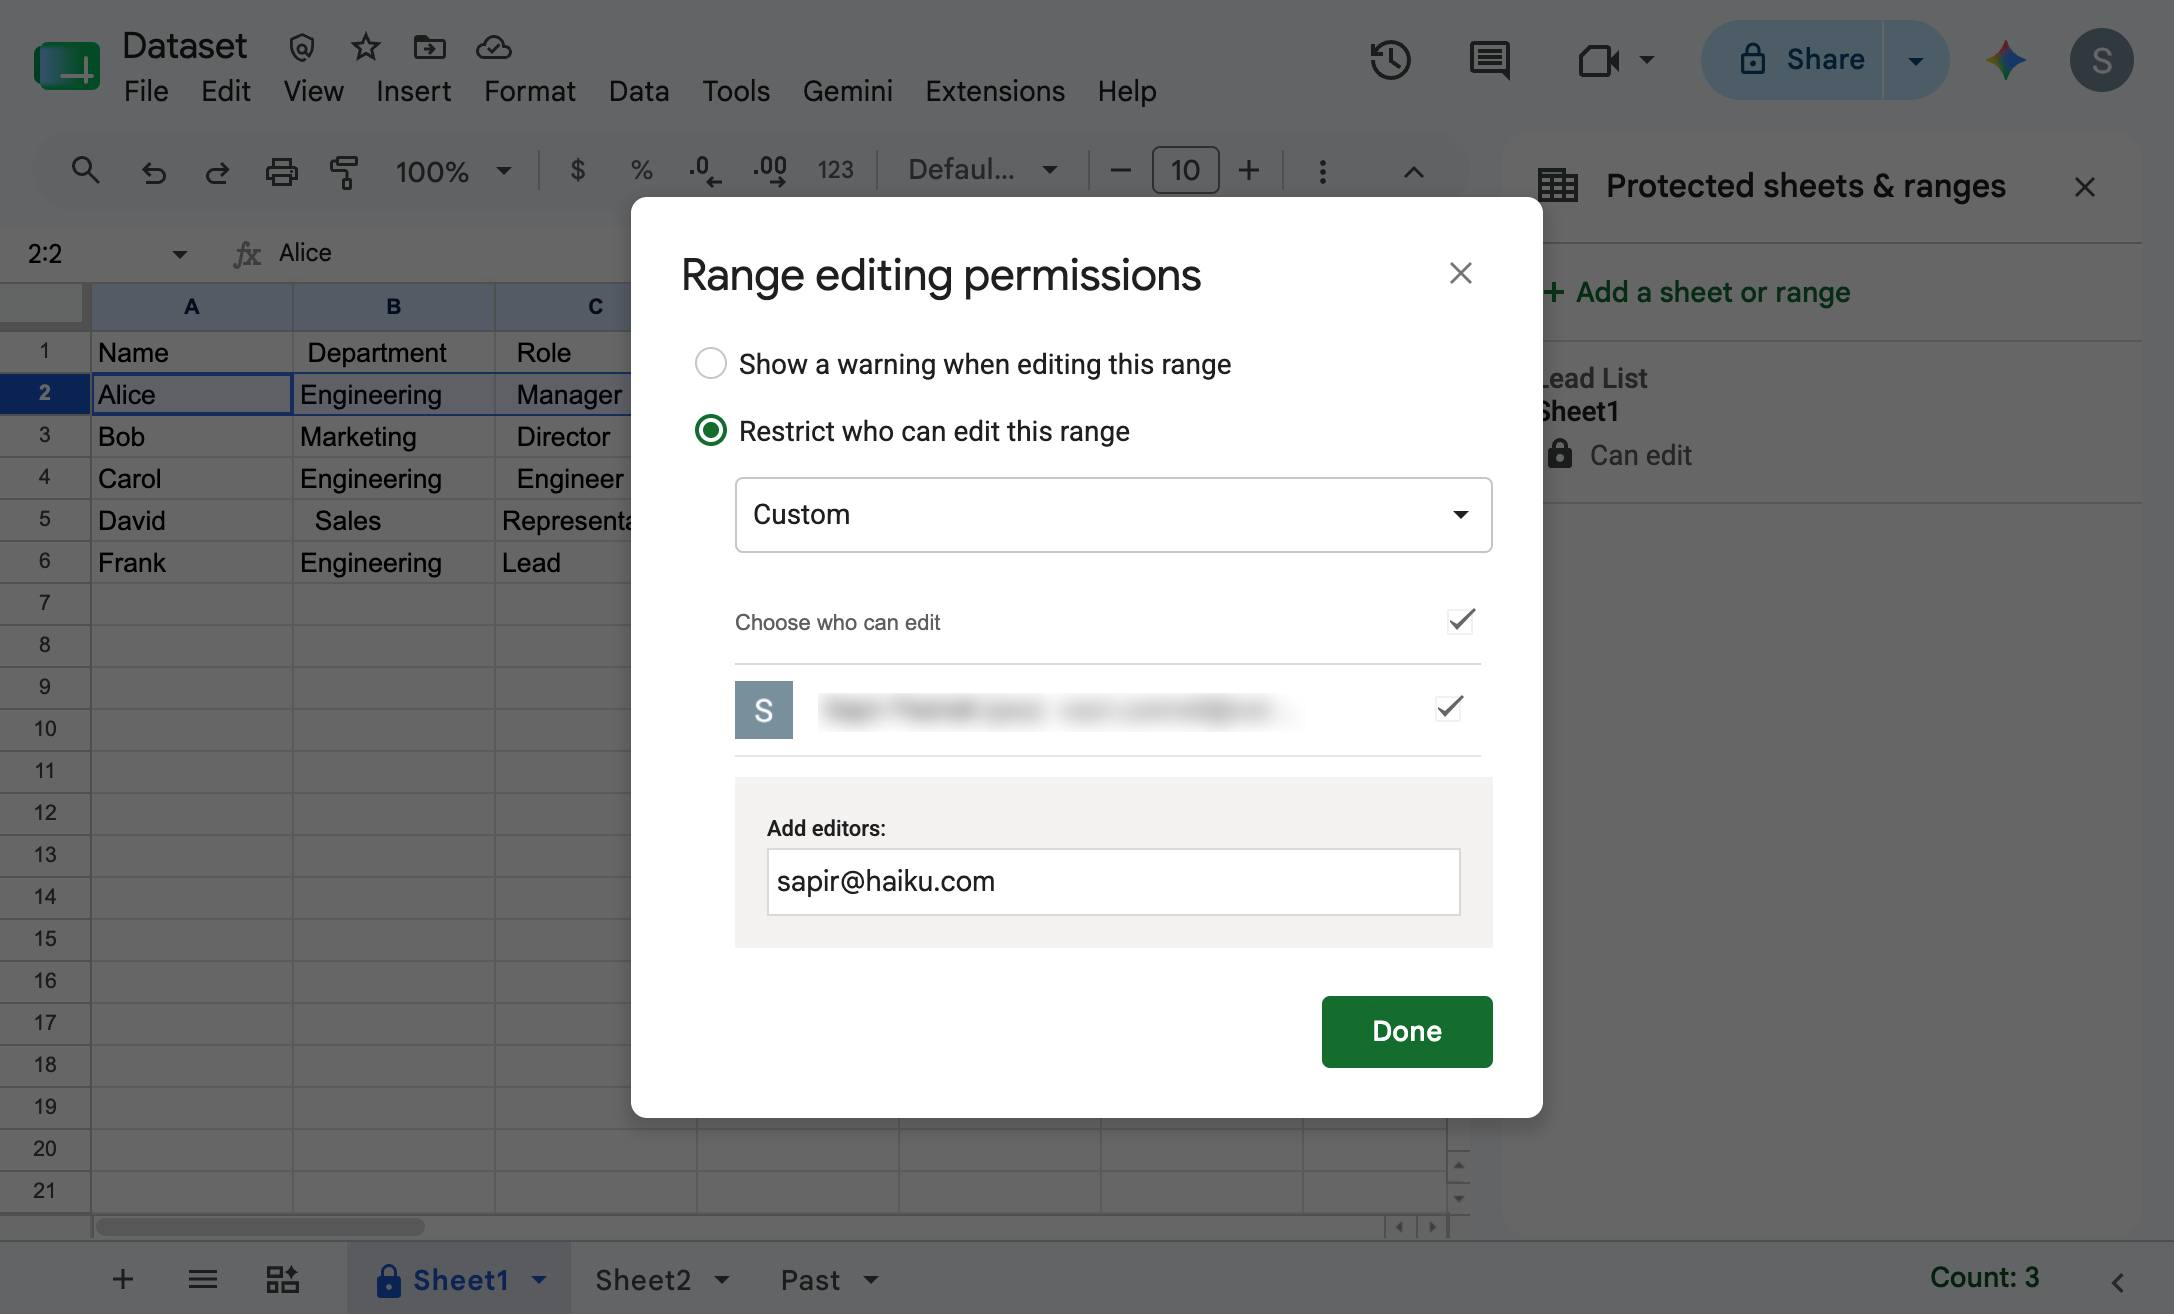
Click the Done button at the bottom right of the Range editing permissions modal to save your changes.
Duplicate this template, swap in your own screens, and share it with your team. Free to start — no credit card.
Fill out the form and we'll get back to you as soon as possible.
Tell us about your team and we'll find the right plan together.