1
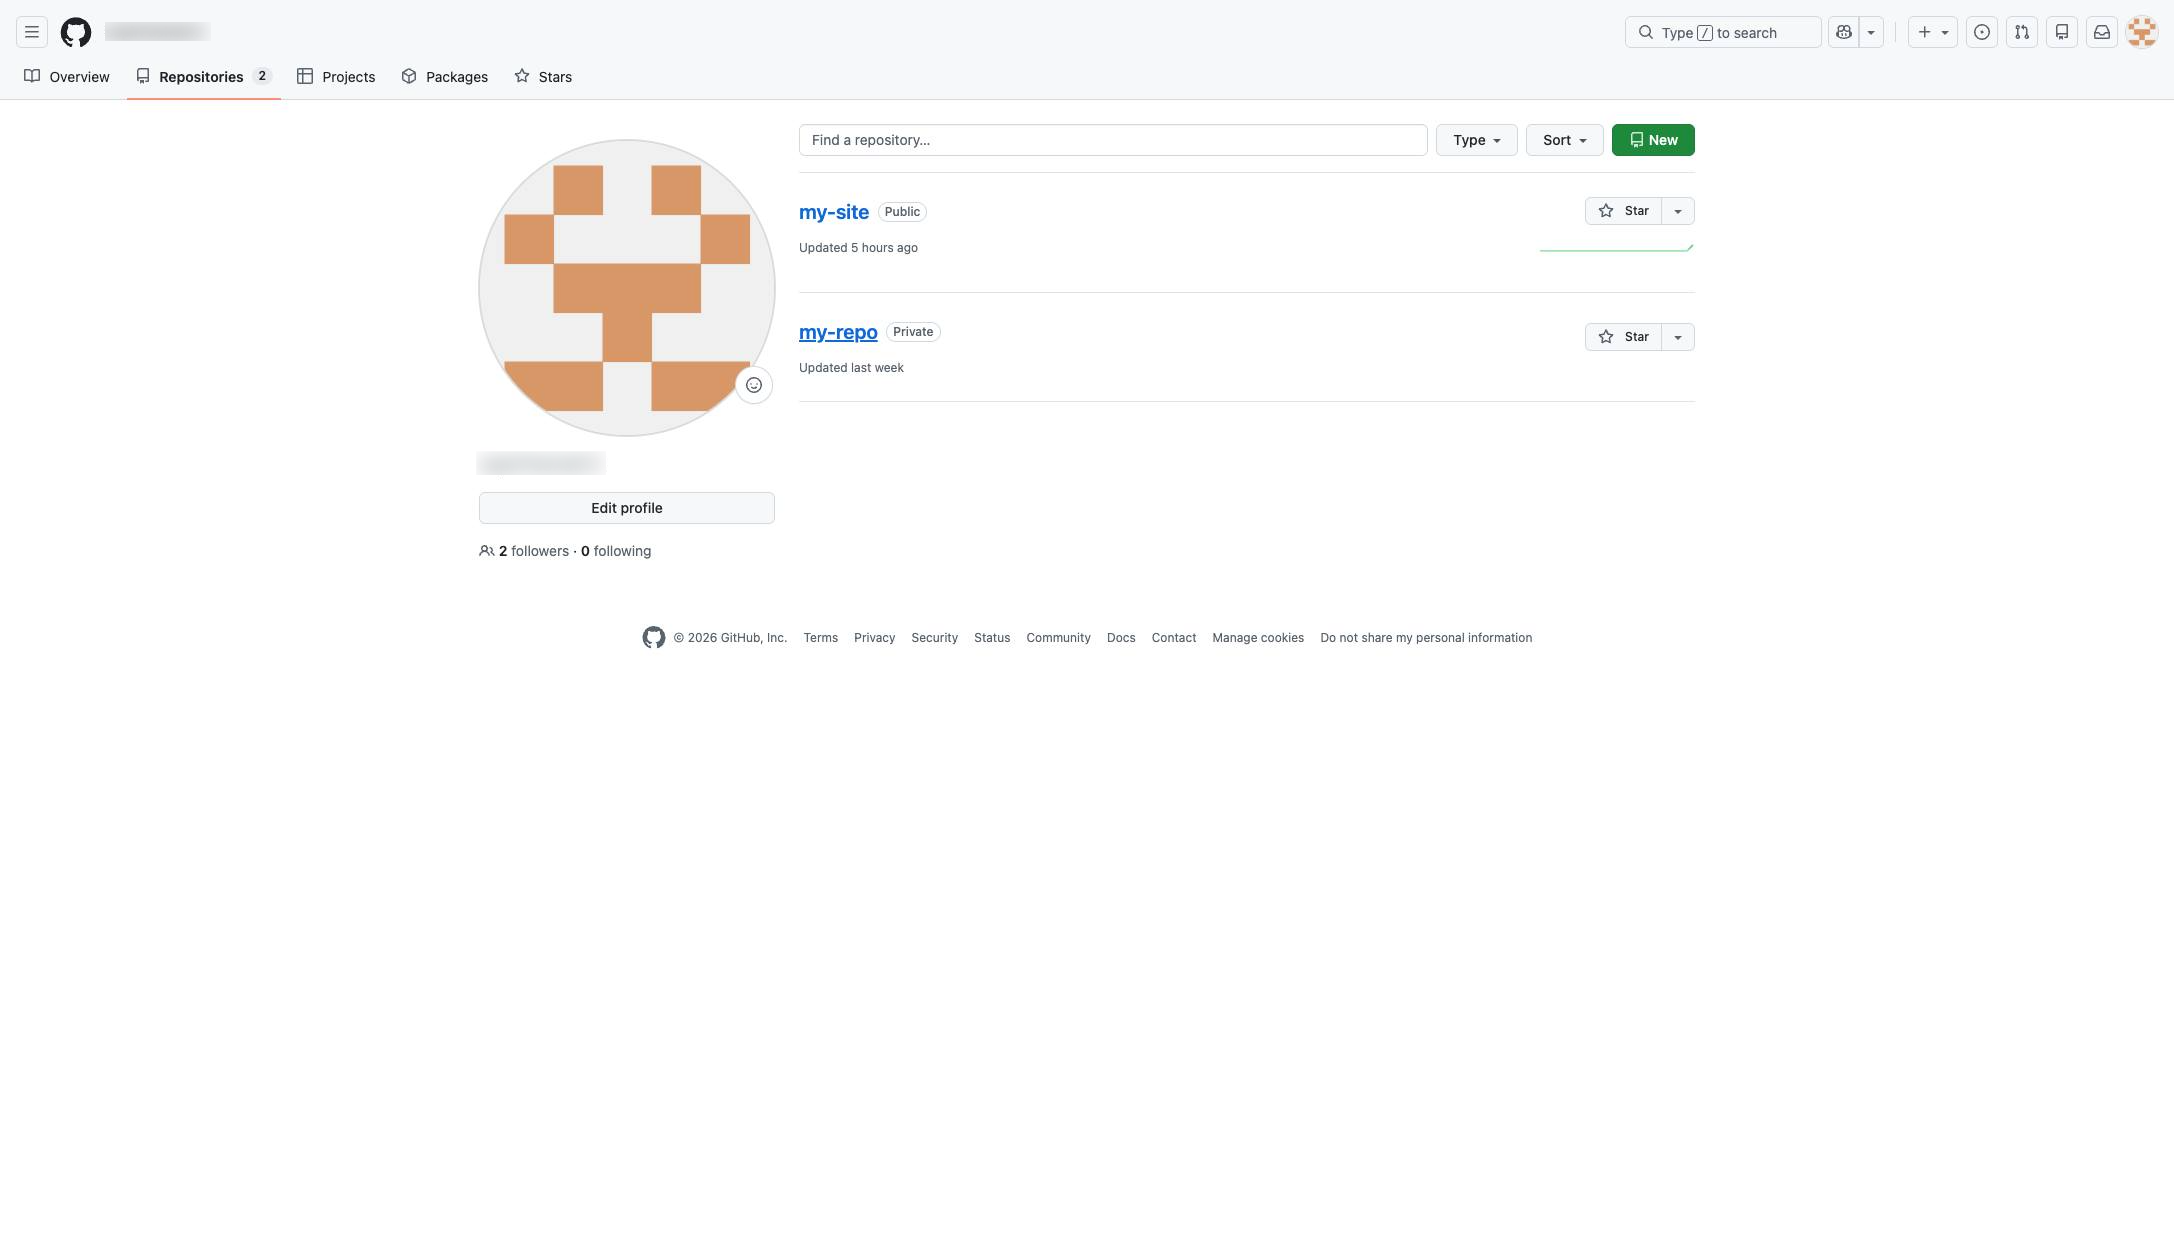
Click the my-repo link
Click the "my-repo" link in the repository list to open its details page.

Uploading your projects to GitHub is simple, but sometimes you don't want the whole internet to have access to your repository. In situations like this, it can be helpful to hide your repository on GitHub by changing the visibility preferences
Click the "my-repo" link in the repository list to open its details page.
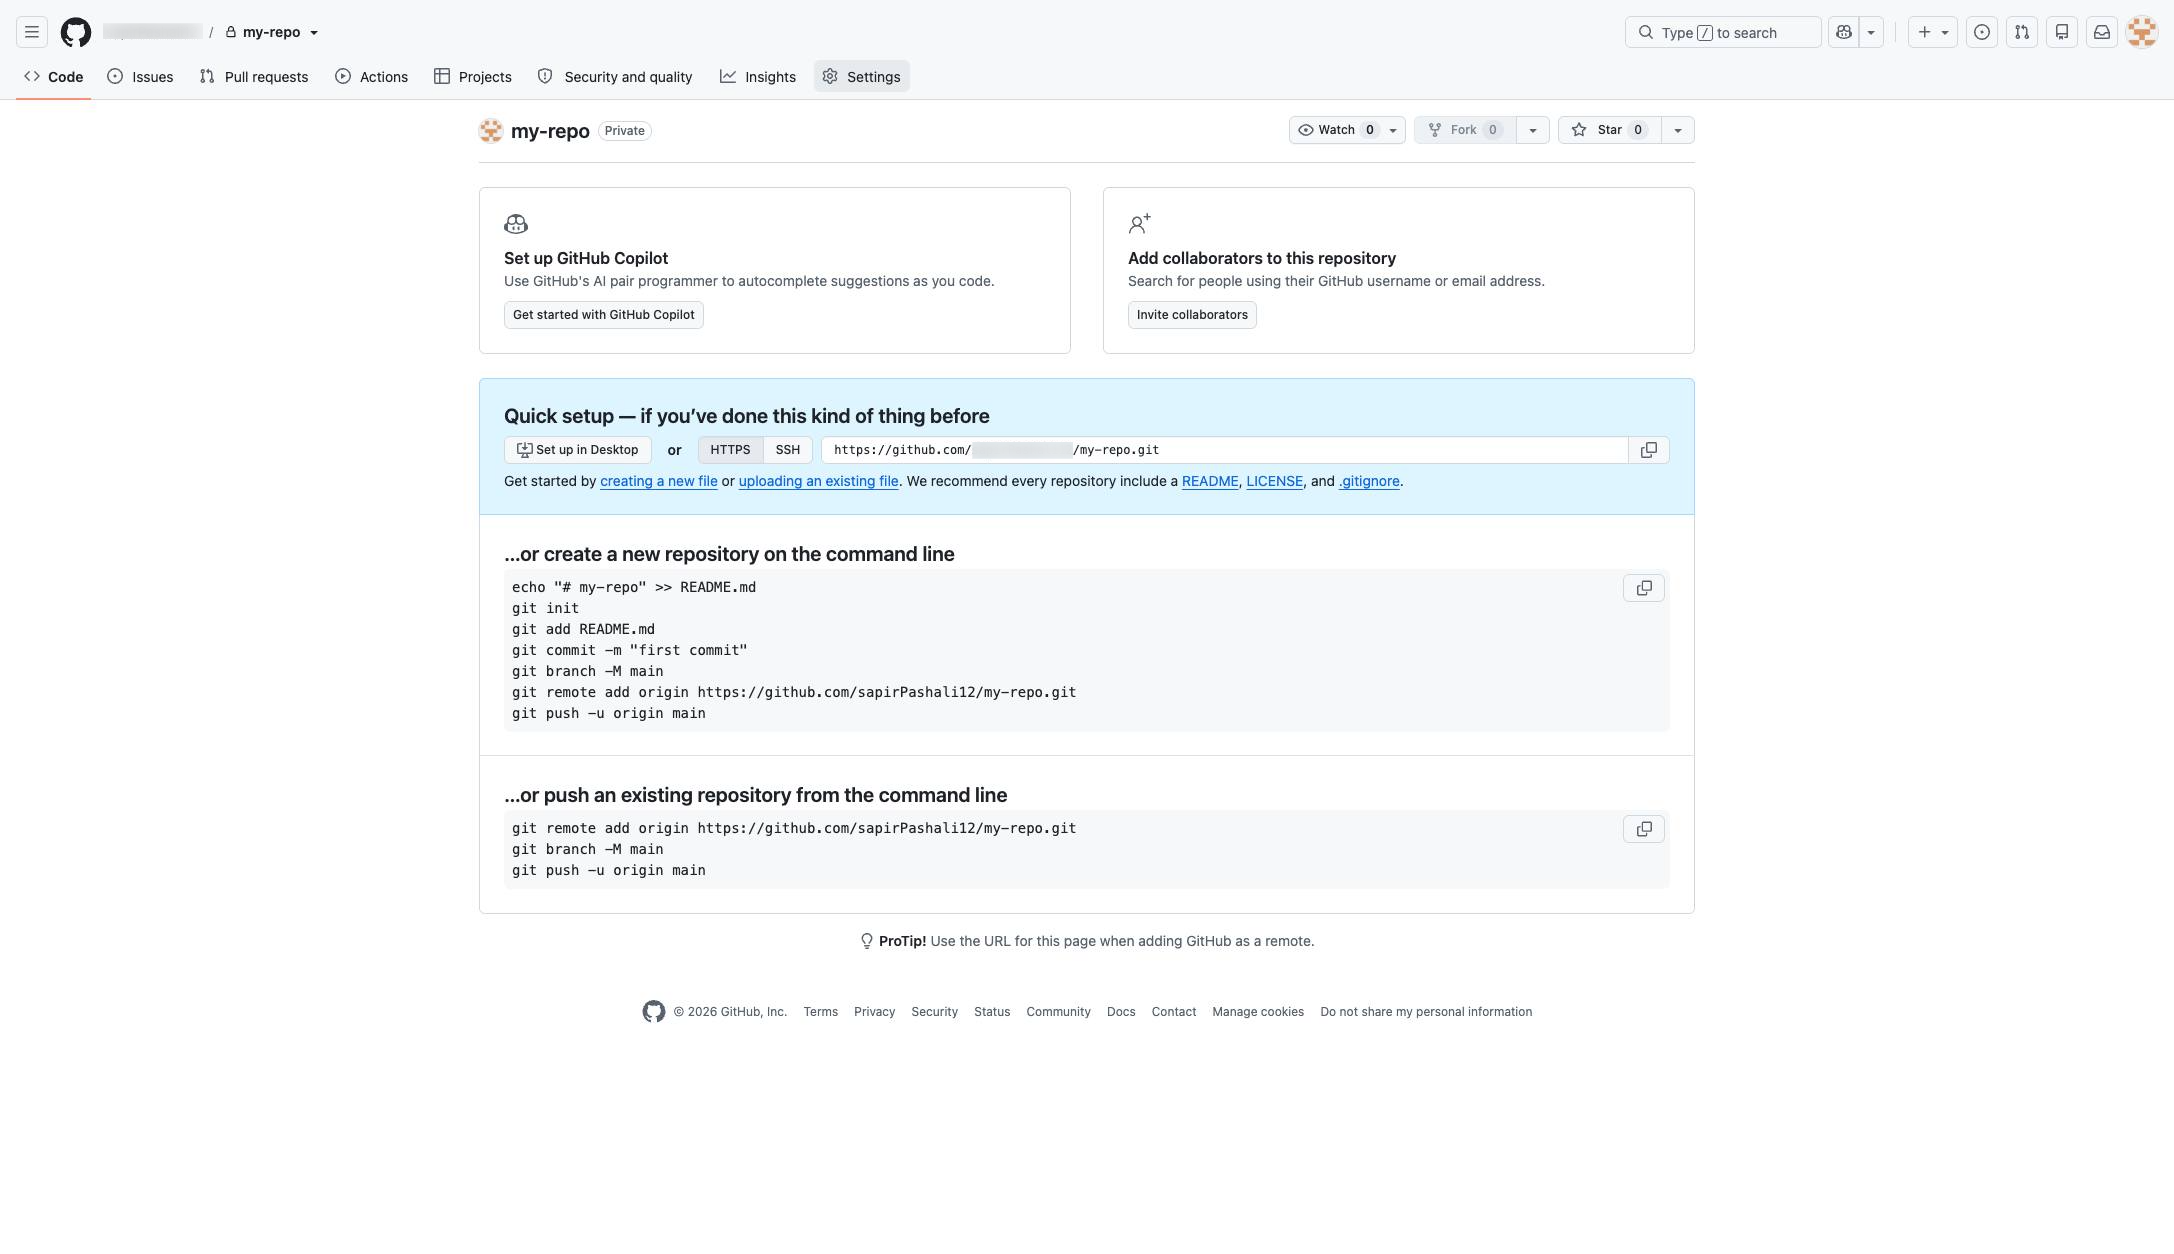
Click the Settings tab in the repository navigation bar to access repository configuration options.
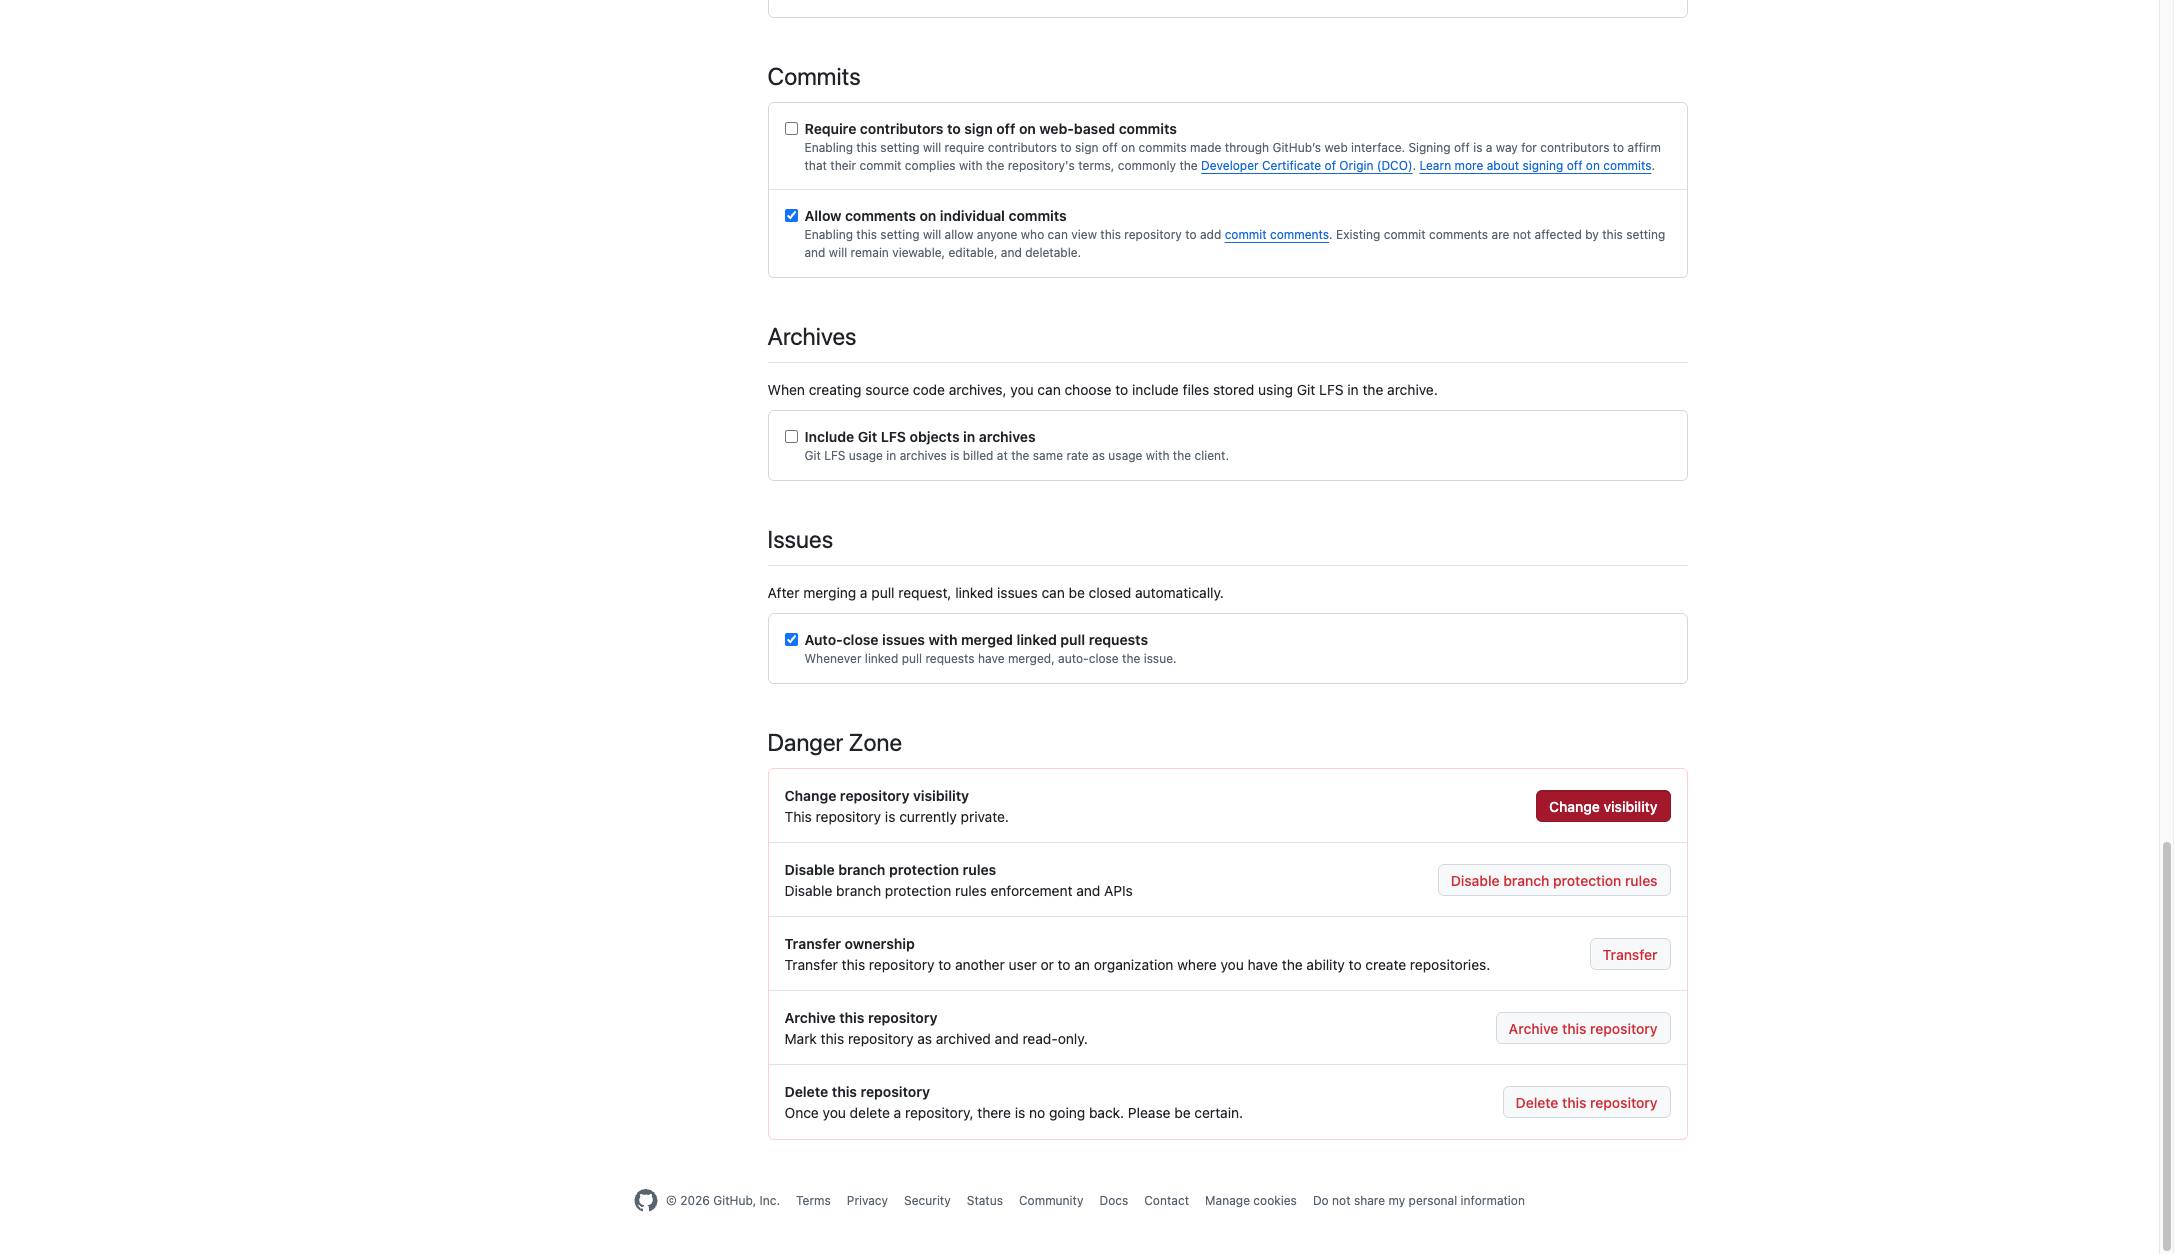
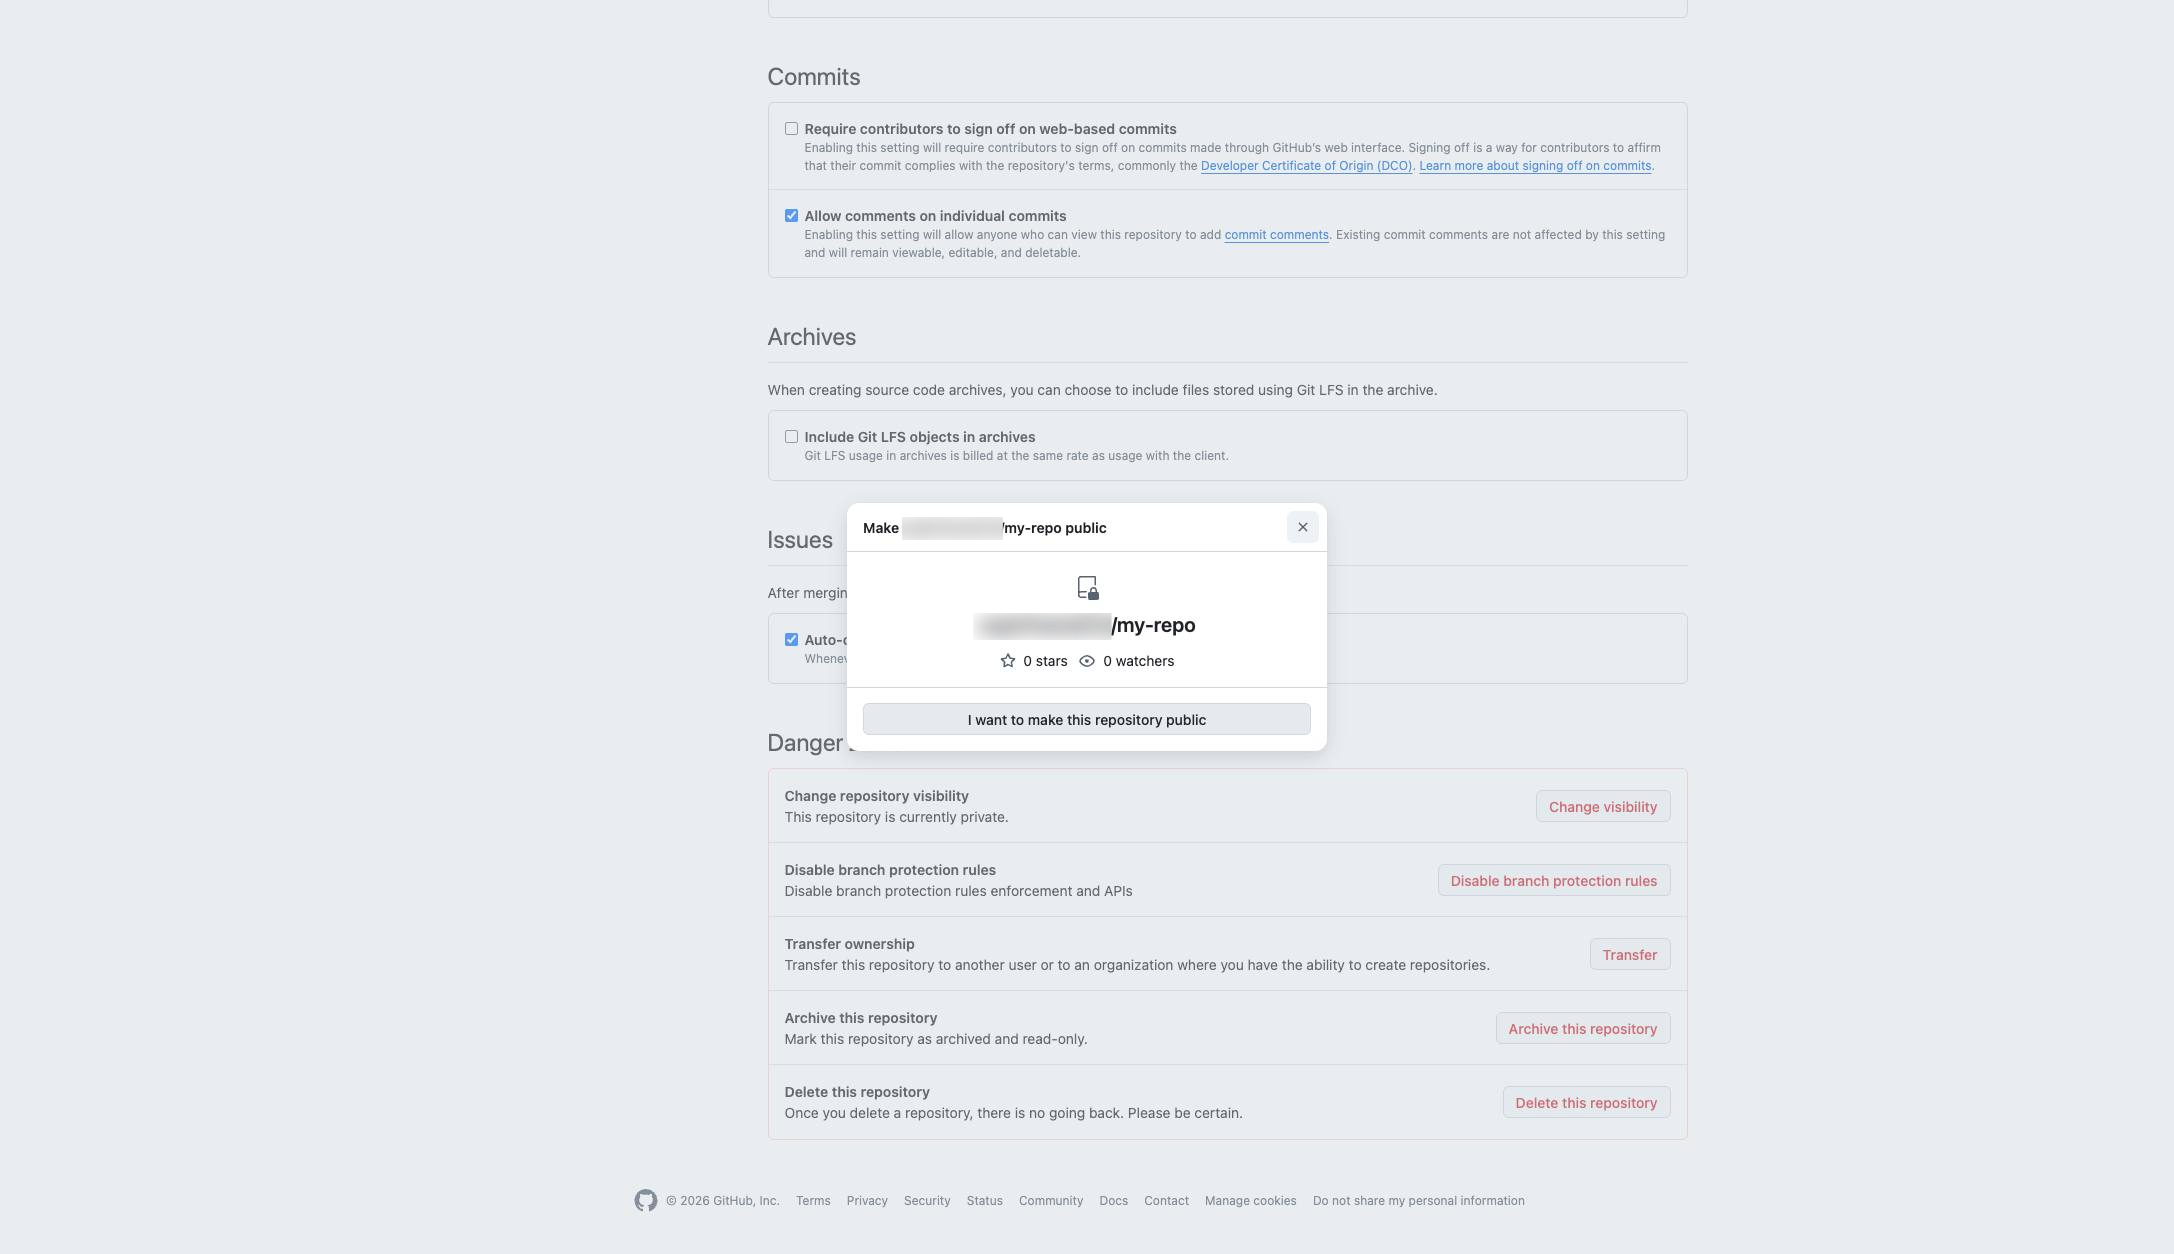
Click the "Change visibility" button in the Danger Zone section to modify the repository's public or private status.
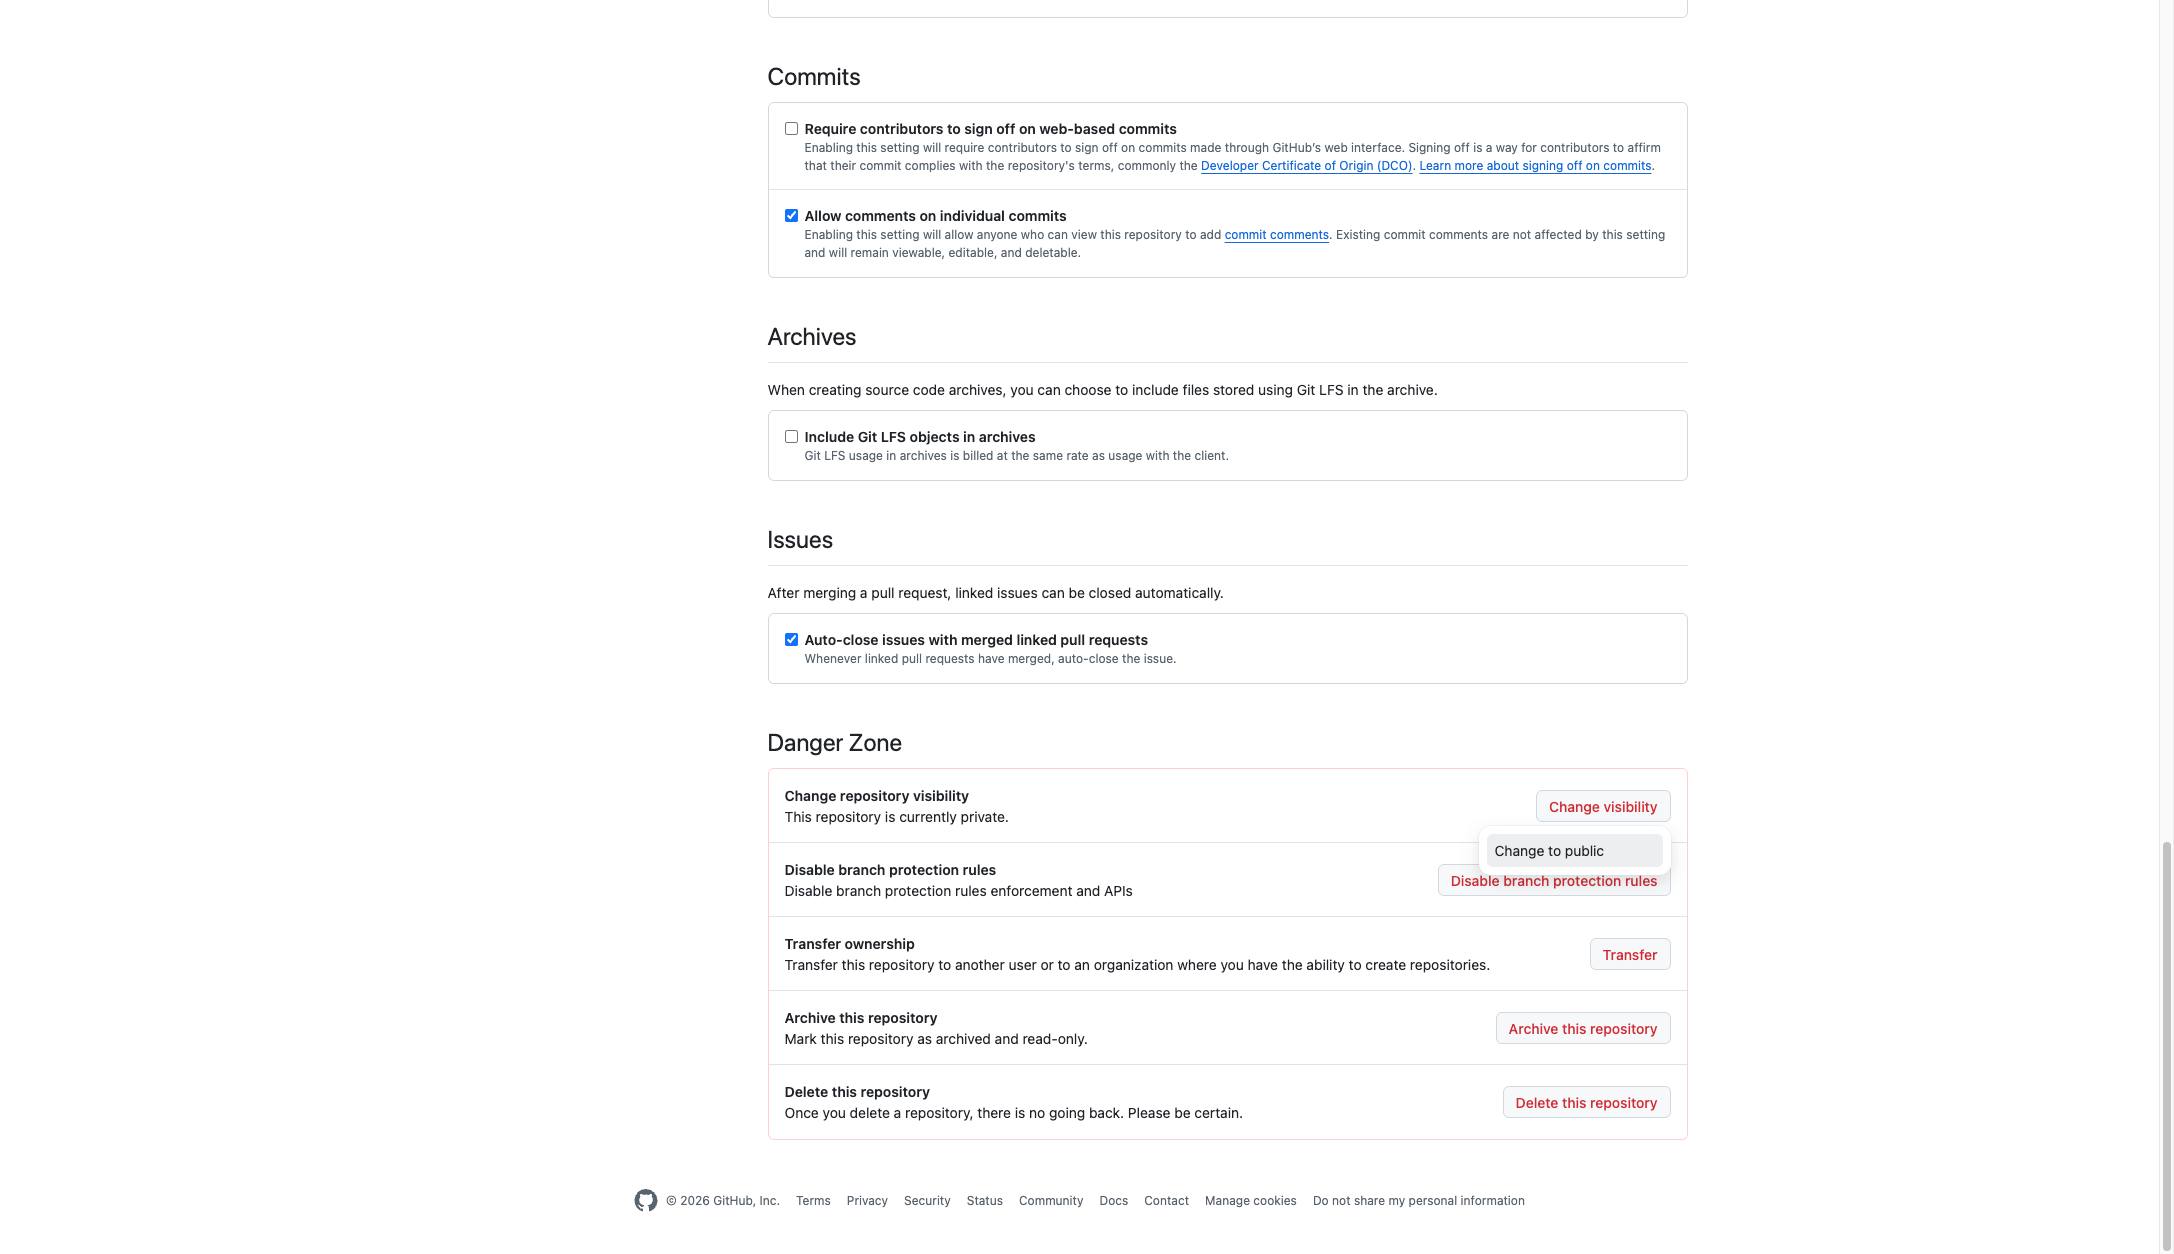
Hit the button labeled Change to private/public
Click the "I want to make this repository public" button within the confirmation modal to proceed.
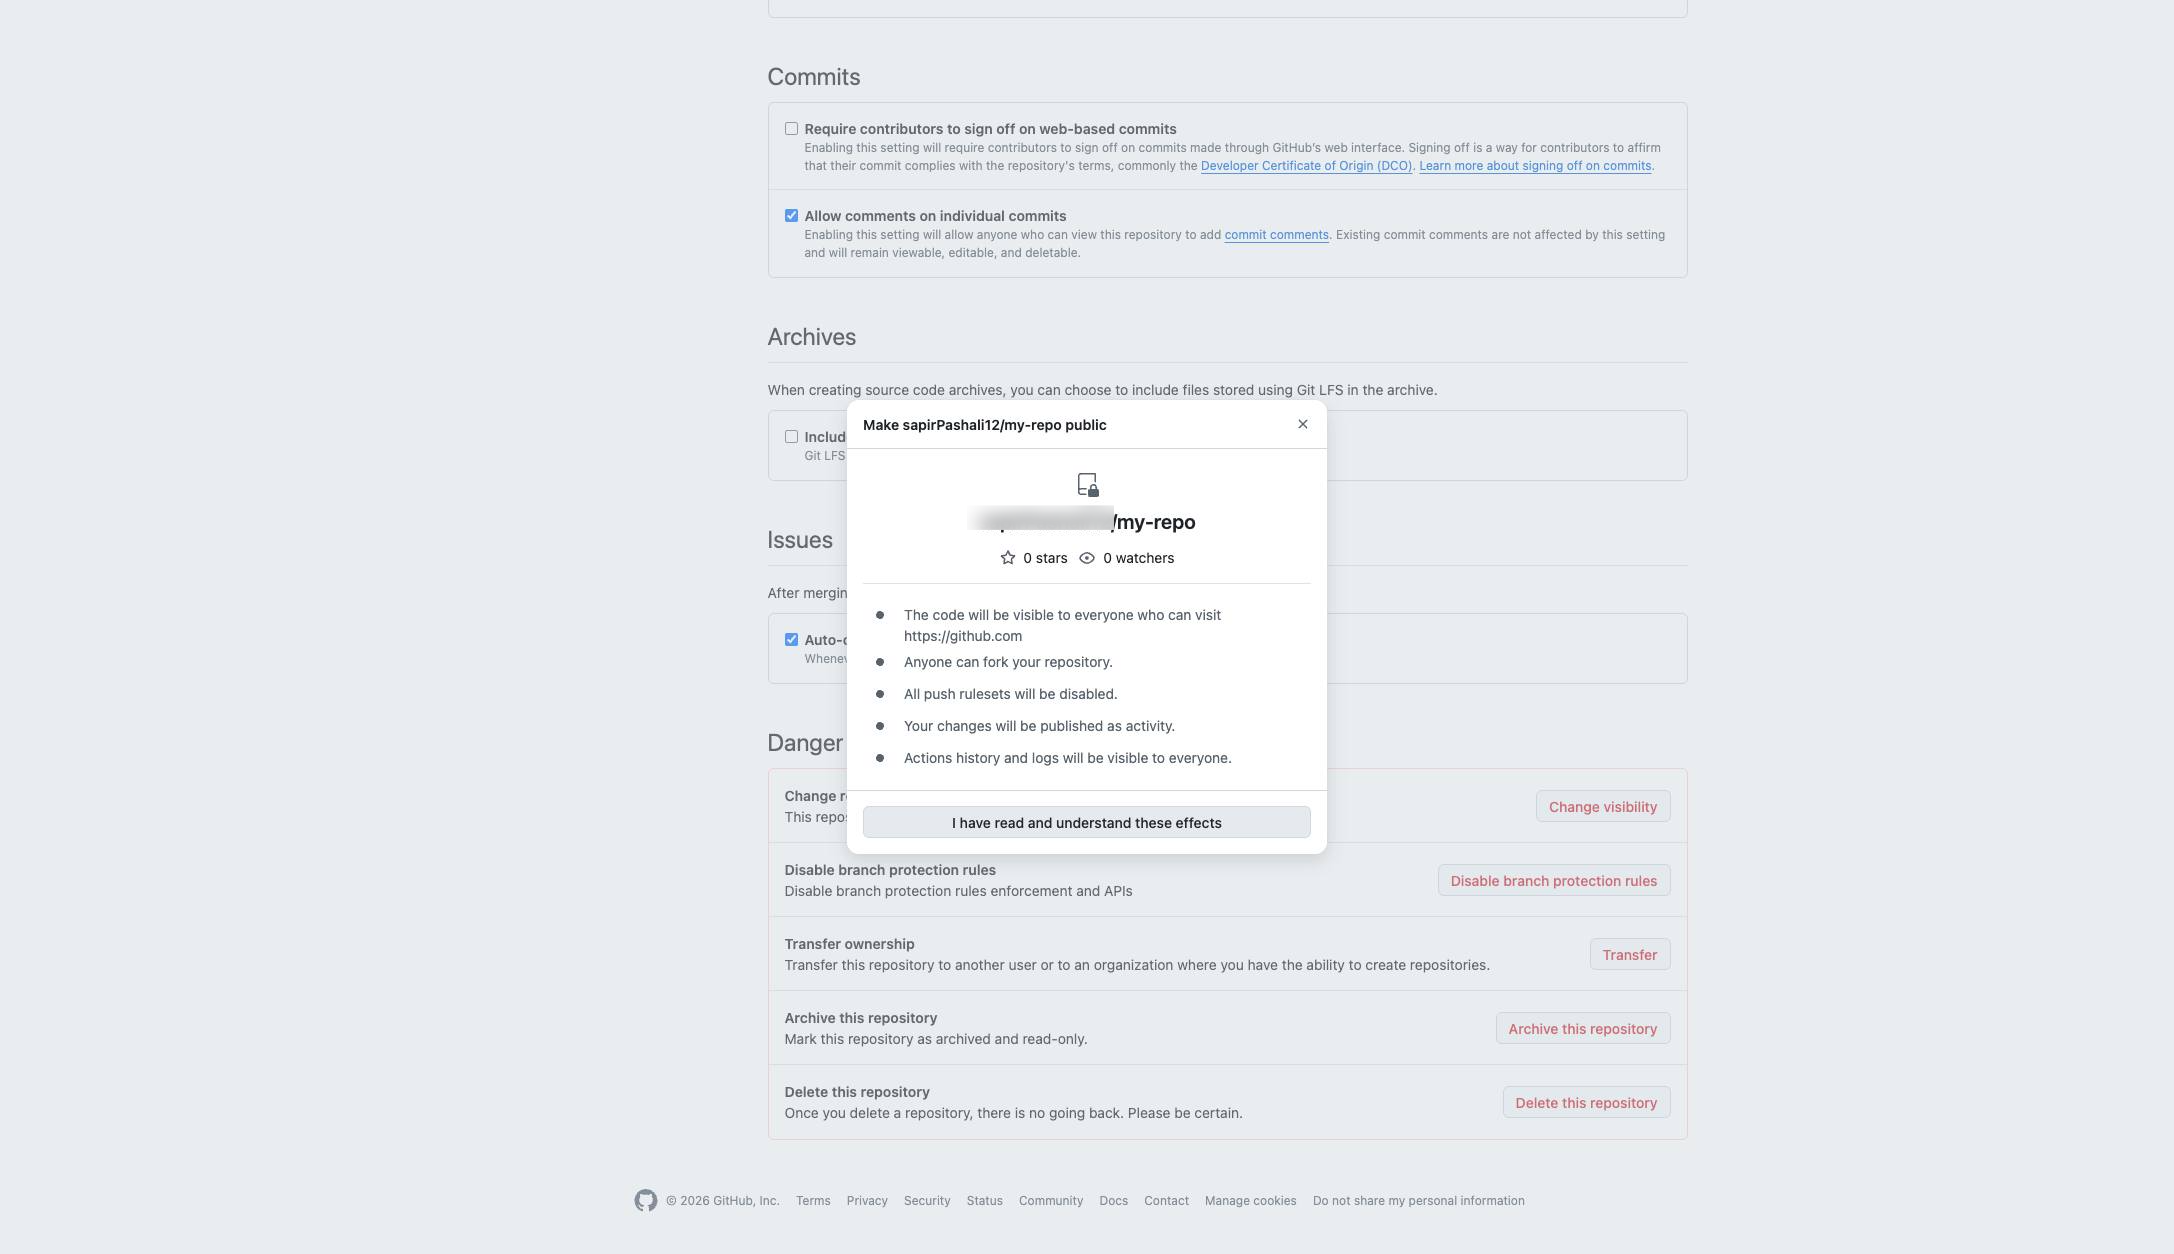
Click the "I have read and understand these effects" button in the confirmation modal to proceed with changing the repository visibility.
Duplicate this template, swap in your own screens, and share it with your team. Free to start — no credit card.
Fill out the form and we'll get back to you as soon as possible.
Tell us about your team and we'll find the right plan together.